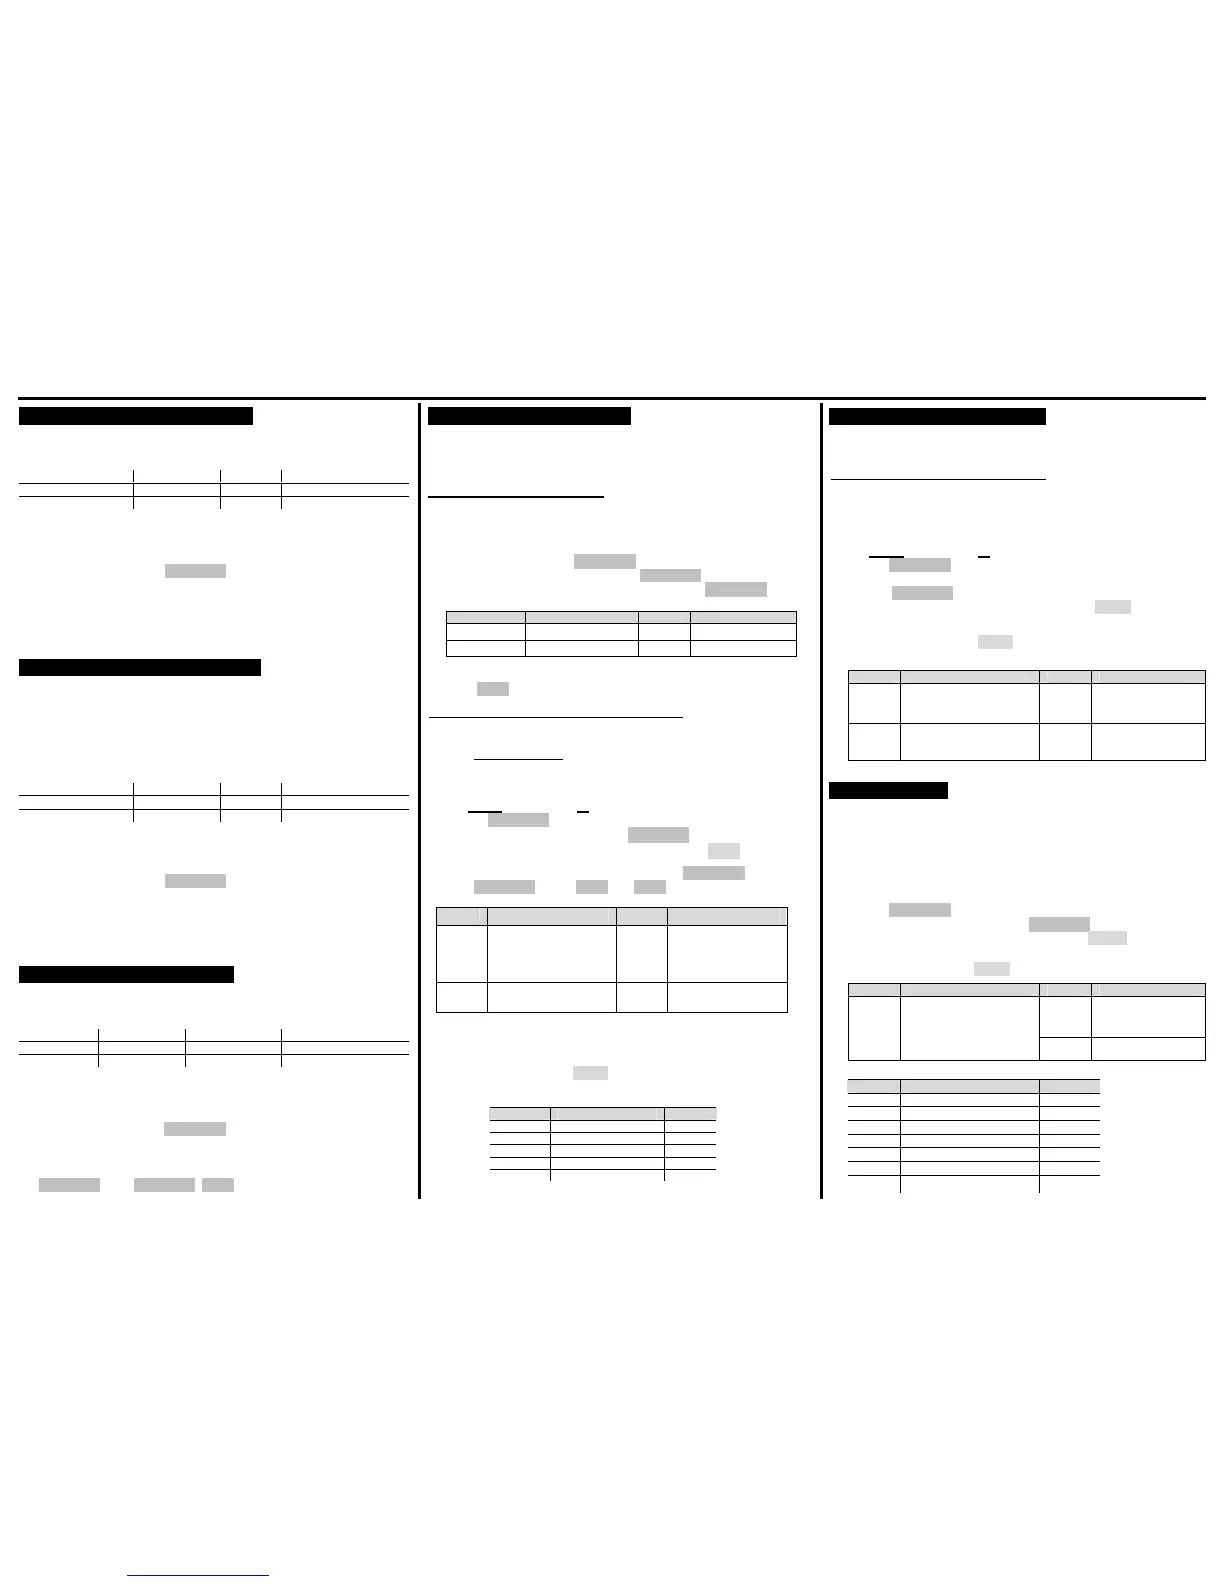
Backing Up Program To SD Card
The files shown are as default, backed up on to the card in the
folder \ER900\PgmBackup\Backup
PLU / Mix and Match Group Tax System Options
Print Options Function Status Clerks Financial / Clerk Text
Logo Stock Macro Misc & Ports
- The SD slot is near to the receipt roll, secured with a screw
- Insert a formatted
(FAT32)
SD card into the slot
- Insert the C key and turn past PGM to the unmarked S mode.
- Enter 100 then press the SUBTOTAL key
- Once copied, the successful filenames are printed on the receipt.
- Then return to the REG Mode
Note: - The default store name of \backup (without spaces) can be
changed as shown in the manual
Restoring Program From SD Card
The files shown are the program files, stored on to the card in the
folder \ER900\PgmBackup\Backup. The program should only be
restored into a machine with the same memory allocation settings.
To print the memory allocation; in S Mode, enter 60 subtotal
*Warning this procedure will overwrite pre-existing data
PLU / Mix and Match Group Tax System Options
Print Options Function Status Clerks Financial / Clerk Text
Logo Stock Macro Misc & Ports
- The SD slot is next to the receipt roll, secured with a screw
- Insert a formatted
(FAT32)
SD card into the slot
- Insert the C key and turn past PGM to the unmarked S mode.
- Enter 110 then press the SUBTOTAL key
- Once copied, the successful filenames are printed on the receipt.
- Then return to the REG Mode
Note: - The default store name of \backup (without spaces) can be
changed as shown in the manual
Saving Sales Total to SD Card
The files shown are as default backed up on to the card in the
folder \ER900\CSV Backup\Backup\Date\Time
CLK Time Fin & VID MnM
Day Grp PLU STK
TRN EJ MIN Tbl
- The SD slot is next to the receipt roll, secured with a screw
- Insert a formatted
(FAT32)
SD card into the slot
- Insert the C key and turn to the X position
- Enter 101 then Press the SUBTOTAL key to save the files
- When Finish is displayed return to the REG mode
Note: - There is a ECR Service task to reset all sales totals in S Mode using
20 SUBTOTAL then QTY/TIME, CASH
(or 30 Subtotal for GT’s)
Setting up a Kitchen Printer
Sales orders can be printed on an internal or external printer. The
products are linked to Groups
(as shown previously)
These groups
are then used to choose which items are to print on the ticket.
Setting the Groups to Print
The items are linked to groups (see previously) i.e. Food, Specials
etc. These groups are then set as Kitchen Printer.
- Insert the C key and turn to the PGM mode
- Enter 900 and press the SUBTOTAL key
- Enter the Group No. i.e 1,2 and press QTY/TIME
- Enter the answer (see table) i.e. 2100 then press SUBTOTAL
Answer
Repeat Group No then Qty/Time, the answer then press the Subtotal key.
- Press CASH to finish and return to REG mode
Setting a Communications Port Printer
The following defines which of the communication ports is to work
with an external printer. (
Nothing is required to be set for Receipt Print KP).
Note :- The required wiring is outlined below.
- Insert the C key and turn past PGM to unmarked S mode.
- Enter either 80 for port 1 or 81 for port 2 connection
- Press the SUBTOTAL key
- Enter the Option number and press QTY/TIME
- Enter the Answer as per the table below and press CASH key
E.g. to set port 1 as baud rate 19,200 enter 80 SUBTOTAL
then 1 QTY/TIME then 4 CASH and CASH to finish.
Note :- The current printer baud rate can be found by powering off/on
the printer whilst depressing the feed key (
power off afterwards).
Repeat Option No. Qty/Time, answer then the CASH key.
- Set all options, then press CASH and return to REG mode
Note :- The wiring used would be as shown below
Option
Answer
Option
Answer
1
Baud Rate Speed
0=9600 4=19,200
5=38,400 6=57,600
7=115,200
11
Printer Type
2=Bixolon SRP2xx
4=Bixolon SRP350
& Sam4s Ellix20
5
Device
4 – Remote Printer
2,3,4 0 –
not used
Setting Up a Barcode Scanner
A serial barcode Scanner can be connected for the creation and sale of
EAN 8, 13 and 02,21 etc Price Inclusive codes
(see Manual)
Setting an External Scanner Port
- Ensure the Scanner is connected to the coms port and the
supplied Sam4s Scanner setup sheet has been scanned, and
a note made of the baud rate, parity and stop bit settings
- Insert the C key and turn past PGM to unmarked S mode.
- Enter either
80 for port 1 or 81 for port 2 connection
- Press the SUBTOTAL key
- Enter the Option number from below i.e. 1 to set Baud Rate
- Press the QTY/TIME key
- Enter the Answer i.e. 0 for 9600 baud and press CASH key
Repeat Option then Qty/Time key, Answer then the Cash key.
- Set all options, then press CASH and return to REG MODE
Option
2 Parity 0=None
1=Odd 2= Even
3 Stop bits -
0=1 1=None
5 Device –
6 - Scanner
Connecting a PC - SERAIL
The ECR can connect to the PC using various packages. E.g.
The Sam4s Utility which allows the program to be Uploaded
from the ECR edited then Download back to the ECR. There
is also control for sales reporting and Receipt bitmap images.
- Insert the C key and turn past PGM to the unmarked S mode.
- Enter either 80 for port 1 or 81 for port 2 connection
- Press the SUBTOTAL key
- Enter the Option number and press QTY/TIME
- Enter the Answer as table below and press the CASH key
Repeat Option No. Qty/Time, answer then the CASH key.
- Set all options, then press CASH and return to REG mode
Option
 Loading...