6 | SAMLEX AMERICA INC.
APPENDIX A
SECTION 2 | Installation
4. Take the other end of remote cable and plug it into the RJ-45 Jack at the back of
the EVO-RC (Fig. 2.3).
5. Check the remote display to ensure the Power-up self test initiates.
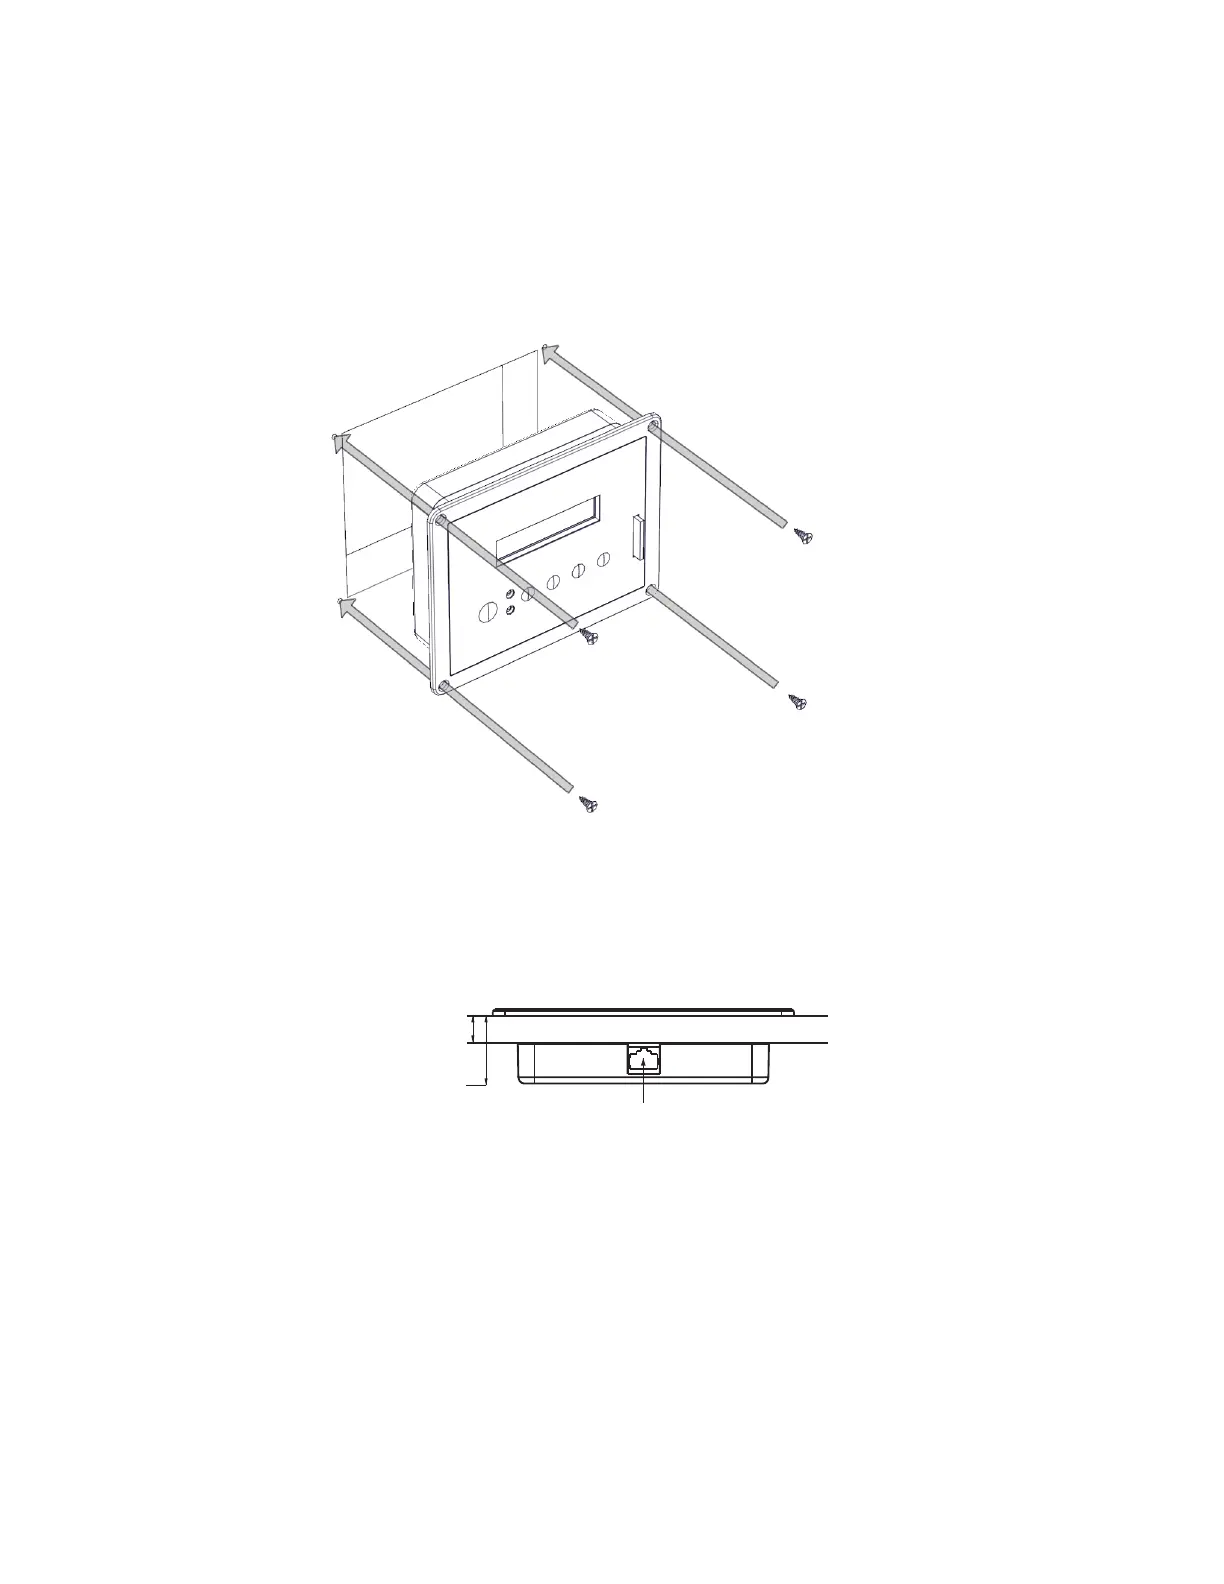
6. If the self test is successful, secure the EVO-RC to the wall using the four screws (Fig 2.2)
Flush mounting the EVO-RC on the wall with 4pcs, Φ3mm self-tapping, at head screws
(supplied with the unit).
Fig 2.2 EVO-RC Flush Mounting
The thickness of the wall/panel board at the place of mounting should not be more than 15mm
to ensure that the RJ-45 jack opening is not obstructed.
Fig 2.3 Wall/Panel Thickness
3.0 GENERAL INFORMATION
EVO-RC Remote Control provides the user with the ability to modify EVO
™
Inverter/Charger’s operating parameters.
The default settings in EVO
™
Inverter/Charger are adequate for some installations but may have to be modied for
others. This Section provides details on the remote functions, status and menu maps and displays, fault messages and
parameter settings.
15mm
35.4mm
RJ-45 Jack
Bottom view
WALL/ PANEL BOARD