9
Graphite 49 · USB/MIDI Keyboard Controller
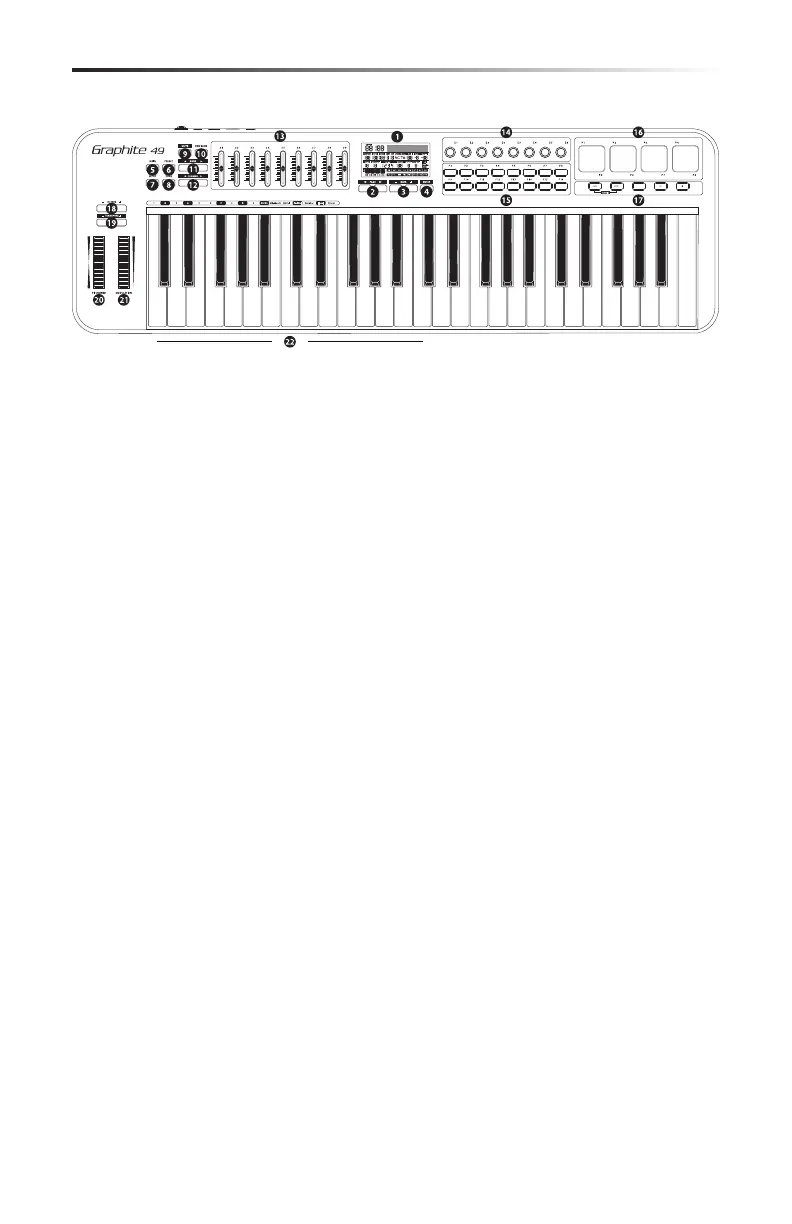
1. Display - The backlit LCD is the command center for the Graphite 49. It displays the current
setup information, performance data, adjustable parameters and controller information.
2. PAGE ◀ / ▶ Buttons - Press the PAGE buttons to navigate through the adjustable param-
eters and functions in all modes.
3. DATA +/– Buttons - Press the DATA buttons to adjust MIDI, controller, and performance data
in all modes.
4. ENTER Button - When pressed, this button applies the selected parameter settings.
5. MAIN Button - Press this backlit button to enter Performance Mode. It will also cancel any
adjusted parameters that have not been saved.
6. PRESET Button - Press this backlit button to enter Preset Mode, where you can select from
30 dierent software and user presets.
7. SETUP Button - Press this backlit button to enter Setup Mode to adjust and assign perfor-
mance and controller parameters within a preset.
8. ZONE Button - Press this backlit button to edit the four zones from which the Graphite can
send independent note and controller information.
9. MUTE Button - Press this button to enable the Mute function. When activated, the word
MUTE will ash on the display and the keyboard will stop transmitting messages from the
encoders and sliders. Pressing the button again will exit the Mute function and transmit all
encoder and slider values together.
10. PAD BANK Button - The Trigger Pads are congured into two pad banks, with dierent set-
tings congured to each pad. Press the PAD BANK button to toggle between the two banks.
11. BANK ◀ / ▶ Buttons - The eight encoders and rst eight sliders are congured into two
banks, so you can control up to 16 individual parameters. Press the BANK buttons to switch
between the two banks of eight controllers.
12. CHANNEL ◀ / ▶ Buttons - Press the CHANNEL buttons to shift all eight encoders and the
rst eight sliders by one MIDI channel to expand the working range of the controllers.
13. Assignable Sliders - The nine sliders send continuous control data via the USB or MIDI OUT
jacks. The S1–S8 sliders are preset from the factory to send volume controls for channels
1–8, and S9 is set to master volume control. The sliders can be assigned to control dierent
parameters in Setup Mode.
Front Panel Controls and Functions
A
B