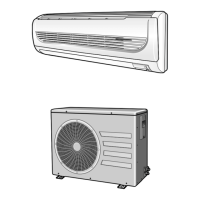
Fixing the Outdoor Unit in Place
C
OMPLETING THE
I
NSTALLATION
E-14
Final Checks and Trial Operation
To complete the installation, perform the following checks and tests
to ensure that the air conditioner operates correctly.
1 Check the following.
◆ Strength of the installation site
◆ Tightness of pipe connection to detect a gas leak
◆ Electric wiring connection
◆ Heat-resistant insulation of the pipe
◆ Drainage
◆ Earth conductor connection
◆ Correct operation (follow the steps below)
2 Press the button and check the following.
◆ The indicator on the indoor unit lights on and blinks.
◆ The airflow blade opens and the fan gears up for operation.
3 Press any button and check the following.
◆ The appropriate indicator lights on and the air conditioner operates
according to the selected mode or function.
4 Press the button and check the following.
◆ The airflow blades work properly.
1 Place the outdoor unit as indicated on the top of the unit to let the
discharged air out properly.
2 Fix the outdoor unit to the appropriate support using anchor bolts.
3 If the outdoor unit is exposed to strong winds, install shield plates
around the outdoor unit, so that the fan can operate correctly.
You should install the outdoor unit on a stable base to avoid the
generation of noise and vibration, especially when installing the
outdoor unit close to your neighbor.
If you install the outdoor unit in a place exposed to strong winds or
at a height, you must fix it to the appropriate support (wall or ground).
➢ Secure the rubber leg in order to prevent the generation of
noise and vibration.
‘X’mm
Rubber leg
‘Y’ mm
Model
✴✴18✴✴
✴✴24✴✴
X
628
660
Y
310
340
AQT18WJWB IM_E_20227 10/25/04 1:34 PM Page 14
 Loading...