EasyManua.ls Logo

Samsung DIGIMAX A40 User Manual

Samsung DIGIMAX A40
124 pages
To Next Page IconTo Next Page
Page #1 background imageLoading...
Page #1 background image
ENGLISH
Users Manual
Thank you for buying a Samsung Camera.
This manual will guide you through using the camera, including capturing images,
downloading images and using the application software.
Please read this manual carefully before using your new camera.
Figures(Images) used for the manual are based on model Digimax A40.
Cyber 400

Table of Contents

Question and Answer IconNeed help?

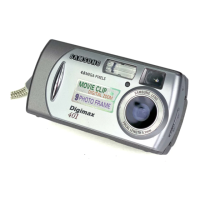
Do you have a question about the Samsung DIGIMAX A40 and is the answer not in the manual?

Samsung DIGIMAX A40 Specifications

General IconGeneral
Optical Sensor Resolution4.0 megapixels
Optical Zoom3x
Digital Zoom4x
LCD Screen Size1.5 inches
Sensor TypeCCD
Effective Pixels4.0 megapixels
Battery Type2 x AA batteries
TypeCompact
Supported Flash MemoryMultiMediaCard
Storage MediaSD, MMC

Summary

Instructions

Getting to Know Your Camera

Safety Warnings

Precautions and Compliance

System Chart

Identification of Features

Front and Back Views

Labels for buttons, ports, and indicators on the camera's front and back.

Side and 5-Function Button

Identification of side buttons and the 5-function button.

Indicator Lamps and Icons

Explanations for self-timer, status lamps, and mode icons.

Connecting to a Power Source

Using the Batteries

Step-by-step guide for inserting batteries and battery status indicators.

Instructions on Memory Card Usage

Memory Card Handling and Insertion

Guidelines for using, inserting, and removing memory cards.

LCD Monitor Indicator

Changing the Recording Mode

Starting the Recording Mode

Auto and Movie Clip Modes

How to use the Auto and Movie clip recording modes for basic shooting.

Movie Clip Features

Recording without audio, successive recording, and pausing movie clips.

Scene Modes

Voice Recording Mode

Things to Watch Out For When Taking Pictures

Using the Camera Buttons

Power, Shutter, and Zoom Controls

Controls for camera power, image capture, and zoom functions.

Voice Recording/Memo/UP Button

Macro/Down Button

Focus Lock Feature

Flash/Left Button Controls

Self-Timer/Right Button

Menu/OK and M (Mode) Buttons

E (Effect) Button

Special Effects Details

Colour Effects

Adjusting image colours like black & white, sepia, red, green, blue, negative.

Photo Frame Effects

Adding decorative frame borders to still images.

+/- Button for Settings

RGB, ISO, and White Balance Adjustments

Fine-tuning RGB values, ISO sensitivity, and white balance settings.

Exposure Compensation

Adjusting exposure levels for brighter or darker images.

Using the LCD Monitor for Settings

How to Use the Menu System

Menu Navigation

Steps for accessing and navigating through camera menus.

Mode Set Menu

Image Size Selection

Quality and Frame Rate Settings

Metering Modes

Sharpness and OSD Information

Sharpness Adjustment

Modifying image sharpness for desired output.

On-Screen Display (OSD) Information

Understanding recording status and idle mode displays.

Starting Play Mode

Playing Back Still Images

Viewing still images stored on the memory card or internal memory.

Playing Back Movie Clips and Capture

Methods for playing movie clips and capturing still images from them.

Playing Back Recorded Voices

How to play back recorded voice memos.

LCD Monitor Indicator in Play Mode

Using Camera Buttons in Play Mode

Thumbnail and Enlargement Functions

Viewing multiple images, enlarging, and trimming them.

Voice Memo/Up Button in Play Mode

Adding voice memos to still images.

Play & Pause/Down Button

Using Play/Pause/Down buttons for playback control.

Delete Button Functions

Menu Navigation Buttons

Album Button Functions

Organizing Images into Albums

Creating and managing albums to organize photos.

Album Playback and Effects

Playing back albums as slideshows with effects and intervals.

Setting Up Playback Functions

Resize Image Function

Protecting Images

Deleting All Images

DPOF

DPOF Standard and Index Print

Configuring standard print settings and index prints via DPOF.

DPOF Print Size and Cancel

Setting print size and cancelling DPOF settings.

Copy to Card Function

PictBridge Printing

PictBridge: Picture Selection

Choosing which pictures to print and setting the number of copies.

PictBridge: Print Setting

Configuring print layout, quality, date, and file name options.

PictBridge: Printing and DPOF Print

Executing prints and directly printing DPOF files.

PictBridge: Reset

Resetting PictBridge configurations to default values.

Setup Menu Overview

File Name Settings

Selecting how image files are named and sequenced.

Auto Power Off

Language and Memory Card Formatting

Language Settings

Changing the camera's display language.

Memory Card Formatting

Preparing memory cards for use by deleting all data.

Date/Time and Imprinting

Date/Time and Date Type Setup

Setting the camera's date, time, and date format.

Imprinting Recording Date

Adding date and time stamps to still images.

Auto Focus Lamp and Sound Settings

Auto Focus Lamp Control

Turning the AF assist lamp on or off.

Operation Sound Settings

Adjusting camera sounds for startup, button presses, and errors.

LCD Brightness and Quick View

LCD Brightness Adjustment

Changing the screen brightness for better visibility.

Quick View Function

Briefly displaying captured images after shooting.

Camera Initialisation

MyCAM Menu Settings

Startup Image Selection

Choosing the image displayed when the camera turns on.

Shutter and Startup Sound Settings

Customizing shutter sounds and startup sounds.

Important Notes and Precautions

Warning Indicator Messages

Before Contacting Service

Specifications

Software Notes and System Requirements

Software Notes

Information regarding the included software, copyrights, and usage.

System Requirements

PC specifications needed to install and run the camera software.

About the Software

Setting Up the Application Software

Starting PC Mode for Image Transfer

Removing the USB Driver for Windows 98SE

Removable Disk Functionality

Removing the Removable Disk

USB Driver Setup and Usage for MAC

Digimax Master Software

Digimax Master: Downloading Images

Step-by-step guide to download images using Digimax Master.

Digimax Master: Image Viewer Functions

Using the image viewer to browse, preview, and manage photos.

Digimax Master: Image Editing Functions

Editing captured still images with tools for resizing, cropping, and quality modification.

Digimax Master: Movie Editing Functions

Creating and editing movie clips by combining media, adding effects, and text.

Frequently Asked Questions (FAQ)

Related product manuals