
B
Billy HarrisAug 15, 2025
What to do when my Samsung SL-X7600GX Copier stops due to a major error?
- DDennis KimAug 15, 2025
If your Samsung Copier has stopped due to a major error, check the display message for more information.
What to do when my Samsung SL-X7600GX Copier stops due to a major error?
If your Samsung Copier has stopped due to a major error, check the display message for more information.
What to do if my Samsung SL-X7600GX Copier shows a minor error?
If your Samsung Copier shows a minor error and is waiting for it to be cleared, check the display message. Once the problem is resolved, the machine will resume its original task.
What to do if toner, imaging unit, or waste toner container is near end of life in Samsung SL-X7600GX?
If your Samsung Copier indicates that the toner cartridge life, imaging unit, or waste toner container is near the end of its life, order a new toner cartridge, imaging unit, or waste toner container.
How to fix paper jam inside Samsung Copier (Jam feed 3, Jam feed 4)?
To resolve a paper jam inside your Samsung Copier (Jam feed 3, Jam feed 4), open the right bottom door of the dual cassette feeder and gently pull the jammed paper straight out. Then, close the dual cassette feeder right bottom door.
How to resolve paper jam in the multi-purpose tray of my Samsung SL-X7600GX?
If there's a paper jam in the multi-purpose tray of your Samsung Copier, and the paper is not feeding properly, pull the paper out of the machine. Then, open and close the front door to resume printing.
How to clear original paper jam in front of scanner of Samsung Copier?
If you encounter an original paper jam in front of the scanner of your Samsung Copier, follow these steps: 1) Remove any remaining pages from the ADF. 2) Open the ADF cover. 3) Gently remove the jammed paper from the ADF. 4) Close the ADF cover.
How to clear original paper jam inside scanner of Samsung Copier?
If you encounter an original paper jam inside the scanner of your Samsung Copier, follow these steps: 1) Remove any remaining pages from the ADF. 2) Open the ADF cover. 3) Gently remove the jammed paper from the ADF. If you do not see paper in this area, go to the next step. 4) Open the input tray. 5) Pull the jammed paper gently out of the ADF. If you do not see paper in this area, go to the next step. 6) Close ADF cover and ADF input tray.
What to do if the fuser area is hot when removing paper from my Samsung Copier?
If the fuser area of your Samsung Copier is hot, exercise caution when removing paper from the machine. Gently pull the jammed paper straight out.
What to do if my Samsung SL-X7600GX Copier says there is no paper?
If your Samsung Copier indicates that there is no paper in the tray, load paper into the tray.
What to do if the door of my Samsung SL-X7600GX Copier is open?
If the door of your Samsung Copier is open, close it.
Information regarding service by trained technicians and use of genuine parts.
Precautions for handling toxic materials, electric shock, and fire hazards.
Guidelines for safe installation, handling of rotating parts, and environmental considerations.
Careful procedures for part replacement, power disconnection, and handling sensitive components.
Warnings about high temperature parts, rotating components, and proper lifting techniques.
Techniques to reduce damage to components caused by static electricity.
Overview of printing speed, processor, memory, document feeder, and LCD specifications.
Detailed specifications covering CPU, UI, memory, storage, interface, warmup time, and power requirements.
Detailed specifications covering CPU, UI, memory, storage, interface, warmup time, and power requirements.
Details on simplex/duplex engine speed, FPOT, resolution, printer languages, and fonts.
Details on scan speed, color mode, compatibility, scan method, file formats, and resolution.
Details on copy speed, FCOT, resolution, and reduce/enlarge options.
Details on fax compatibility, modem speed, TX speed, resolution, and fax features.
Specifications for input capacity, standard cassette tray, multipurpose tray, and duplex printing paper handling.
Specifications for network interface, NW protocols, IP addressing, SNMP/MIB access, and printing protocols.
Information about toner cartridges, drum units, and waste toner containers, including model names and yields.
List of maintenance parts with part codes, life expectancy in pages, and remarks.
Configuration and list of available options like job separators, finishers, and multi-purpose tables.
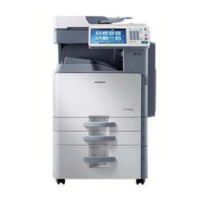
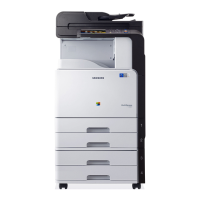
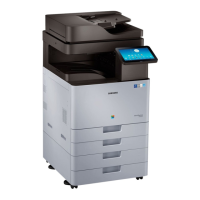
Labelled diagram of the front view of the machine, identifying key external parts.
Second labelled diagram of the front view, showing additional external components.
Labelled diagram of the rear view of the machine, identifying external ports and covers.
Overview of the feeding system, including its components like pick-up unit, registration unit, and exit unit.
Explanation of the feeding system's function and its main components: pick up unit, registration unit, etc.
Detailed description of rollers and their functions, including diagrams and part numbers.
Specifications and structure of the cassette tray, including capacity, paper support, and weight.
Explanation of the pick-up roller's function and its interaction with the cassette and paper path.
Description of the registration roller's function in aligning paper edges and its drive system.
Details on the MPF unit's capacity, media size, weight, feeding speed, and paper separation mechanism.
Detailed description of the printing process, from OPC drum charging to cleaning and quenching.
Information on the tandem type drum units and deve units used for color developing and productivity.
Explanation of the imaging unit's structure, including drum, charge roller, cleaning roller, and CRUM.
Description of how each color OPC drum and magnetic roller are driven by color motors and the BLDC motor.
Details on the dual-component development system, developer powder supply, and TC sensor.
Information on toner and carrier mixture, quantities, and transfer mechanisms within the cartridge.
Overview of the ITB unit, its toner transfer process, cleaning blade, and sensors.
Explanation of toner movement from drums to ITB, removal of remaining toners, and sensor functions.
Description of how the drive motor powers the transfer belt via gears and the ITB drive roller.
Explanation of the ITB cleaner's function in removing toner and patterns from the belt, and waste toner transport.
Details on the main function, working mechanism, and troubleshooting for the toner reservoir unit.
Explanation of the fuser unit design, including halogen lamps, belt fuser, pressure roller, thermistor, and thermostat.
Description of how the fuser motor drives the pressure roller and rotates the fusing belt.
Explanation of how the CPU controls fuser lamps and overheat protection mechanisms.
Description of how the fuser unit controls paper loop level using photo sensors and motor speed.
Details on LSU components like polygon motor, laser diodes, lenses, mirrors, and skew adjustment function.
Explanation of the laser beam path, F2 lens function, and reflecting mirrors adjustment.
Description of beam detector sensor boards (PD PBA) for detecting scanning start positions and creating Hsync signals.
Explanation of the automatic line position adjustment process using line patterns and sensors.
Diagram showing locations of drive motors and a table detailing their types, quantities, and functions.
Description of the main drive unit's power train for OPC, Deve, and ITB components.
Explanation of the power train for pick-up and CST lift functions.
Details of the power train for feed and MP drive systems.
Description of the power train for the regi roller driving.
Explanation of the power train for fuser and exit driving, and fuser release.
Details of the power train for toner supply and reservoir driving.
Description of the power train for the CST lock driving.
Explanation of the power train for engaging T1.
Details of the power train for the WTB drive.
Explanation of the scanner's purpose, its FR and HR carriages, and its three main modules.
Illustrations and descriptions of scanner system components like scan glass, carriages, imaging unit, and drive unit.
Important precautions for moving the scanner, including fixing the carriages and handling locking screws.
Description of DSDF components like stacker, guides, pick-up roller, ADF roller, and D-CIS module.
Diagrams showing the location of electrical parts and a table with their references, part codes, and controller boards.
Explanation of the DSDF drive system, consisting of motors and clutches for paper transfer.
Details of the DSDF pick-up assembly and its operation procedure.
Description of the DSDF regi drive system and its operation procedure.
Explanation of the feed-out drive system and its operation procedure.
Description of DSDF components for GX models, including stacker, guides, rollers, and D-CIS module.
Diagrams showing electrical parts locations for GX DSDF and reference to component codes.
Explanation of the DSDF drive system for GX models, consisting of 8 step motors.
Details of the DSDF pick-up assembly for GX models and its operation procedure.
Description of the DSDF pre-regi assembly and its operation procedure.
Explanation of the DSDF regi assembly and its operation procedure.
Details of the DSDF scanning drive assembly and its operation procedure.
Explanation of the DSDF exit assembly and its operation procedure.
Details of the DSDF lifting assembly and its operation procedure.
Explanation of the DSDF pick-up and reverse roller release assembly and its operation procedure.
Details of the DSDF scan in roller release assembly and its operation procedure.
Description of the main controller's processor, memory, interfaces, and control capabilities.
Information and connection details for the USB Hub PBA, used for interfacing with main board, UI, and USB devices.
Specifications and connection details for the SMPS PBA (Type5), which supplies power to various boards.
Specifications and connection details for the SMPS PBA (Type4), used for power supply.
Details of the Fuser Drive Board (FDB), which supplies voltage to the Fuser AC, Heater, and Main board.
Description of the HVPS board, which generates high-voltage channels for various units.
Information about the Eraser PBA, which erases negative charges on the drum surface after printing.
Details on the Fuser PBA, including CRU memory for life cycle counting and pressure sensor interface.
Information about the Waste Sensor PBA, which detects the waste toner level.
Details on the Paper Size sensor PBA used for sensing paper size from the tray.
Information about the OPE Unit, including its processor, memory, LCD, and interface.
Details on the DSDF PBA, its microcontroller, motor drivers, and sensors.
Information about the Scan Joint PBA, which interfaces with WLED, sensors, and main board.
Details of the CCDM PBA, used for converting reflected light to electrical signals.
Information on the WLED IF PBA, which interfaces with WLED and sensors in the platen unit.
Details about the WLED PBA, which provides scanner light using two WLEDs.
Details on the rollers and their functions within the DCF paper feeding system.
Location, part codes, and connection information for electrical parts within the DCF unit.
Block diagram of the DCF board, showing CPU, motor drive ICs, and communication with the main board via UART.
Details on the rollers and their functions within the HCF paper feeding system.
Location, part codes, and connection information for electrical parts within the HCF unit.
Block diagram of the HCF board, showing CPU, motor drive ICs, and communication with the main board via UART.
Details on the rollers and their functions within the LCT paper feeding system.
Location, part codes, and connection information for electrical parts within the LCT unit.
Block diagram of the LCT board, showing CPU, motor drive ICs, and communication with the main board via UART.
Essential safety precautions for handling PBAs, using correct parts, and avoiding damage.
Guidelines for using approved parts, avoiding unauthorized changes, and noting screw locations.
Precautions for handling Printed Circuit Board Assemblies (PBAs) to prevent damage from static electricity.
Instructions on how to carefully release parts held by plastic latches to avoid breakage.
Procedures for performing machine cleaning and maintenance tasks.
Step-by-step instructions for cleaning specific components like LSU window, scan glass, and DSDF white bar.
Procedure for cleaning the LSU window using a specialized cleaning tool.
Instructions for cleaning the scanner's glass surface with a soft cloth.
Procedure for cleaning the DSDF white bar and CIS components with a soft cloth.
Instructions for cleaning the paper dust stick when prompted by the machine.
Alternative procedure for cleaning the LSU window, involving a cleaning stick.
Step-by-step guides for replacing various maintenance parts, including drum units and ITB cleaners.
Instructions for removing and replacing the drum unit, including safety notes.
Procedure for removing and replacing the development unit, including firmware update recommendation.
Instructions for removing and replacing the ITB cleaner.
Procedure for removing and replacing the ITB unit, including ACR sensor cleaning.
Instructions for removing and replacing the fuser unit, with a crucial caution about its high temperature.
Procedure for removing pick-up, separation, and forward rollers.
Instructions for replacing MP pick-up, reverse, and forward rollers, with a recommendation to replace all three.
Procedure for removing and replacing the DSDF pick-up roller assembly for LX models.
Instructions for removing and replacing the DSDF reverse roller for LX models.
Procedure for removing and replacing the DSDF pick-up roller assembly for GX models.
Instructions for removing and replacing the DSDF reverse roller assembly for GX models.
Procedures for replacing major service parts of the machine, including covers and boards.
Instructions for removing the left cover of the machine.
Procedure for removing the rear cover.
Instructions for removing and replacing the HVPS board.
Procedure for removing and replacing the temperature-humidity sensor.
Instructions for removing and replacing the LSU, with a caution about potential harness damage.
Procedure for removing and replacing the OPE Unit, including cable disconnections and hinge screws.
Instructions for removing and replacing the main board, including MSOK transfer.
Procedure for removing and replacing the toner supply drive unit.
Instructions for replacing SMPS boards (Type 5 and Type 4), including removal of covers.
Detailed procedure for removing and replacing SMPS board 1.
Procedure for removing and replacing SMPS board 2.
Instructions for removing and replacing SMPS board 3 (GX model only).
Procedure for removing and replacing the Fuser Drive Board (FDB).
Instructions for removing and replacing the SMPS fan.
Procedure for removing and replacing the main drive unit.
Instructions for removing and replacing the inductor unit.
Procedure for removing and replacing the auto closing unit.
Instructions for removing and replacing the pick-up drive unit 1.
Procedure for removing and replacing the pick-up drive unit 2.
Instructions for removing and replacing the regi drive unit.
Procedure for removing and replacing the feed/MP drive unit.
Instructions for removing and replacing the fuser fan and duct.
Procedure for removing and replacing the fuser/exit drive unit.
Instructions for removing and replacing the side door open sensor.
Procedure for removing and replacing the auto size sensor.
Instructions for removing the inner cover, including toner cartridge and front cover removal.
Procedure for removing and replacing the front cover open sensor.
Instructions for removing and replacing waste toner container sensors.
Procedure for removing and replacing the WTB drive unit.
Instructions for removing and replacing the HDD, including cable disconnection.
Procedure for removing and replacing the LSU fan.
Instructions for removing the side unit, including cover and stopper release.
Procedure for removing and replacing the fuser-out sensor.
Instructions for removing and replacing the feed 2 sensor.
Procedure for removing the MP unit, including roller, shaft, and link removal.
Instructions for removing the MP empty sensor.
Procedure for removing the MP paper length sensor.
Instructions for removing and replacing the MP solenoid.
Procedure for removing and replacing Pick-Up Unit 2.
Instructions for removing the pick-up lifting sensor and empty sensor.
Procedure for removing the pre-feed sensor 2.
Instructions for removing and replacing Pick-Up Unit 1.
Instructions for removing the pick-up lifting sensor and empty sensor.
Procedure for removing the pre-feed sensor 1.
Instructions for removing the exit unit, including side cover and fuser unit removal.
Procedure for removing the return sensor.
Instructions for removing the duplex 1 sensor.
Procedure for removing the exit 1 bin full sensor.
Instructions for removing and replacing the exit gate solenoid.
Procedure for removing and replacing the DSDF unit for LX models.
Instructions for removing and replacing the DSDF PBA.
Procedure for removing and replacing the DSDF main motor.
Instructions for removing and replacing the DSDF paper length sensor.
Procedure for removing and replacing the DSDF unit for GX models.
Instructions for removing and replacing the DSDF PBA for GX models.
Procedure for removing and replacing the DSDF stacker sensor.
Instructions for removing and replacing the scanner unit, including DSDF unit and cable disconnection.
Procedure for removing and replacing the scan glass.
Instructions for removing and replacing the LED lamp module.
Procedure for removing and replacing the scanner imaging unit.
Instructions for removing and replacing the scan joint board.
Procedure for removing and replacing the APS sensor.
Instructions for removing and replacing the reservoir unit, including toner cartridge removal.
Procedures for replacing DCF feed motor, pick-up motor, and DCF PBA.
Instructions for removing and replacing the DCF feed motor.
Procedure for removing and replacing the DCF pick-up motor.
Instructions for removing and replacing the DCF PBA.
Procedures for replacing HCF feed motor, pick-up motor, and HCF PBA.
Instructions for removing and replacing the HCF feed motor.
Procedure for removing and replacing the HCF pick-up motor.
Instructions for removing and replacing the HCF PBA.
Procedure for removing and replacing the HCF lift-up motor.
Instructions for removing and replacing the HCF shaft motor.
Procedures for replacing LCT feed motor, pick-up motor, and LCT PBA.
Instructions for removing and replacing the LCT feed motor.
Procedure for removing and replacing the LCT pick-up motor.
Instructions for removing and replacing the LCT PBA.
Procedure for removing and replacing the LCT lift-up motor.
Information about the control panel's display screen, motion sensor hole, power button, and status LED.
Explanation of how to navigate the display screen using touch gestures like tap, touch and hold, swipe, and panning.
Definition of terms used in menu navigation: Tap, Touch and Hold, Swipe, and Panning.
Description of the main home screen, its applications, shortcuts, and navigating between home screens.
Instructions for creating and deleting shortcuts, adding widgets, and moving icons in the Apps menu.
Explanation of the notification bar's function for displaying processes, toner status, alerts, and device functions.
Explanation of the status LED colors (Off, Blue, Red) and their meanings regarding machine status.
Instructions for updating the printer firmware using the control panel or network methods.
Step-by-step guide for downloading, copying, and installing firmware via USB using the printer control panel.
Procedure for updating firmware remotely via the network using SyncThru Web Service (SWS).
Detailed instructions for clearing paper jams in various locations within the machine, including ADF and trays.
Procedures for clearing original document jams in front of and inside the scanner ADF.
Instructions for clearing paper jams in trays 1, 2, 3, 4, the multi-purpose tray, and inside the machine.
Instructions on how to enter the Service Mode (Tech Mode) using the power button and password.
Step-by-step guide to access the Service Mode using the control panel and entering a specific password.
Hierarchical breakdown of the Service Mode menu, detailing Navigation Tabs like Information, Maintenance Counts, Diagnostics, and Service Functions.
Details on accessing system information such as General, Supply Status, Software Version, Service Hours, Fault Log, Print Reports, and Export Reports.
Information on maintenance counts, including Fault Count, Jam Count, and Part Replacement Count.
Overview of diagnostic tests for Engine, Scanner/ADF, and Adjustment functions like print, copy, and scan area.
Details on various service functions like memory clear, hard disk maintenance, network settings, debug logs, capture logs, system recovery, and TR control mode.
Menu options for retrieving General system information and Supply Status (CRU/FRU).
Displays serial number, IP addresses, MAC address, total impressions, and installation date.
Shows customer and field replacement unit status, including item, threshold, status, count, and maximum life.
Displays detailed version information of all software installed in the system.
Shows system power on hours and power save hours since the first booting.
Displays faults that occurred during operation; clear button clears the log.
Lists available reports that can be printed, such as Supplies Information, Error Information, and Fax Protocol Dump.
Exports reports like Configuration, Error Information, and Usage Counter to a USB stick.
Displays counts for system faults, jams, and part replacements.
Displays fault counts grouped by system area, allowing detailed fault descriptions upon selection.
Shows jam counts grouped by location (Print Jam, Scan Jam) with detailed jam locations.
Displays replacement counts for system parts, showing part name and sensing method.
Provides tools for engine diagnostics, fax diagnostics, scanner diagnostics, and various adjustments.
Includes NVM initialization, NVM read/write, and engine test routines for motors and sensors.
Includes NVM read/write and test routines for fax machine functions like dial pulse, ring detection, and DTMF timing.
Covers Shading Test for image quality checks and NVM read/write for scanner and ADF memory.
Procedures for print, copy, and scan area adjustments, including automatic and manual calibration.
Guides for automatic and manual adjustment of print image position and magnification.
Instructions for manually adjusting copied image position, similar to print adjustment.
Procedures for automatic and manual adjustment of scanned image position and magnification.
Instructions for automatic and manual adjustment of scanned images via the DSDF.
Procedure for setting color coverage ratio for auto color mode to classify documents as color or monochrome.
Functions for Auto Color Registration and Auto Tone Adjustment (Normal and Full) to correct color shifts and image density.
Menu option to print test patterns manually for skew adjustment.
Various service functions including memory clear, hard disk maintenance, network settings, debug logs, capture logs, system recovery, and TR control mode.
Resets system memory to factory defaults, requiring country selection and reboot.
Functions for clearing device configuration, temporary/spool data, user data, and checking for bad sectors.
Sets the count for large pages (A3, ledger) to 1 or 2 counts.
Enables/disables remote connections via telnet, OSGI, and SMB protocols.
Sets system log message levels (Off, Job Status, Details) for troubleshooting.
Copies saved system logs to USB memory as a zip file for analysis.
Captures and exports network packets for troubleshooting network issues.
Procedures for repairing or formatting the HDD, including USB or network recovery options.
Adjusts transfer value to optimize image quality, especially for different paper types and color issues.
Clears the machine's cache data after installing XOA applications.
Manages hibernation mode for the operating system image and reduces operating time.
Enables or disables warning messages for low paper status.
Enables or disables alert messages for consumable life status.
Allows selection of the type of FDI for tracking machine usage.
Sets the machine's hard stop condition when the drum life expires.
Enables configurable options (On/Off) in service mode for technicians and dealers.
Enables SFE functions related to the dealer.
Enables image rotation for printing envelopes correctly on SEF or LEF directions.
Guides for troubleshooting machine status or errors indicated by error codes on the control panel.
Troubleshooting steps for paper mismatch errors, involving checking and changing tray paper settings.
Troubleshooting for system errors like booting failures and scanner failures, including SVC mode operations.
List of motor errors (A1-xxxx) with troubleshooting steps involving checking connections, SVC mode tests, and replacing components.
Troubleshooting for Feed/MP motor operation issues, checking signals, power, and replacing parts.
Troubleshooting for Fuser/Exit motor operation issues, checking connections and replacing components.
Troubleshooting for ITB motor operation issues, checking connections and replacing components.
Troubleshooting for Yellow OPC motor operation issues, checking connections and replacing components.
Troubleshooting for Magenta OPC motor operation issues, checking connections and replacing components.
Troubleshooting for Cyan OPC motor operation issues, checking connections and replacing components.
Troubleshooting for Black OPC motor operation issues, checking connections and replacing components.
Troubleshooting for T1 engage motor operation issues, checking connection, resistance, and replacing parts.
Troubleshooting for Yellow toner supply problems, checking pipes, motors, and replacing parts.
Troubleshooting for Magenta toner supply problems, checking pipes, motors, and replacing parts.
Troubleshooting for Cyan toner supply problems, checking pipes, motors, and replacing parts.
Troubleshooting for Black toner supply problems, checking pipes, motors, and replacing parts.
Troubleshooting for fan errors (A2-xxxx), involving checking connections, SVC mode tests, and replacing fans or main board.
Troubleshooting for sensor errors (A3-xxxx), including cleaning and replacing defective sensors or main boards.
Troubleshooting for CTD/ACR sensor contamination or failure, involving cleaning and SVC mode calibration.
Troubleshooting for fuser NC sensor errors, involving temperature tests and replacing fuser unit or main board.
Troubleshooting for inner temperature sensor errors, involving connection checks and replacing sensor or main board.
Troubleshooting for outer temperature/humidity sensor errors, involving connection checks and replacing sensor or main board.
Troubleshooting for toner cartridge errors, including replacement, compatibility, and supply issues.
Procedure for preparing a new yellow toner cartridge when the current one is low.
Instructions for replacing the yellow toner cartridge when it reaches its end of life.
Troubleshooting for yellow toner supply inefficiency, involving cartridge handling and shaking.
Troubleshooting for yellow toner cartridge installation or CRUM data detection problems.
Troubleshooting for incompatible yellow toner cartridges, requiring replacement.
Procedure for ordering a new magenta toner cartridge when the current one is low.
Instructions for replacing the magenta toner cartridge when it reaches its end of life.
Troubleshooting for magenta toner supply inefficiency, involving cartridge handling and shaking.
Troubleshooting for magenta toner cartridge installation or CRUM data detection problems.
Troubleshooting for incompatible magenta toner cartridges, requiring replacement.
Procedure for ordering a new cyan toner cartridge when the current one is low.
Instructions for replacing the cyan toner cartridge when it reaches its end of life.
Troubleshooting for cyan toner supply inefficiency, involving cartridge handling and shaking.
Troubleshooting for cyan toner cartridge installation or CRUM data detection problems.
Troubleshooting for incompatible cyan toner cartridges, requiring replacement.
Procedure for ordering a new black toner cartridge when the current one is low.
Instructions for replacing the black toner cartridge when it reaches its end of life.
Troubleshooting for black toner supply inefficiency, involving cartridge handling and shaking.
Troubleshooting for black toner cartridge installation or CRUM data detection problems.
Troubleshooting for incompatible black toner cartridges, requiring replacement.
Troubleshooting for drum unit errors, including replacement and compatibility checks.
Procedure for ordering a new yellow drum unit when its life is nearing expiration.
Instructions for replacing the yellow drum unit when it reaches its end of life.
Troubleshooting for yellow drum unit installation or detection problems.
Troubleshooting for incompatible yellow drum units, requiring replacement.
Procedure for ordering a new magenta drum unit when its life is nearing expiration.
Instructions for replacing the magenta drum unit when it reaches its end of life.
Troubleshooting for magenta drum unit installation or detection problems.
Troubleshooting for incompatible magenta drum units, requiring replacement.
Procedure for ordering a new cyan drum unit when its life is nearing expiration.
Instructions for replacing the cyan drum unit when it reaches its end of life.
Troubleshooting for cyan drum unit installation or detection problems.
Troubleshooting for incompatible cyan drum units, requiring replacement.
Procedure for ordering a new black drum unit when its life is nearing expiration.
Instructions for replacing the black drum unit when it reaches its end of life.
Troubleshooting for black drum unit installation or detection problems.
Troubleshooting for incompatible black drum units, requiring replacement.
Troubleshooting for ITB unit errors, including replacement and cleaning of the transfer belt.
Procedure for preparing a new transfer belt unit when its life is nearing expiration.
Instructions for replacing the transfer belt unit and resetting the T2 roller count.
Procedure for replacing the ITB cleaner when its life has expired.
Troubleshooting for fuser unit errors, including end of life and installation issues.
Instructions for replacing the fuser unit when it reaches its end of life.
Troubleshooting for fuser unit installation or connection problems.
Troubleshooting for waste toner container errors, including full, low, and not installed states.
Troubleshooting for developer unit errors, including replacement, compatibility, and supply issues.
Instructions for replacing the yellow developer unit when its life has expired.
Troubleshooting for yellow developer unit problems with toner supply or sensor calibration.
Instructions for replacing the magenta developer unit when its life has expired.
Troubleshooting for magenta developer unit problems with toner supply or sensor calibration.
Instructions for replacing the cyan developer unit when its life has expired.
Troubleshooting for cyan developer unit problems with toner supply or sensor calibration.
Instructions for replacing the black developer unit when its life has expired.
Troubleshooting for black developer unit problems with toner supply or sensor calibration.
Troubleshooting for transfer roller errors, including replacement and installation.
Procedure for preparing a new transfer roller assembly.
Instructions for replacing the 2nd transfer roller and resetting the T2 roller count.
Troubleshooting for transfer roller installation problems.
List of error codes related to the Double Cassette Feeder unit and their troubleshooting steps.
Troubleshooting for paper jams in Tray 3 of the DCF unit, involving roller checks and part replacement.
Troubleshooting for tray 3 cassette pull-out or auto size sensor issues.
Troubleshooting for low or empty paper errors in Tray 3, involving sensor checks.
Troubleshooting for input system failures in Tray 3, involving connection checks and part replacement.
Troubleshooting for paper jams in Tray 4 of the DCF unit, involving roller and sensor checks.
Troubleshooting for tray 4 cassette pull-out or auto size sensor issues.
Troubleshooting for low or empty paper errors in Tray 4, involving sensor checks.
Troubleshooting for input system failures in Tray 4, involving connection checks and part replacement.
List of error codes related to the High Capacity Feeder unit and their troubleshooting steps.
Troubleshooting for paper jams in Tray 4 of HCF/LCT, involving roller and sensor checks.
Troubleshooting for paper jams in Tray 5 of DCF/LCT, involving roller and sensor checks.
Troubleshooting for LCT top cover or side door open switch issues.
Troubleshooting for LCT cassette pull-out or installation sensor problems.
Troubleshooting for communication errors between LCT and main machine, involving PBA replacement.
Troubleshooting for low or empty paper errors in LCT Tray 4, involving sensor checks.
Troubleshooting for low or empty paper errors in LCT Tray 5, involving sensor checks.
Troubleshooting for paper feed failures from LCT, involving connection checks and unit replacement.
Reference to the Finisher Service Manual for H2-xxxx type errors.
List of jam error codes (Mx-xxxx) occurring in various trays and paths, with troubleshooting steps.
Troubleshooting for paper jams in Tray 1, involving checks of pick-up unit and sensor.
Troubleshooting for paper jams in Tray 2, involving checks of pick-up unit and sensor.
Troubleshooting for paper jams in MP Tray, involving MP solenoid and feed/MP drive unit checks.
Troubleshooting for paper jams inside the machine related to feed sensors and motors.
Troubleshooting for paper jams in Tray 1, involving feed sensors and motors.
Troubleshooting for paper jams in Tray 2, involving feed sensors and motors.
Troubleshooting for paper jams inside the machine related to regi sensor and motor.
Troubleshooting for paper jams in the duplex path, involving fuser out sensors and motors.
Troubleshooting for paper jams in the duplex path, involving fuser out sensors and motors.
Troubleshooting for paper jams in the exit area, involving sensors and solenoids.
List of errors related to tray installation, paper levels, and output bin status.
Troubleshooting for Tray 1 cassette pull-out or auto size sensor issues.
Troubleshooting for Tray 2 cassette pull-out or auto size sensor issues.
Troubleshooting for paper feed failures from Tray 1, involving pickup unit and sensor checks.
Troubleshooting for paper feed failures from Tray 2, involving pickup unit and sensor checks.
Troubleshooting for low or empty paper errors in Tray 1, involving sensor checks.
Troubleshooting for low or empty paper errors in Tray 2, involving sensor checks.
Troubleshooting for MP Tray paper empty errors, involving sensor checks.
Troubleshooting for output bin or inner tray full errors, involving bin-full sensor checks.
List of system error codes (Sx-xxxx) related to video, HDD, MSOK, network, UI, and scanner failures.
Troubleshooting for video system failure, possibly due to CPU overheating, involving main board replacement.
Troubleshooting for clock initialization errors, involving time setup and battery voltage check.
Troubleshooting for video chip failures on the main board, requiring replacement.
Troubleshooting for memory detection failure during booting, involving main board replacement.
Troubleshooting for HDD partition or memory full errors, involving system recovery and HDD replacement.
Troubleshooting for HDD partition or memory full errors, involving hard disk maintenance.
Troubleshooting for MSOK installation or defect issues, involving rear cover removal and main board replacement.
Troubleshooting for main board defects affecting video system failure.
Troubleshooting for main board network communication failures.
Troubleshooting for USB device chip failures, involving OPE hub board replacement.
Troubleshooting for FDI device installation or replacement.
Troubleshooting for main board defects causing engine system failures.
Troubleshooting for ACR errors, involving ACR calibration and sensor cleaning.
General errors indicating engine status, requiring waiting for disappearance.
Troubleshooting for front or side cover open errors, involving sensor checks.
Troubleshooting for right door open errors, involving sensor checks.
Troubleshooting for color registration failures, involving ACR sensor and ITB unit checks.
Troubleshooting for scanner lock errors, involving checking module movement and cables.
Troubleshooting for ADF connection or communication errors with CIP6 board.
Troubleshooting for fax modem card problems on Line 1.
Troubleshooting for fax modem card problems on Line 2.
Troubleshooting for UI system failures due to communication errors between main and OPE boards.
Troubleshooting for network cable disconnection or port issues.
Troubleshooting for defective network chips in optional network kits.
Troubleshooting for network errors like IP address conflicts and 802.1x authentication failures.
Troubleshooting for fuser failures, specifically related to heater control relay abnormalities.
Troubleshooting for fuser unit errors, including end of life and installation issues.
Troubleshooting for fuser unit failures related to thermistor and halogen lamp issues.
Troubleshooting for abnormal pressure control unit operation in the fuser.
Troubleshooting for LSU errors, including Hsync signal issues and motor operation problems.
Troubleshooting for LSU Hsync signal abnormalities, involving cable checks and LSU replacement.
Troubleshooting for LSU motor operation problems, involving motor tests and cable checks.
Troubleshooting for abnormal LSU temperature sensor readings.
List of DSDF errors for LX models and troubleshooting steps for paper jams and cover status.
Troubleshooting for paper jams inside the DSDF scanner, involving sensor and actuator checks.
Troubleshooting for incorrect document insertion in DSDF, involving cover and pick-up module checks.
Troubleshooting for paper jams inside the DSDF scanner, involving sensor checks.
Troubleshooting for paper jams in the DSDF exit area, involving sensor checks.
Troubleshooting for DSDF scanner top door open errors, involving cover open sensor checks.
List of DSDF errors for GX models and troubleshooting steps for paper jams and cover status.
Troubleshooting for paper jams inside the DSDF scanner, involving sensor and actuator checks.
Troubleshooting for incorrect document insertion in DSDF, involving cover and pick-up module checks.
Troubleshooting for paper jams inside the DSDF scanner, involving sensor checks.
Troubleshooting for paper jams in the DSDF exit area, involving sensor checks.
Troubleshooting for DSDF scanner top door open errors, involving cover open sensor checks.
Guidance on analyzing and resolving print quality issues attributed to components, consumables, media, or software.
Troubleshooting steps for vertical black bands, involving checks of charge roller, ITB belt, and scanner unit contamination.
Troubleshooting for vertical white bands or light bands, involving foreign substance removal and developer unit checks.
Troubleshooting for horizontal periodic black bands or dots, involving charge roller and OPC drum checks.
Troubleshooting for horizontal periodic light/dark bands or dots, involving OPC exposure and developer unit quality.
Troubleshooting for foggy images, involving OPC voltage, HVPS board, and developer unit checks.
Troubleshooting for light images, involving TRC operation, transfer issues, and HVPS output voltage.
Troubleshooting for blurred images, involving humidity, T2 transfer voltage, and HVPS connections.
Troubleshooting for incorrect color registration, involving ACR sensor cleaning and skew adjustment.
Troubleshooting for uneven pitch or jitter images, involving drive gear checks and LSU assembly.
Troubleshooting for skewed images, involving cassette installation, roller condition, and ADF installation.
Troubleshooting for blank copies, involving LSU operation, HVPS board, and main board connections.
Troubleshooting for poor fusing performance, involving paper type, fuser unit wear, and temperature control.
Troubleshooting for stains on the paper back side, involving transfer roller, ITB belt, and fuser unit checks.
Procedure for adjusting color tone to factory standard, involving scanning an ID chart.
Troubleshooting for duplex blur, white spot, or blur on color print-outs, involving TR control mode adjustments.
Covers other potential problems like image system issues and drive unit noise.
Troubleshooting for toner cartridge detection, image registration, and TRC/ACR errors.
Troubleshooting for acoustic noise issues in the fuser unit.
Troubleshooting for ADF hinge noise/cracks and ADF recognition issues.
Troubleshooting for drive unit noise issues, particularly when printing.
Troubleshooting for paper pickup failures from trays and envelope wrinkles.
Troubleshooting for ACR fail problems and loud noise from the LSU motor.
Troubleshooting for SMPS output voltage drops, HDD noise, networking issues, and UI malfunctions.
Troubleshooting for 24V output voltage drops from the SMPS, involving checks of output channels and connections.
Troubleshooting for loud noise from the Hard Disk Drive, suggesting HDD replacement.
Troubleshooting for networking problems, involving ping tests and checking network-related components.
Troubleshooting for UI touch malfunctions, possibly caused by interference or incorrect configuration.
Troubleshooting for missing home screen icons or broken UI screens, possibly due to software errors.
Procedure for adjusting the DSDF hinge to correct skewed image output.
Wiring diagram showing connections for the fuser, exit, duplex, and toner units.
Wiring diagram detailing the connections for the scanner unit, DSDF, DCIS, and CCDM.
Wiring diagram showing connections for the LSU, OPE unit, and USB interfaces.
Wiring diagram illustrating connections for side, MP, feed, regi, and pick-up units.
Wiring diagram showing connections for OPC, WTB, and CST Lock components.
Wiring diagram illustrating connections for HVPS, SMPS, and FDB boards.
List of recommended tools for troubleshooting, including DVM, spring hook, tweezers, and soft cloth.
Glossary of printing and networking terminologies used in the manual.
Information on sub-brand names and model code structure, including function codes.
List of document versions, dates, page references, and descriptions of changes made.
| Duplex printing | Yes |
|---|---|
| Print technology | Laser |
| Maximum resolution | 1200 x 1200 DPI |
| Time to first page (black, normal) | 6.9 s |
| Time to first page (color, normal) | 8.3 s |
| Print speed (black, normal quality, A4/US Letter) | 60 ppm |
| Copier resize | 25 - 400 % |
| Maximum copy resolution | 600 x 600 DPI |
| Maximum number of copies | 9999 copies |
| Time to first copy (black, normal) | 3.1 s |
| Time to first copy (color, normal) | 4.5 s |
| Copy speed (black, normal quality, A4) | 60 cpm |
| Scan to | E-mail, File, FTP, SMB, USB |
| Scan drivers | SANE, TWAIN |
| Scanner type | Flatbed & ADF scanner |
| Maximum scan resolution | 4800 x 4800 DPI |
| Faxing | No |
| Digital sender | - |
| Maximum duty cycle | 330000 pages per month |
| Page description languages | PCL 5, PCL 6, PCL XL, PDF 1.7, PostScript 3 |
| Internal memory | 6144 MB |
| Processor cores | 4 |
| Processor frequency | 1500 MHz |
| Internal storage capacity | 320 GB |
| Sound power level (standby) | 30 dB |
| Sound pressure level (copying) | 59 dB |
| Sound pressure level (printing) | 56 dB |
| Total input capacity | 1140 sheets |
| Total output capacity | 500 sheets |
| Maximum input capacity | 6140 sheets |
| Multi-Purpose tray input capacity | 100 sheets |
| Envelopes sizes | 9, 10, C5, DL |
| Paper tray media types | Bond paper, Card stock, Envelopes, Heavy paper, Labels, Plain paper, Pre-Printed, Recycled paper, Thick paper, Thin paper, Transparencies |
| Non-ISO print media sizes | Folio |
| ISO A-series sizes (A0...A9) | A3, A4, A5, A6 |
| ISO B-series sizes (B0...B9) | B5 |
| Maximum ISO A-series paper size | A3 |
| Display | LCD |
| Control type | Touch |
| Product color | Black, Grey |
| Display diagonal | 10.1 \ |
| Display resolution | 960 x 600 pixels |
| Market positioning | Business |
| Cabling technology | 10/100/1000Base-T(X) |
| Ethernet LAN data rates | 10, 100, 1000 Mbit/s |
| Supported network protocols (IPv6) | TCP / IPv4 / HTTP / HTTPS / SNMP (v1.2 / v3) / LDAP / LDAPS / SMTP / SSL / TLS / IPSec / DNS / WINS / SLP / Bonjour / SSDP /DDNS / DHCP / BOOTP / IPv6 / NetBIOS over TCP / IP |
| Standard interfaces | Ethernet, USB 2.0, USB 3.2 Gen 1 (3.1 Gen 1) |
| Optional connectivity | Wireless LAN |
| USB 3.2 Gen 1 (3.1 Gen 1) ports quantity | 1 |
| AC input voltage | 220 - 240 V |
| AC input frequency | 50 - 60 Hz |
| Power consumption (average operating) | 1300 W |
| Sustainability certificates | Blue Angel, ENERGY STAR |
| Certification | EPEAT Silver |
| Depth | 706.8 mm |
|---|---|
| Width | 585 mm |
| Height | 932 mm |
| Weight | 97300 g |