S&C Instruction Sheet 761-505 11
Installation
Figure 6. Hoisting the switch pole into position.
STEP 5. Hoist the switch poles and bolt them into posi-
tion as shown on the erection drawing. See
Figure 6.
NOTICE
Make sure the surfaces on which the switch
pole bases are mounted are flat and true.
Mounting to an uneven surface can cause
the bases to twist, placing undue strain
on the insulators and throwing the blades
out of alignment, resulting in difficul ties
operating the switch. Use shims as required.
STEP 6. Lift or hoist the bell-crank assembly, including
base or bracket, and bolt it into position as shown
on the erection drawing. See Figure 7.
STEP 7. Make sure the bell-crank is held in the 45-degree
position. The bell-crank and bell-crank bearing
have indexing ridges to facilitate align ment. See
Figure 8.
Figure 7. Lifting the bell-crank into position.
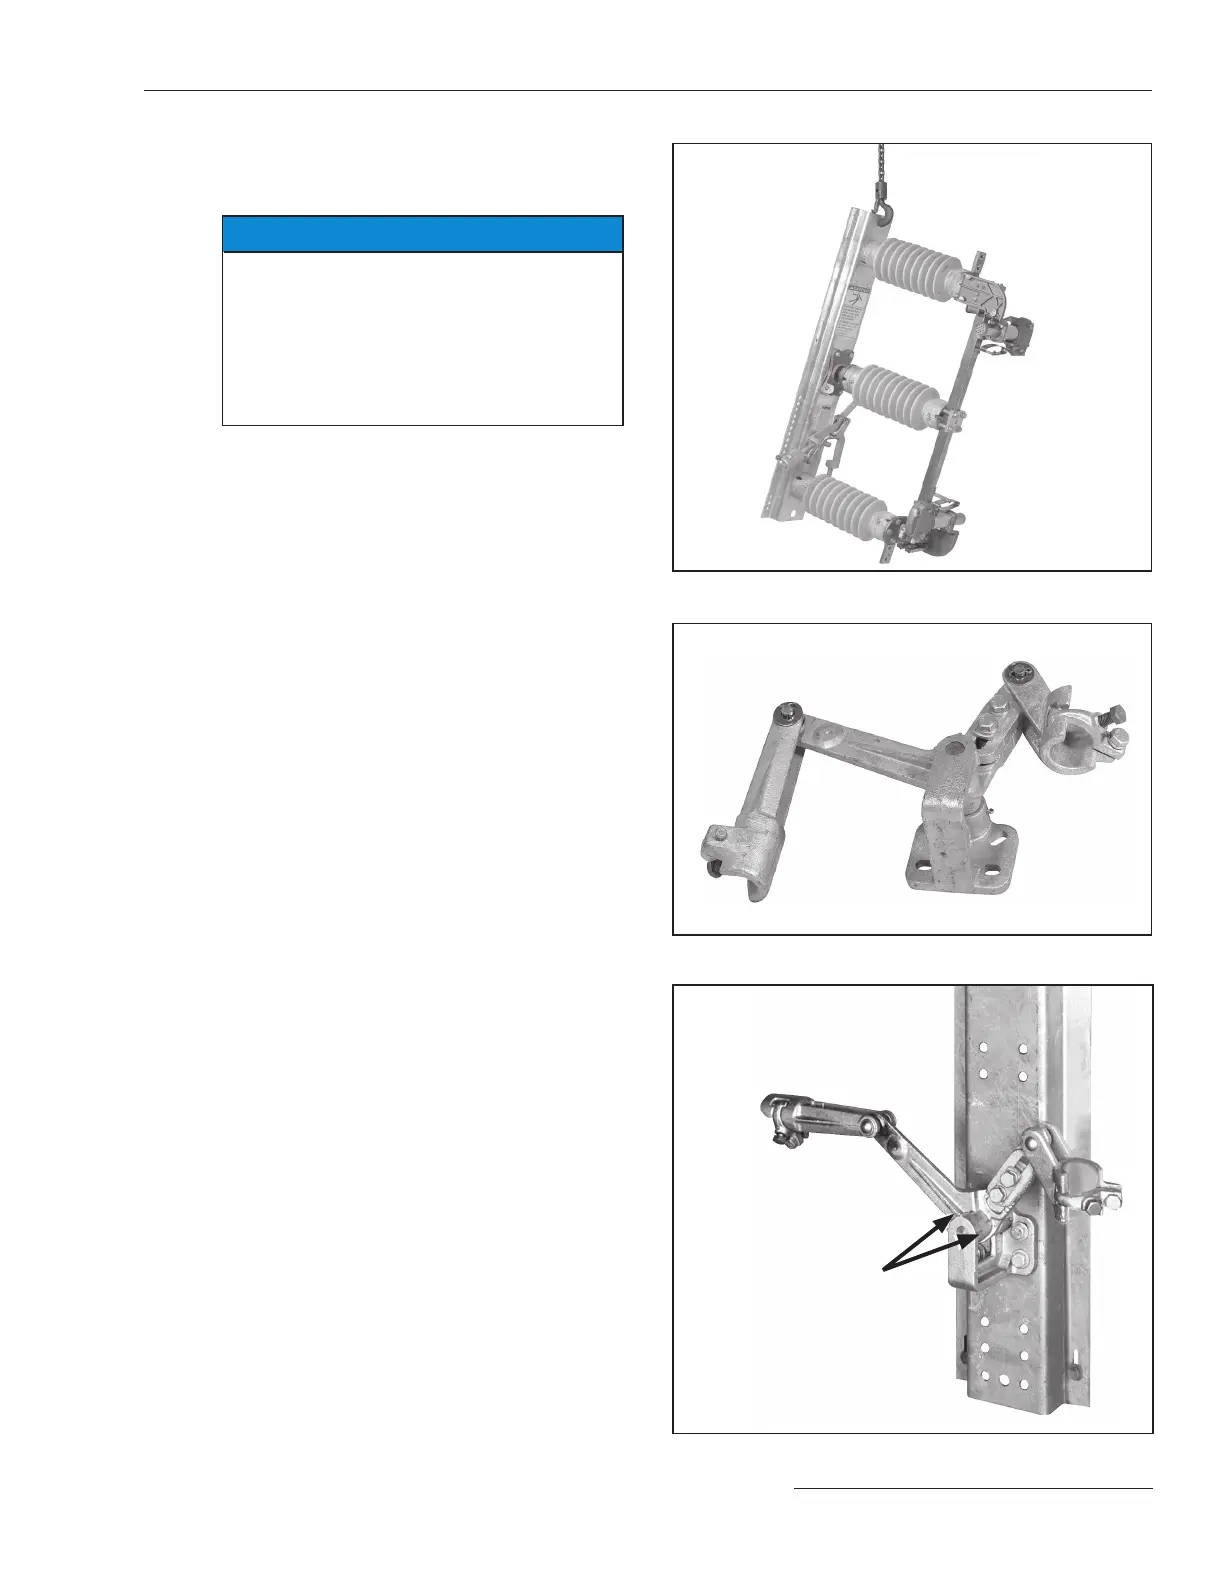
Figure 8. The bell-crank in the 45-degree position.
45-degree
position
marks
 Loading...


