S&C Instruction Sheet 765-510 17
STEP 12.
Open and close the interrupter switch slowly to
check that no operating dif culties are
encountered caused by undetected damage in
shipping. (This applies only when checking for
alignment and complete closure; when in
service, the interrupter switch should be opened
or closed vigorously through its full travel
without hesitation at any point.)
STEP 13.
CAUTION
Adjust the stop plates to remove all excess
play from the operating mechanism and
to attain proper “windup” tension before
energizing the switch.
Slack in the operating pipe may allow the
vertical operating pipe to move or vibrate
during high winds or inclement weather.
Failure to properly adjust the handle may
cause contact overheating or arcing,
damaging the blade contacts. Injury to
operating personnel may result.
Loosen the bolts that secure the adjustable stop
plates to the foot-bearing support plate. See
Figure 12. Place the switch in the fully Open
position and adjust the open-position stop plate
so the handle, when lowered, ts into the open-
position slot. Mark on the support plate the
location of the open-position stop plate.
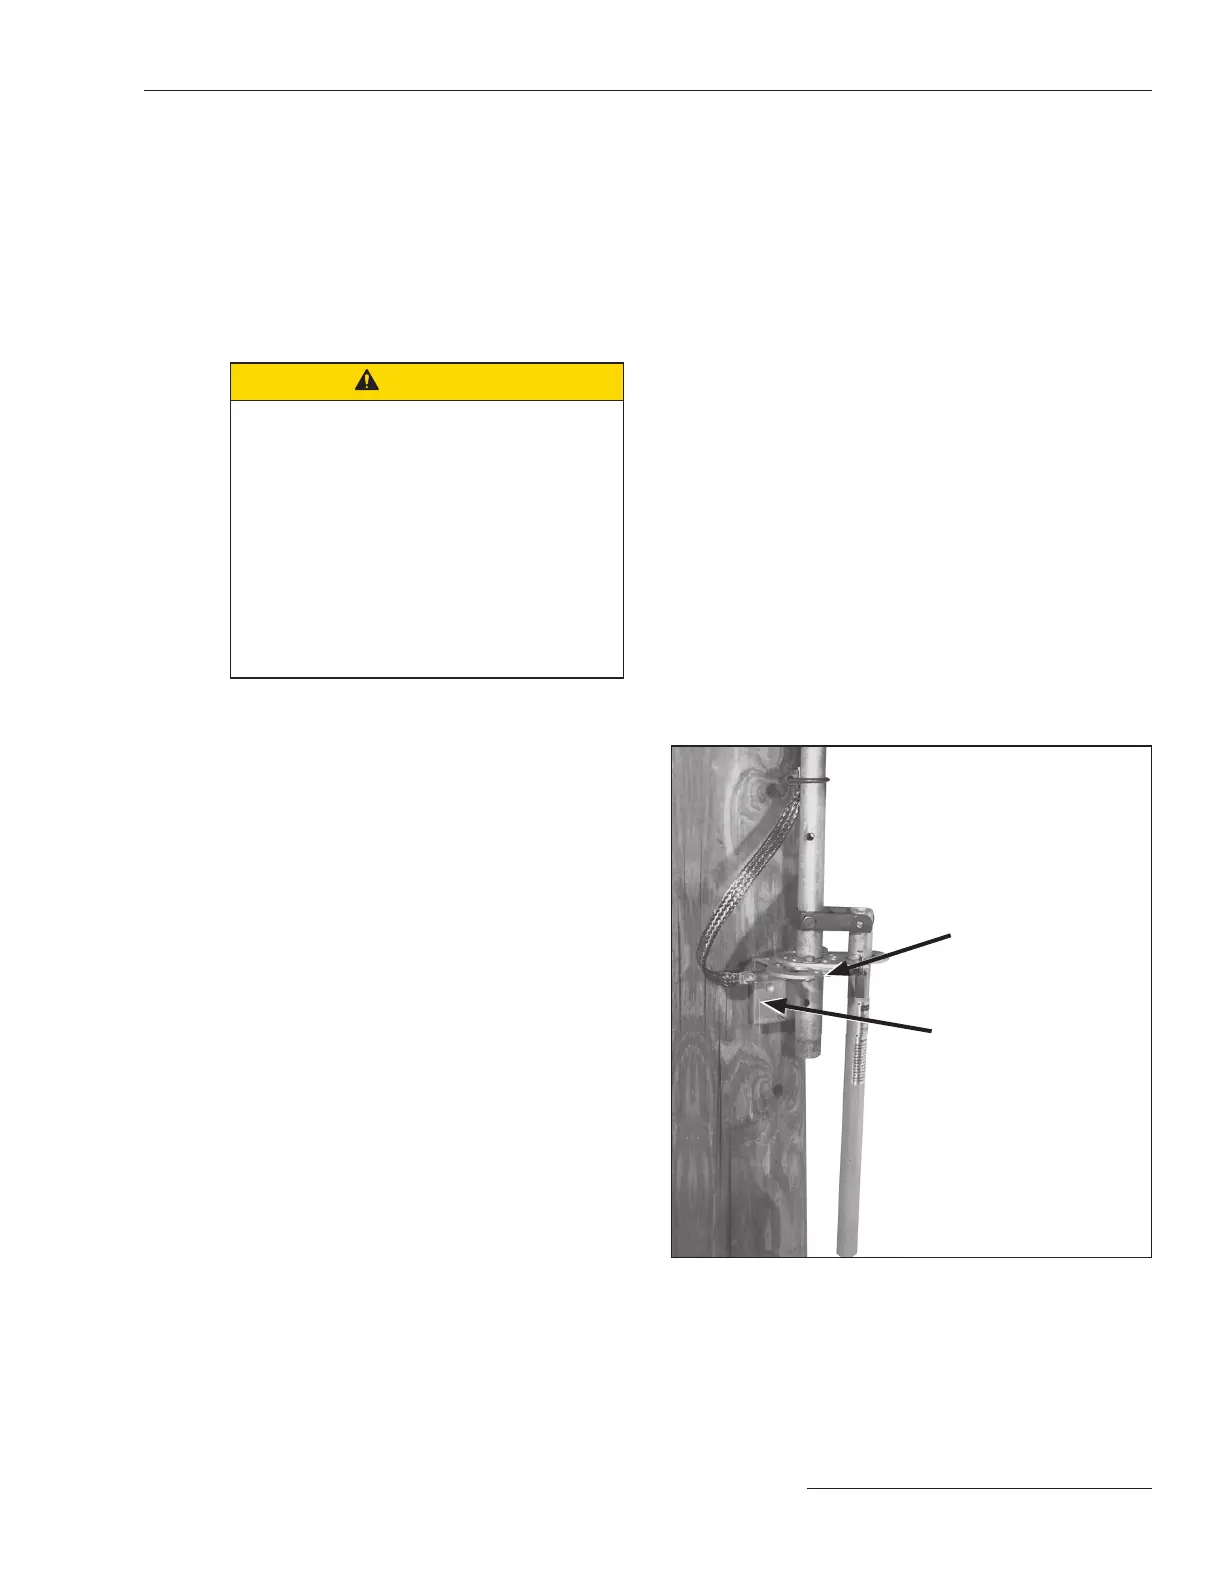
Figure 12. The foot-bearing assembly and operating-handle
assembly.
Foot bearing support plate
Adjustable stop plates
Installation
Fully close the switch and apply sufficient
pressure to the handle in the closing direction
to remove all play in the operating-pipe linkage.
Adjust the closed-position stop plate so the
handle will require even greater pressure to
force it into the closed-position slot. Mark on the
support plate the location of the closed-position
stop plate.
While holding both stop plates in the previ-
ously marked positions, torque the bolts to
secure the stop plates to the support plate. Move
the handle to the Switch-Open position and
verify the handle, when lowered, fits firmly into
the open-position slot.
Move the handle to the Switch-Closed
position. Verify all play in the operating-pipe
linkage has been taken up before the handle
can be lowered into the closed-position slot
and substantial pressure is required to force the
handle into the closed-position slot.
STEP 14. Make sure all clamp bolts and piercing set
screws have been torqued to nal tightness.

 Loading...
