17
Manage Cables - Cable Tunnel
1
NOTES:
● This product is NOT recommended for brick, plaster, or
wallpapered walls.
● If wall has been painted, allow paint to cure at least 30 days
before installing cable tunnels.
● Wipe away any dirt, dust, grease, etc. on the surface and let dry
completely before installing.
● The tunnels
25
can be painted to match your wall.
● The tunnels
25
can be cut to fit the length required.
To Remove Adhesive Clips
1. Insert a flat object (e.g. - knife blade) behind the clip and the
adhesive pad and pry o the plastic clip.
2. Peel o the adhesive pad with your fingers.
3. If adhesive residue remains, use a cloth soaked in an organic
solvent to wipe away the residue.
NOTE: First test the solvent in a concealed spot to make
sure it will not damage the wall surface.
23
23
24
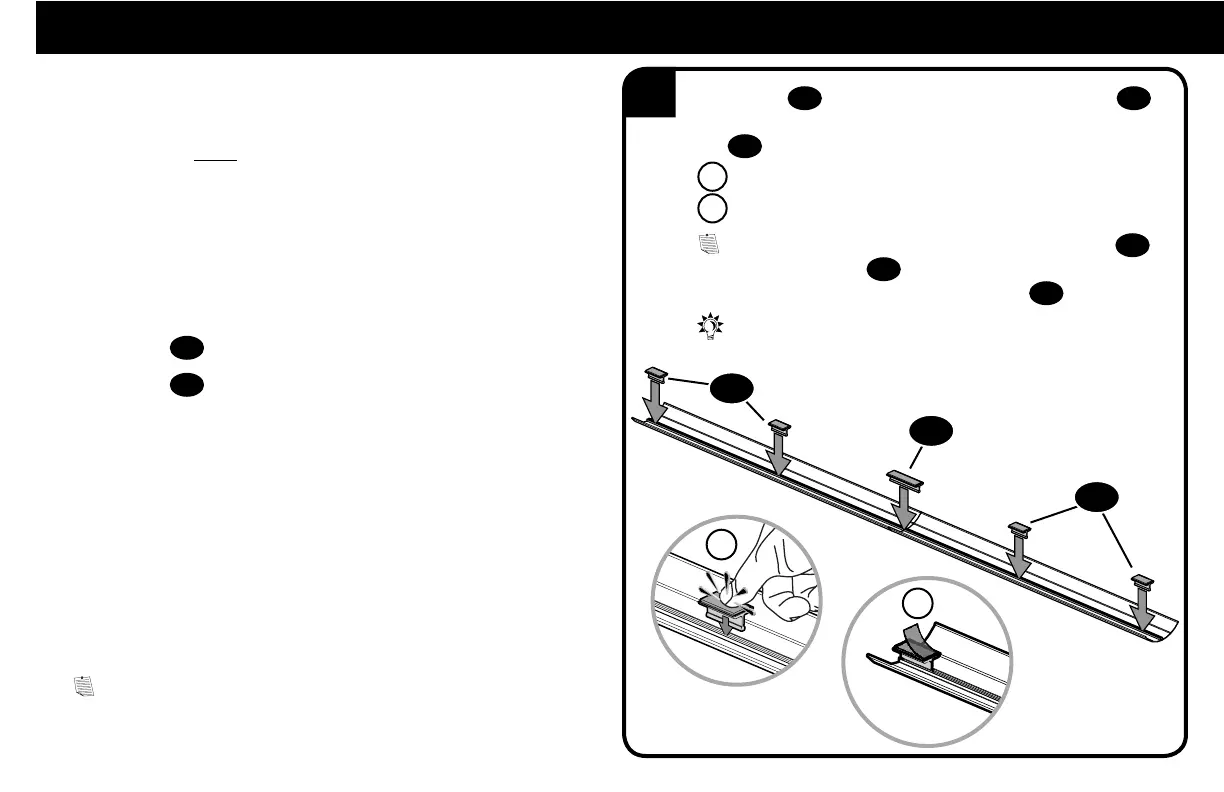
Space clips
23
evenly along the length of the tunnel(s)
25
with a clip near each end. To combine tunnels, use the long
clip
24
to connect where they meet.
A Press firmly until clips snap in place.
B Peel o backing of adhesive pads on clips.
NOTE: If using two tunnels, install five
clips - four
23
clips and one long clip
24
.
If using only one tunnel, install three
clips
23
.
TIP: If the edges of the two tunnels do not align, reverse
one tunnel end for end.
A
B