EasyManua.ls Logo

Sanus WMS3 User Manual

Sanus WMS3
12 pages
To Next Page IconTo Next Page
Page #1 background imageLoading...
Page #1 background image
SANUS • 6436 City West, Eden Prairie, MN 55344 USA • sanus.com
Americas: 800-359-5520 • 952-225-6013 • info@sanus.com
Europe, Middle East, and Africa: + 31 40 2324700 • europe.sanus@milestone.com
©2013 Milestone AV Technologies, a Duchossois Group Company. All rights reserved. Sanus is a division of Milestone.
All other brand names or marks are used for identification purposes and are trademarks of their respective owners.
FR
Nous vous remercions d’avoir choisi un montant mural WMS de Sanus Systems. Le montant mural
WMS de Sanus Systems a été conçu pour supporter des haut-parleurs pesant jusqu’à 3,62 kg (8lb).
ES
Gracias por elegir el soporte para pared WMS de Sanus Systems. El soporte para pared WMS de
Sanus Systems está diseñado para sostener parlantes con un peso de hasta 3,62 kg (8 lb).
EN
Thank you for choosing the Sanus Systems WMS wall mount. The Sanus Systems WMS wall mount
is designed to support speakers weighing up to 3.62 kg (8 lbs.).
Este producto está diseñado para que se use únicamente en aplicaciones con pernos de madera
y bloques de concreto. La pared o el cielo raso deben ser capaces de soportar hasta cinco veces
el peso del altavoz y del montaje juntos. Si tiene dudas sobre la capacidad de la superficie para
soportar el monitor, póngase en contacto con el Servicio de Atención al Cliente de Sanus Systems o
con un contratista calificado.
ADVERTENCIA
Ce produit est conçu pour être installé seulement sur des montants en bois ou des blocs de
béton! Le mur ou le plafond doit pouvoir supporter cinq fois le poids total du haut-parleur et du
support combiné. Si vous avez des doutes quant à la capacité de la surface à supporter le moniteur,
contactez le service à la clientèle de Sanus Systems ou un entrepreneur qualifié.
ATTENTION
This product is designed for use in wood stud and concrete block applications only! The wall
or ceiling must be capable of supporting up to five times the weight of the speaker and mount
combined. If you have any doubts about the ability of the surface to support the monitor, contact
Sanus Systems Customer Service, or a qualified contractor.
CAUTION
WMS3 & WMS5
(6901-300150 <06>)
Question and Answer IconNeed help?

Do you have a question about the Sanus WMS3 and is the answer not in the manual?

Sanus WMS3 Specifications

General IconGeneral
Maximum weight capacity3.64 kg
Package weight45 g
Weight and Dimensions IconWeight and Dimensions
Depth15.24 mm
Width3.18 mm
Height8.26 mm

Summary

Product Overview and Safety Precautions

Weight Capacity and Application Guidelines

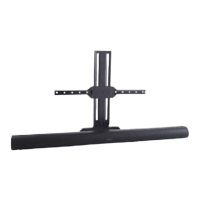
Details the Sanus Systems WMS wall mount's support capacity for speakers up to 3.62 kg (8 lbs.) and suitable wall types.

Installation Surface Requirements

Specifies use in wood stud and concrete block applications only, requiring walls to support five times the combined weight.

Safety Warnings and Usage Guidelines

Choking Hazard and Child Safety

Warns about small items being a choking hazard if swallowed and must be kept away from young children.

Proper Use and Installation Caution

Advises against unspecified uses and warns that improper installation or use may cause injury or damage.

Supplied Parts and Hardware

Inventory and Condition Check

Lists all included parts and hardware, advising to verify condition and contact customer service for missing or damaged items.

Installation Steps

Step 1: Mount the Speaker Plate

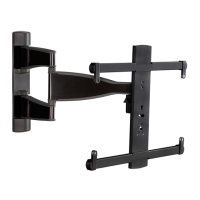
Instructions for mounting the speaker plate to the speaker.

Step 1.1: Mounting to Speaker Adapter

Details mounting the speaker plate to the satellite speaker adapter, noting specific screw requirements for Bose speakers.

Step 2: Mounting to Wood Stud Walls and Ceiling Joists

Provides instructions for mounting the unit to wood stud walls and ceiling joists.

Step 2.1: Mounting to Concrete Walls or Ceilings

Details the process of mounting the product to poured concrete or concrete block walls and ceilings.

Step 3: Install Arm

Instructions for installing the adjustable arm component of the mount.

Step 4: Attach the Speakers

Guides on how to attach the speakers to the installed mount.

Related product manuals