PROGRAMMED PLAY
Up to 32 tracks, from up to 3 discs, can be programmed for play in any
order.
To begin the programming procedure, select “CD function first.
The discs or tracks must be programmed in the stop mode.
The same disc or track can be programmed more than once.
Follow the example below to programme tracks 6 and 2 on DISC 1 and all
tracks on DISC 3, In this example, each disc has 9 tracks and DISC 3 is
in playing position.
1.
2.
3.
4.
5.
6.
Press the MEMORY button.
Select disc 1 by pressing the DISC 1
button.
- The DISC SELECT button on the
remote control can also be used.
Select track 6 by pressing the ➤E/ FM
button.
The number buttons on the remote
control can also be used.
h’~ P R.
/,,
s PR
m&
/,,
Press the MEMORY button, “PROG.” remains lit.
Select track 2 by pressing the K+ /<4
button.
Z
PR.
Press the MEMORY button. “PROG.” ~
remains lit.
I
I
1
1
7.
8.
9.
Select disc 3 by pressing the DISC 3
~
button
HL
PR 3
Press the MEMORY button, “PROG. ” w
remains lit.
Press the ➤/11button to start play.
~
When all programmed tracks have been ~
I-III #
Uu I
D
played, the player stops automatically. “O
0.00 appears on the display.
- The programme contents are retained in memory.
Any attempt to programme more than 32 tracks will result in “FUL~
being displayed and discontinuation of the programming.
If a non-existent disc or track number is programmed, that disc or track
will be skipped during play.
The programme is cleared when the ■ button is pressed in the stop
LISTENING TO TAPES
.—..—4—.
1.
2.
3.
4.
5,
6.
mode.
Checking the programme
Each time the MEMORY button is pressed in the stop mode, the
programmed details sequentially appear on the display.
Changing a programme
To add a new track to a programme:
1. In the stop mode, press the MEMORY button repeatedly until”- - --
- -“ is displayed.
2, Select a disc and track as explained above.
3. Press the MEMORY button.
To change a track:
1, In the stop mode, press the MEMORY button repeatedly until the track
~ ““-’
.,,
Deck A is for playback only deck B is for both playback and recording.
[
If a cassette is loaded, you can turn the unit on and begin play
immediately by pressing the F button.
1
Kzil
@
o
number to be replaced is displayed.
2. Select a disc and track as explained above.
3. Press the MEMORY button.
Note:
Programmed details cannot be partially deleted or inserted.
Press the TAPE A/B button to select ‘TAPE. “TAPE appears on the
display,
Press the cassette holder (EJECT portion) to open it.
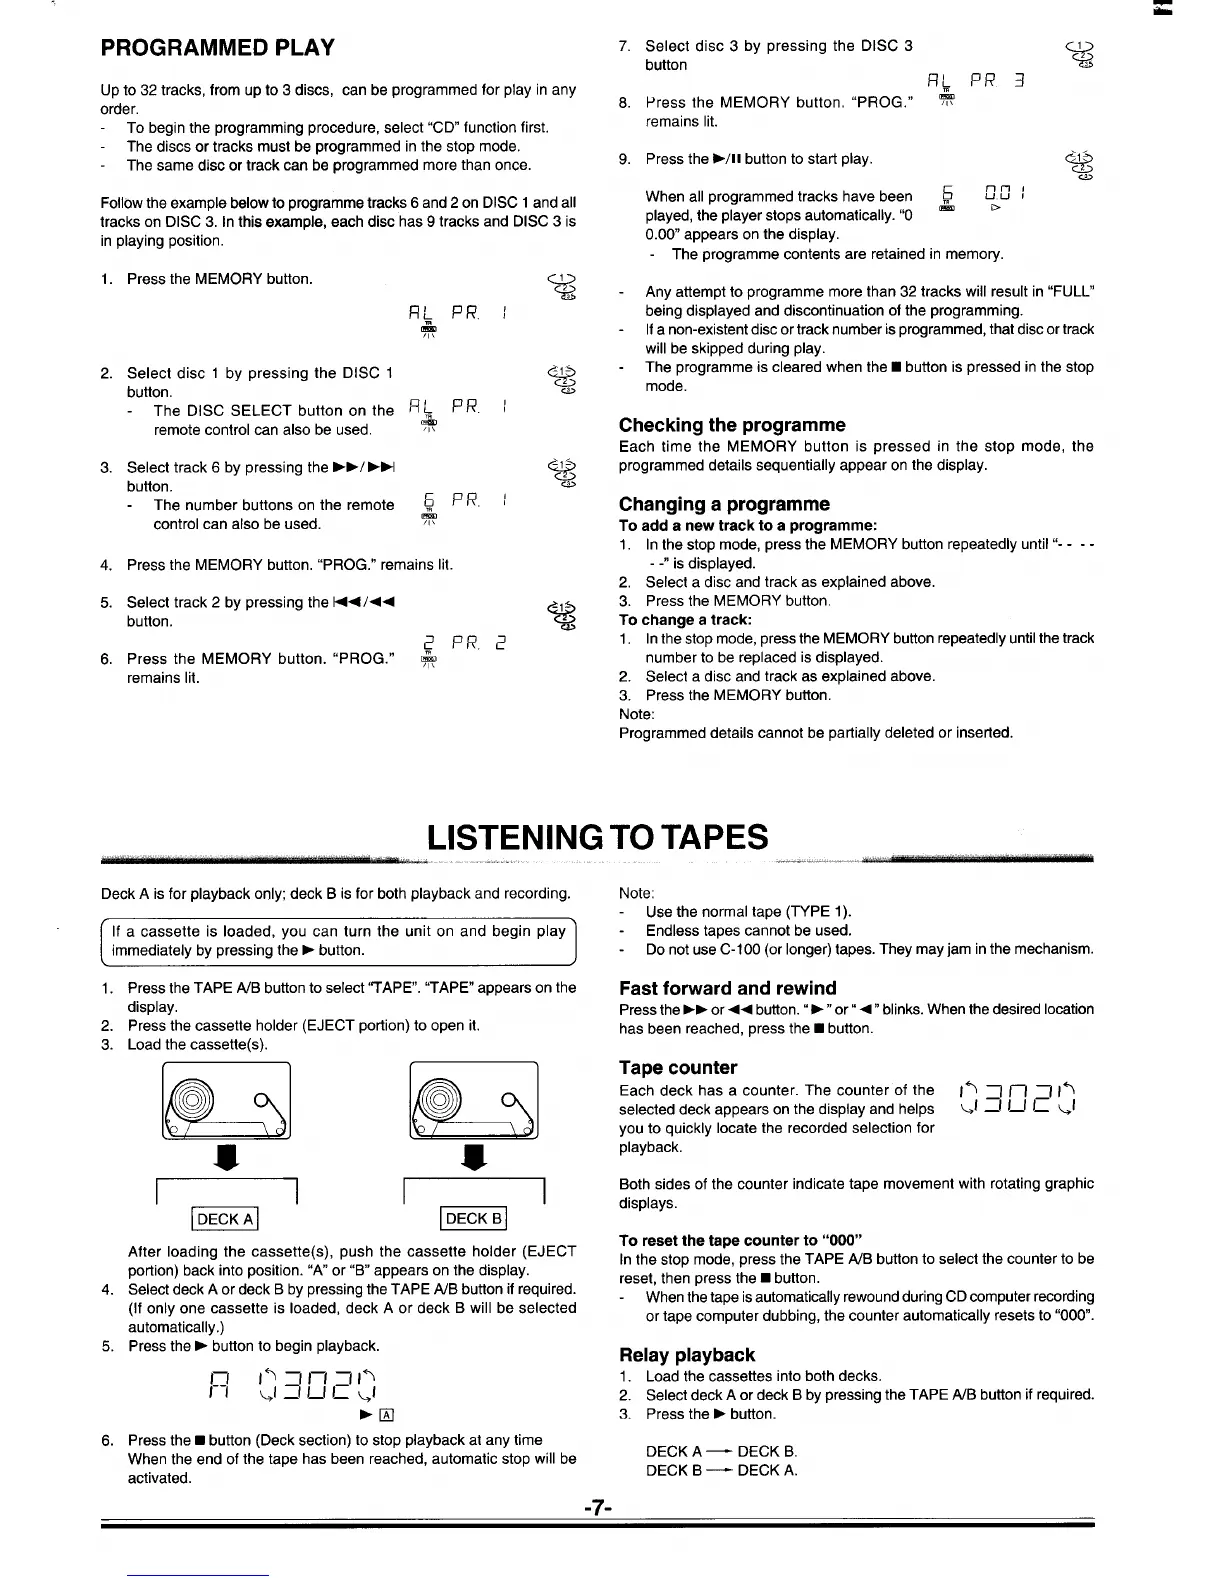
Load the cassette(s).
EEml’EEi’
After loading the cassette(s), push the cassette holder (EJECT
portion) back into position. “A or “B appears on the display.
Select deck A or deck B by pressing the TAPE A/B button if required.
(If only one cassette is loaded, deck A or deck B will be selected
automatically.)
Press the ➤ button to begin playback.
Press the ■ button (Deck section) to stop playback at any time
When the end of the tape has been reached, automatic stop will be
activated.
Note:
- Use the normal tape (TYPE 1).
Endless tapes cannot be used.
Do not use C-100 (or longer) tapes. They may jam in the mechanism.
Fast forward and rewind
Press the ➤> or << button. ” ➤ ” or” 4” blinks. When the desired location
has been reached, press the ■ button.
Tape counter
Each deck has a counter. The counter of the
II :1 )—l :111
selected deck appears on the display and helps
QI _l l_l I_ >1
you to quickly locate the recorded selection for
playback.
Both sides of the counter indicate tape movement with rotating graphic
displays.
To reset the tape counter to “000”
In the stop mode, press the TAPE AJB button to select the counter to be
reset, then press the ■ button.
- When the tape is automatically rewound during CD computer recording
or tape computer dubbing, the counter automatically resets to “000.
Relay playback
1. Load the cassettes into both decks.
2. Select deck A or deck B by pressing the TAPE A/B button if required.
3. Press the F button.
DECK A — DECK B,
DECK B — DECK A.
-7-
 Loading...