LISTENING TO TAPES
Deck Aisforplayback only; cfeck Bisforboth playback and recording
Donotturn the unit offwhilethe tape is running. Otherv~ise, the pinch
roller may be damaged.
.
1,
2.
3.
4,
5.
Set the FUNCTION switch to TAPE. “TA” appearson the display
Press the STOP/EJECT button to open the casse~e holder.
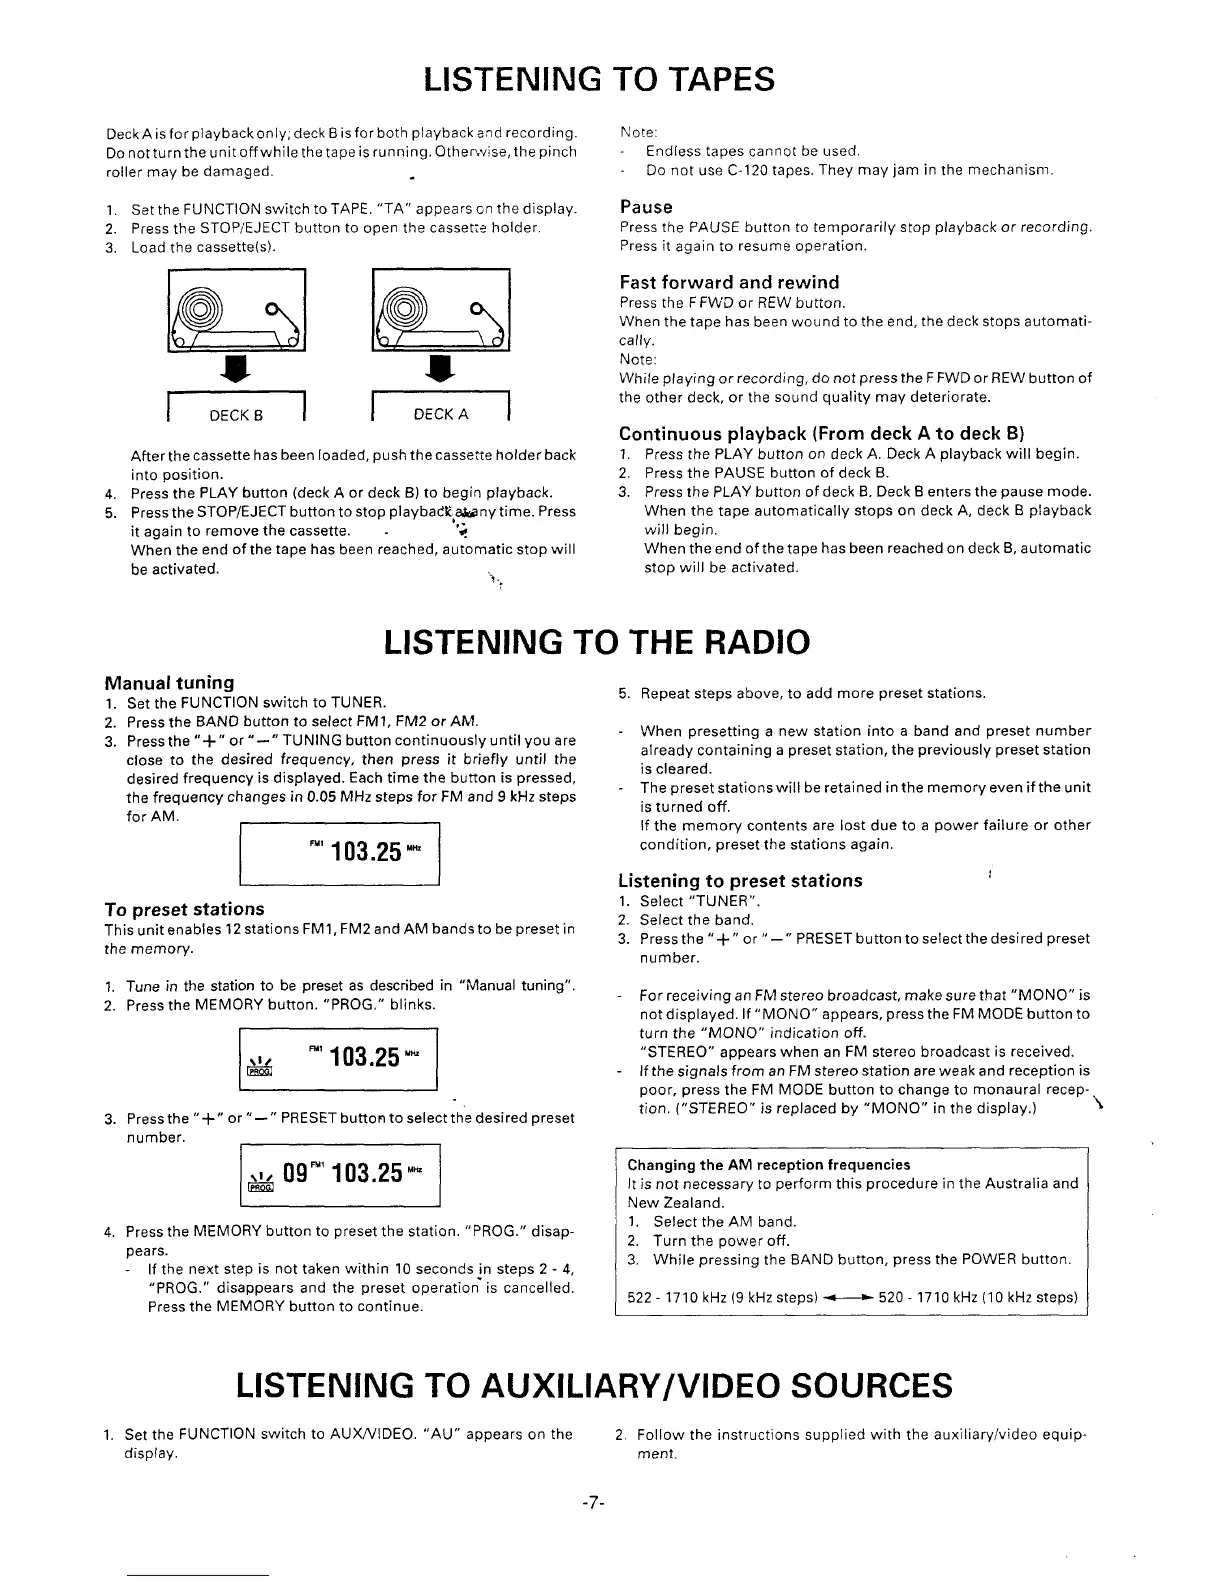
Load the cassette(s).
t
I t
t
kkalk!!!ld
-s -s-
Inzlr==l
After the cassette has been loaded, push the cassette holder back
into position.
Press the PLAY button (deck A or deck B) to begin playback.
Press the STOP/EJECT button to stop play badk,akanytime. Press
it again to remove the cassette. .
-,-
*
When the end of the tape has been reached, automatic stop will
be activated.
‘i.
:
Note:
Endless tapes cannot be used.
Do not use C-120 tapes. They may jam in the mechanism.
Pause
Press the PAUSE button to temporarily stop playback or recording.
Press it again to resume operation.
Fast forward and rewind
Press the FFWD or REW button,
When the tape has been wound to the end, the deck stops automati-
cally.
Note:
While playing orrecording, do not press the FFWDor REWbutton of
the other deck, or the sound quality may deteriorate.
Continuous playback (From
deck A to deck B)
1.
2.
3.
Press the PLAY button on deck A. Deck A playback will begin.
Press the PAUSE button of deck B.
Press the PLAY button of deck B. Deck B enters the pause mode.
When the tape automatically stops on deck A, deck B playback
will begin.
When the end of the tape has been reached on deck B, automatic
stop will be activated,
LISTENING TO THE RAD1O
Manual tunirm
1.
2.
3.
Set the FUNC~lON switch to TUNER.
Press the BAND button to select FM1, FM2 or AM.
Press the “+” or “-”
TUNING button continuously until you are
close
to the desired frequency, then press it briefly until the
desired frequency is displayed. Each time the button is pressed,
the frequency changes in 0.05 MHz steps for FM and 9 kHz steps
for AM.
I
I
“ 103.25 ‘m
To preset stations
This unit enables 12stations FM1, FM2and AM bands to be preset in
the memory.
1. Tune in the station to be preset as described in “Manual tuning”.
2. Press the MEMORY button. “PROG, ” blinks.
“ 103.25 “M
&
3. Press the “+” or’’–”
PRESET button to select the desired preset
number.
I
[
w 09”’103.25 ‘m
4. Press the MEMORY button to preset the station. “PROG.” disap-
pears.
If the next step is not taken within 10 seconds in steps 2-4,
“PROG.” disappears and the preset operatio~ is cancelled.
Press the MEMORY button to continue.
LISTENING TO AUXILM
5 Repeat steps above, to add more preset stations.
When presetting a new station into a band and preset number
already containing a preset station, the previously preset station
is cleared.
The preset stations will be retained in the memory even if the unit
is turned off.
If the memory contents are lost due to a power failure or other
condition, preset the stations again.
Listening to preset stations
I
1.Select “TUNER”.
2. Select the band.
3. Press the “+’’o r’’-”
PRESET button to select the desired preset
number.
For receiving an FM stereo broadcast, make sure that “MONO” is
not displayed. If “MONO” appears, press the FM MODE buttonto
turn the “MONO” indication off.
“STEREO” appears when an FM stereo broadcast is received.
If the signals from an FM stereo station are weak and reception is
Door, Dress the FM MODE button to chanae to monaural receR-
.
tion. (“STEREO” is replaced by “MONO” in the display.)
“\
.
Changing the AM reception frequencies
Itis not necessary to perform this procedure in the Australia and
New Zealand.
1, Select the AM band.
2. Turn the power off.
3. While pressing the BAND button, press the POWER button.
522-1710 kHz (9 kHz steps) _520-1710kHz (lOkHz steps)
3Y/VIDEO SOURCES
1, Set the FUNCTION switch to AU XNIDEO. “AU” appears on the
2. Follow the instructions supplied with the auxiliary/video equip
disp(ay.
ment.
-7-
 Loading...