Do you have a question about the Sanyo DSR-M800 and is the answer not in the manual?
| Video Input Channels | 8 |
|---|---|
| Compression Format | MPEG-2 |
| Network Connectivity | Ethernet |
| Playback Channels | 1 |
| Audio Input Channels | 4 |
| Type | Digital Video Recorder |
| TV Tuner | No |
| Remote Control | Yes |
| Recording Resolution | 720 x 480 |
| Playback Format | MPEG-2 |
| Video Recording System | NTSC |
| Inputs | 8 x BNC (video), 4 x RCA (audio) |
| Outputs | 1 BNC video, 1 RCA audio |
| Tuner | No |
Warnings about opening the unit, modifications, and servicing requirements.
Advice on proper placement to ensure safe and satisfactory operation.
Guidelines to avoid electric shock and fire hazards during operation.
FCC compliance details and recommendations for authorized service.
Highlights of the digital video recorder's capabilities, storage, and connectivity.
List of included items and explanation of symbols used in the manual.
Crucial handling instructions for the HDD unit to prevent damage and data loss.
Guidelines for selecting installation locations and environmental conditions.
Information on component lifespan and ensuring important recordings.
Procedures for HDD checks, protection, and unit cleaning.
Advice for long-term storage and backup battery function.
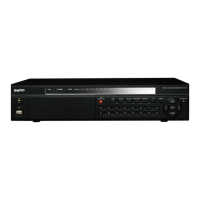
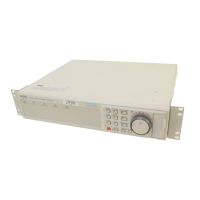
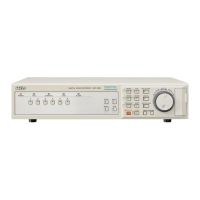
Identification and explanation of the buttons and indicators on the front panel.
Description of the terminals and ports on the rear panel.
Explanation of dip switch functions and control/alarm terminal configurations.
How to connect cameras, monitors, microphones, and PCs.
Instructions for connecting system controllers and remote control circuits.
Steps for connecting the power cord and control/alarm terminal cables.
Guidance on network connection and handling power issues.
Details of the information shown in the operation display area during normal and playback modes.
How to change the position or visibility of the operation display area.
Steps to select the preferred language for the user interface.
Step-by-step guide to setting the device's date and time accurately.
How to set automatic time adjustments for daylight saving.
How to connect devices for automatic time synchronization.
Detailed steps for setting up external clock synchronization between multiple recorders.
How to start and stop standard recording operations.
Instructions for scheduling recordings using the timer function.
How to set timer reservations that span across multiple days.
Procedure to erase all scheduled timer recordings.
How to designate specific dates as holidays for timer recording.
How to enable and set parameters for recording triggered by alarm inputs.
What happens when an alarm is detected and how alarm recording concludes.
How to start, stop, and play back recorded images.
Using fast-forward, rewind, and still image functions during playback.
How to freeze playback, advance frame by frame, or move backwards.
Adjusting playback speed for slow-motion and reverse playback.
How to search and play back images recorded during alarm events.
How to locate and play back recordings by specifying a date and time.
Step-by-step guide to performing an alarm search and previewing results.
How to start the date and time search process.
Detailed steps to input date/time and view or play back specific recordings.
How to activate and deactivate the key lock to prevent unintended button presses.
How to display, navigate, and exit the device's menu system.
Procedure to reset sub-menu items to their factory default values.
A summary of the functions and settings available within each main menu category.
How to configure the device's language and internal clock settings.
Options for automatic time adjustments and synchronization with other devices.
How to set automatic time adjustments for daylight saving.
How to connect devices for automatic time synchronization.
Detailed steps for setting up external clock synchronization between multiple recorders.
Configuration options for picture quality, audio, overwrite, disk full reset, alarm, and video loss.
How to restart recording after the disk becomes full when overwrite is OFF.
Explanation of the timer setting items for scheduling recordings.
How to set daily recurring timer recording schedules.
How to set timer reservations that span across multiple days.
Procedure to erase all scheduled timer recordings.
How to designate specific dates as holidays for timer recording.
Options to customize on-screen information and set buzzer alerts for various events.
How to set administrator and user passwords to restrict operation.
Detailed steps for setting up user-level passwords.
How to set permissions for recording and playback operations.
Steps to enable the security lock feature and test its functionality.
How to connect to a network and configure IP addresses for PC control.
How to connect and configure RS-485 terminals for system control.
How to view power failure events and the total operating time of the hard disk.
How to save and load device settings using a CompactFlash card.
Procedures for downloading (saving) and uploading (loading) menu configurations.
Steps to format the hard disk, erasing all recorded data.
Instructions for adding an optional hard disk and its setting conditions.
Technical specifications for RS-485 data format and communication protocol.
How to configure RS-485 termination switches when connecting multiple devices.
A table listing the commands supported by the digital video recorder for remote control.
Detailed technical specifications including capacity, resolution, compression, and recording parameters.
Details on input/output terminals, power requirements, and environmental operating conditions.
Visual representation and measurements of the digital video recorder's physical size.
Details of Sanyo's warranty terms, obligations, and common exclusions.
Section for recording purchase details for protection against theft or loss.