Separately sold parts
F - 3
2. System Configuration
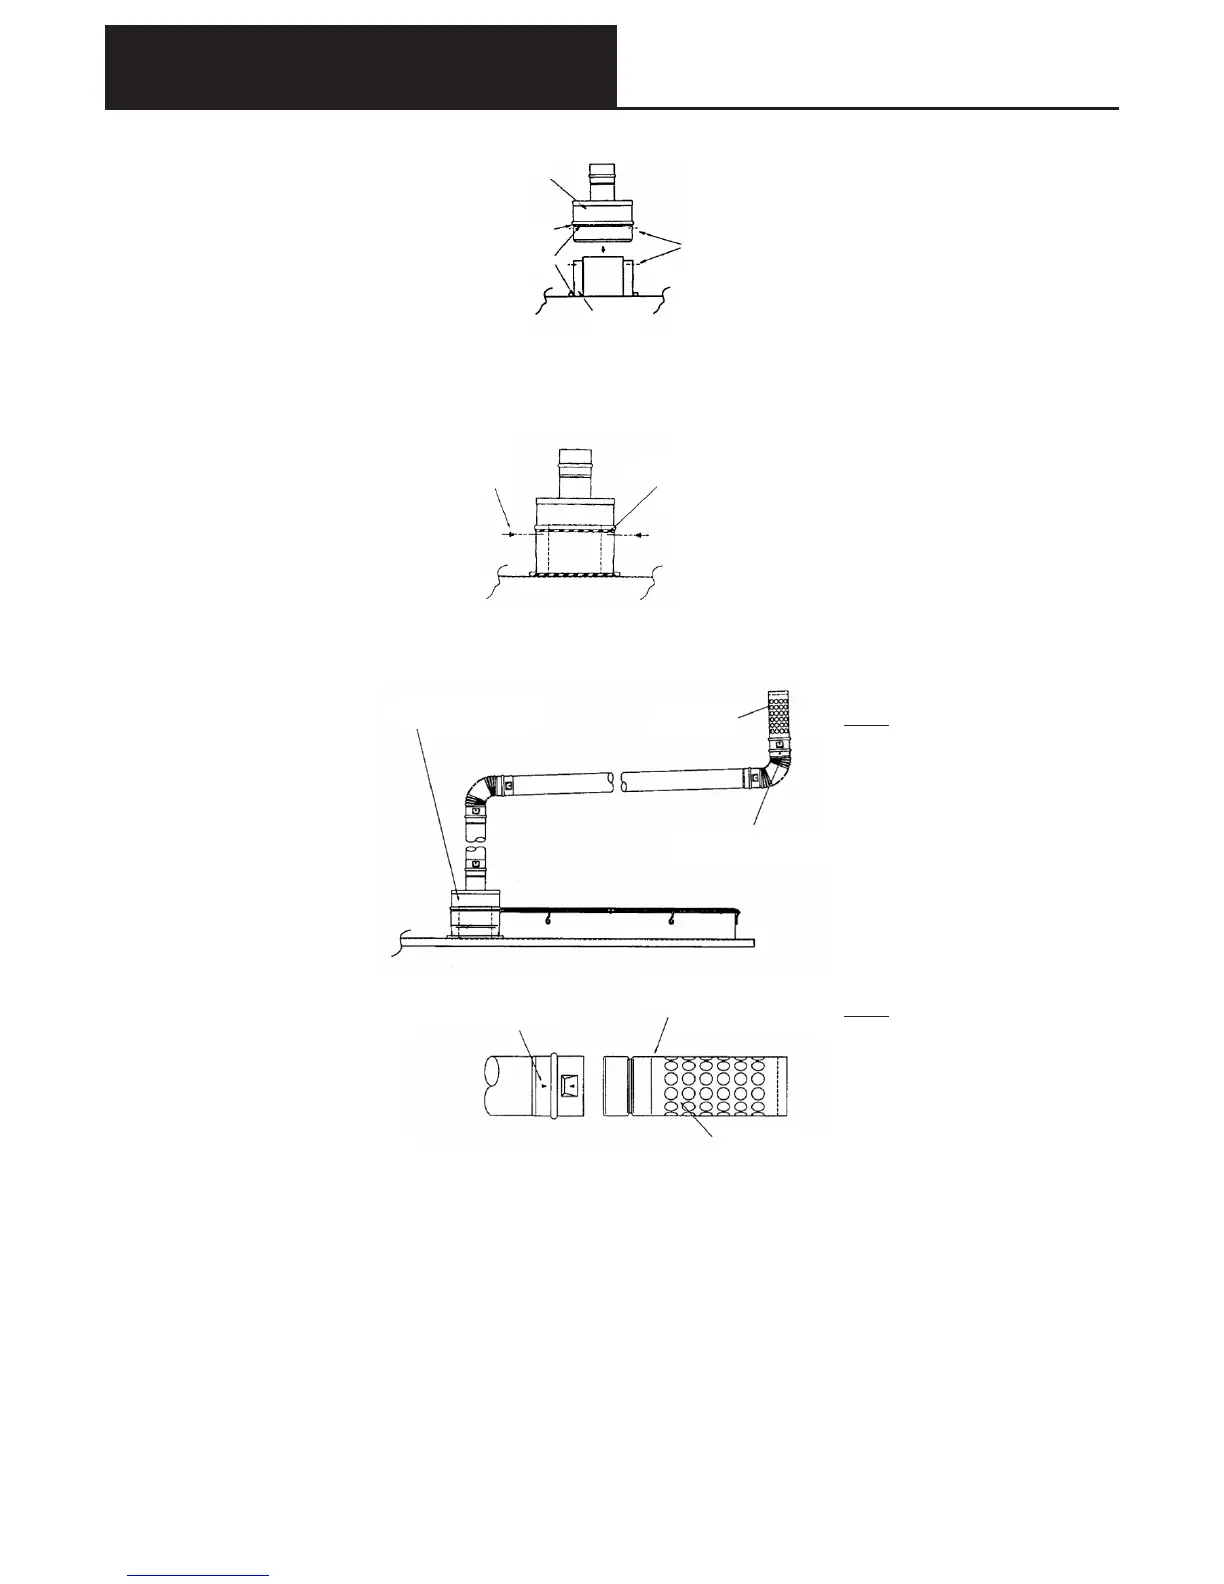
Component B
Stopper
Seal material to
be applied to
the whole circumference
Component A
Screw hole positions
(Note)
Seal material to be Shinetsu Chemicals
RTV-KE 45 or equivalent.
Condition of the seal material
around the bottom of the stopper
to be corrected.
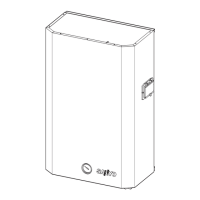
Screws (2)
removed at d)
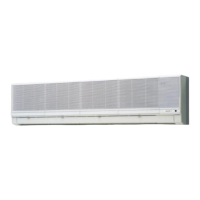
Fig. 5
Adaptor for
exhaust gas extension
Exhaust gas top
Alignment mark
on the female side
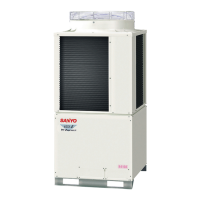
Fig. 6
ONJ pipe female connector
alignment mark
Male side connector
warning mark (red line)
Exhaust gas top
9) Apply seal material to the two locations indicated in the above diagram, for the whole circumference for
about 3-5mm.
10) Insert component B onto component A, while aligning the screw holes of components A and B, until the
stopper of component B is reached.
11) Secure component B with the 2 screws removed at 4).
12) Apply seal material around the 2 holes where the 2 screws above are installed, and correct the condition
of the seal material at the bottom of stopper.
13) Be sure to install the exhaust gas top on the end of the exhaust gas pipe.
14) Insert the exhaust gas top onto the ONJ pipe until the warning mark (red line) on the male connector
becomes hidden. Refer to figure 6.
15) After connecting, rotate the alignment mark on the female connector through approx. 30°, to prevent it
from being pulled out. (See Figure 6)
16) The exhaust gas top should be installed vertically as shown in Figure 5.
■Cautions regarding construction
●Cautions regarding connecting the ONJ pipe
1) When connecting the ONJ pipe, insert until the warning mark (red line) on the male connector side
becomes hidden. When it is securely connected a “click!” will be heard. Refer to Figure 6.
2) Do not cut the ONJ pipe under any circumstances. If size adjustment is necessary use a slide pipe.
3) After connecting, if it becomes necessary to disconnect, rotate the alignment mark on the female side
and return to the position in Figure 6, and pull the component out.
4) For other points regarding the ONJ pipe, refer to the maker’s instruction manual.