10
408951
www.sauder.com/services
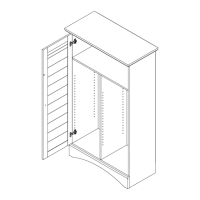
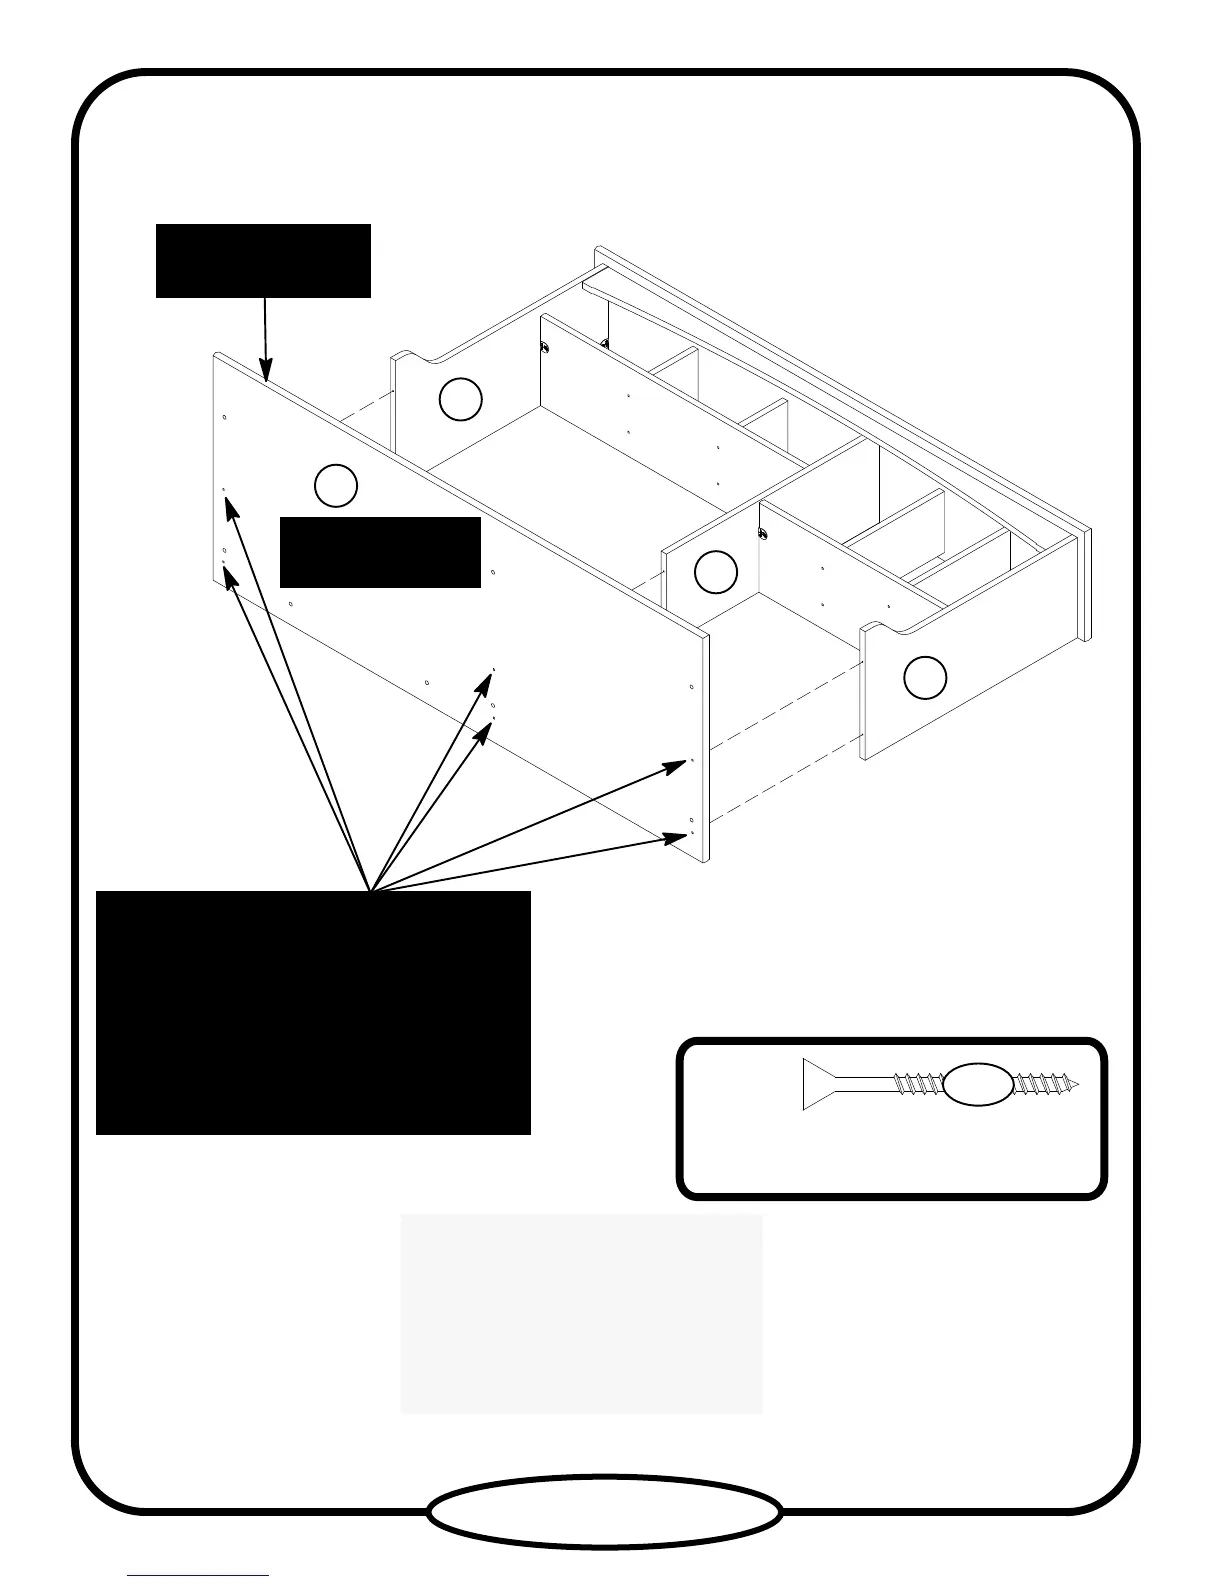
Finish drilling the six holes
shown in the bottom surface of the
TOP (H) using a 1/4” or
6.5 mm drill bit.
Next, fasten the TOP (H) to the
HUTCH ENDS (C and D) and
HUTCH UPRIGHT (G). Use six
BLACK 1−7/8” FLAT HEAD
SCREWS (JJJ).
Acabe de perforar los seis agujeros en
la superficie inferior del PANEL
SUPERIOR (H) utilizando una broca
6.5 mm.
A continuación, fije el PANEL
SUPERIOR (H) a los EXTREMOS DE
ORGANIZADOR (C y D) y al PARAL
DE ORGANIZADOR (G). Utilice seis
TORNILLOS NEGROS DE CABEZA
PERDIDA de 48 mm (JJJ).
Finir de percer les six trous dans la
surface inférieure du DESSUS (H) en
utilisant une mèche 6,5 mm.
Ensuite fixer le DESSUS (H) aux
EXTRÉMITÉS DE SURMEUBLE (C
et D) et au MONTANT DE
SURMEUBLE (G). Utiliser six VIS
NOIRES TÊTE PLATE 48 mm (JJJ).
6 used in this step
6 utilisées à cette étape
6 utilizados en este paso
Black
Noire
Negro
JJJ
C
D
G
H
Unfinished surface
Surface non finie
Superficie sin acabado
Finish drilling the holes from the bottom surface. Use
a 1/4” or 6.5 mm drill bit. Then, use the BLACK
1−7/8” FLAT HEAD SCREWS (JJJ).
Finir de percer les trous de la surface inférieure.
Utiliser une mèche 6,5 mm. Ensuite, utiliser les VIS
NOIRES TÊTE PLATE 48 mm (JJJ).
Acabe de perforar los agujeros desde la superficie
inferior. Utilice una broca 6.5 mm. A continuación,
utilice los TORNILLOS NEGROS DE CABEZA
PERDIDA de 48 mm (JJJ).
Long rounded edge
Long chant arrondi
Borde largo redondeado