24
408951
www.sauder.com/services
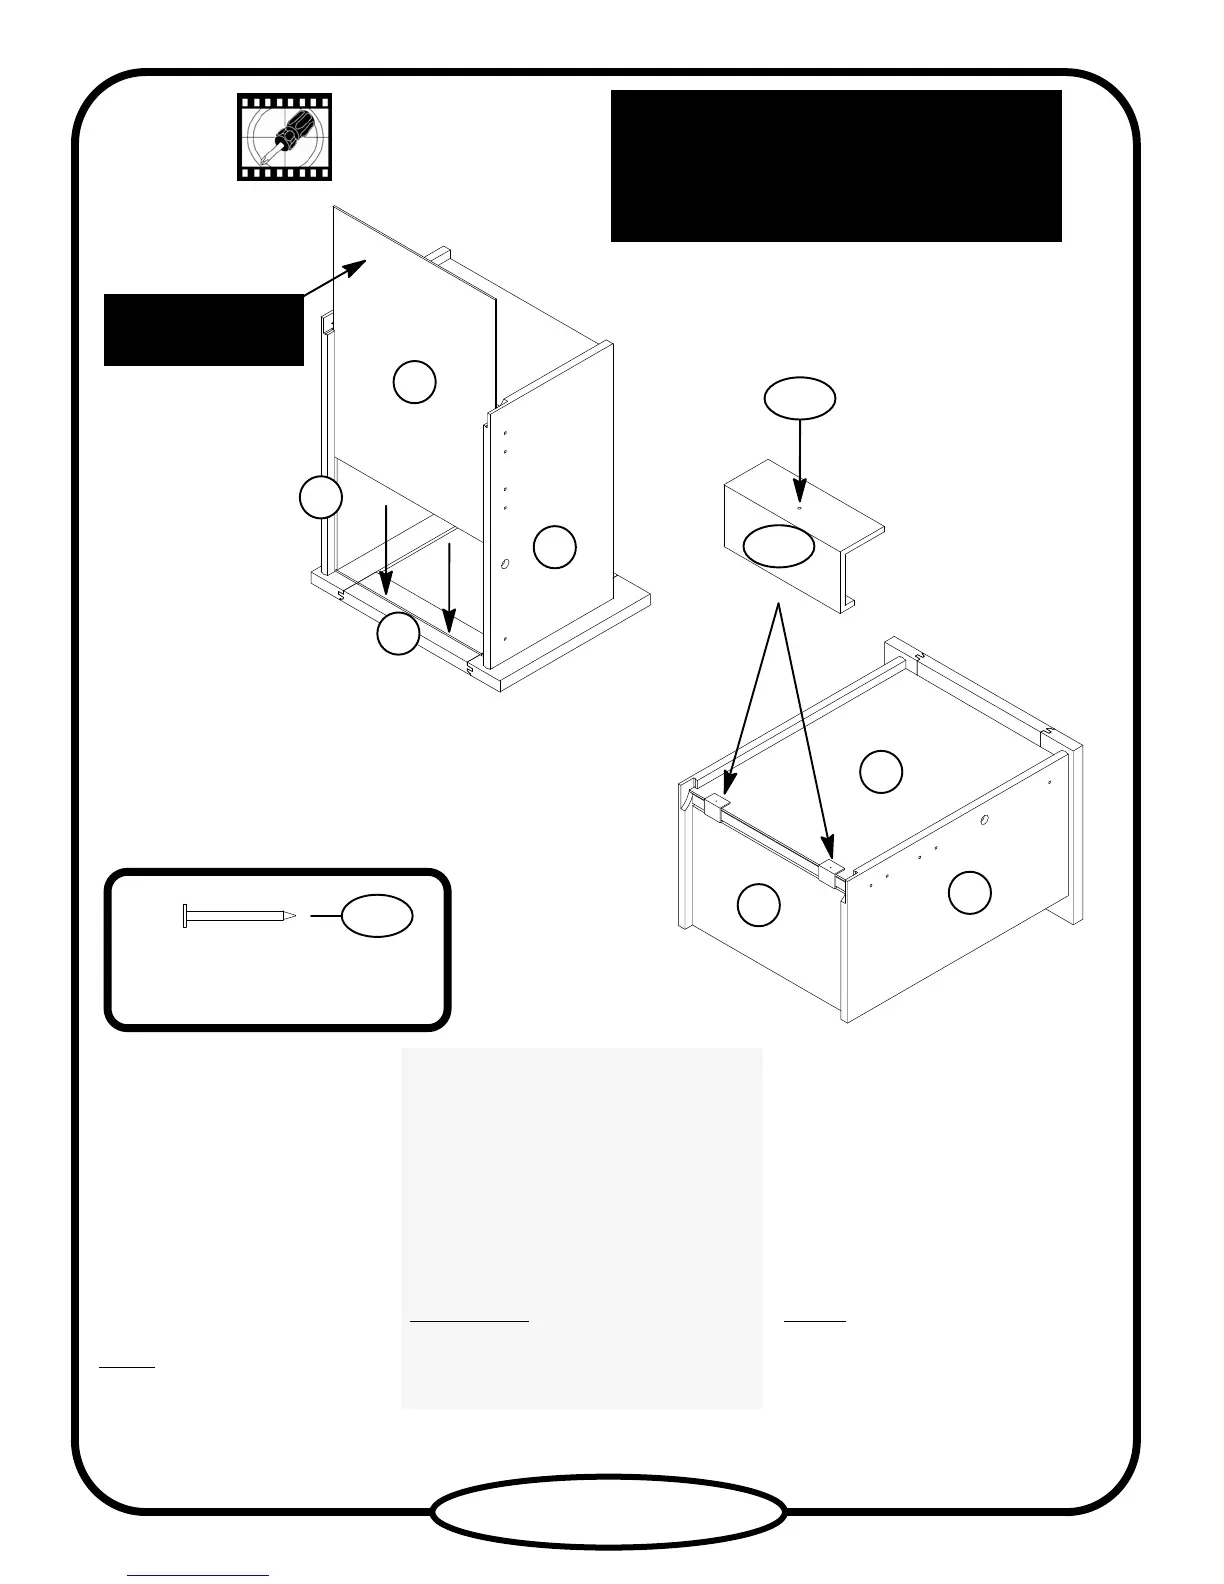
Slide the LARGE DRAWER
BOTTOM (DD) into the grooves in
the LARGE DRAWER SIDES (BB
and CC) and LARGE DRAWER
FRONT (Z).
Flip the drawer over and insert two
CLIPS (FFF) into the groove
in the LARGE DRAWER
BACK (AA) and wrap them over the
LARGE DRAWER BOTTOM (DD).
Tap a NAIL (VVV) through
each CLIP.
NOTE
: The CLIPS should set in
about 1” from the DRAWER SIDES.
Repeat this step for the other
drawer.
Deslice el FONDO DE CAJÓN
GRANDE (DD) dentro de las ranuras de los
LADOS DE CAJÓN GRANDE (BB y CC)
y de la CARA DE CAJÓN GRANDE (Z).
Vuelva el cajón al revés e inserte dos
GRAPAS (FFF) dentro de la ranura del
DORSO DE CAJÓN GRANDE (AA) y
envuélvalas sobre el FONDO DE CAJÓN
GRANDE (DD). Ligeramente clave un
CLAVO (VVV) a través de cada GRAPA.
NOTA:
Las GRAPAS deben colocarse
aproximadamente a 25 mm de los
LADOS DEL CAJÓN.
Repita este paso para el otro cajón.
Enfiler le FOND DE GRAND
TIROIR (DD) dans les rainures des
CÔTÉS DE GRAND TIROIR (BB et CC)
et du DEVANT DE GRAND TIROIR (Z).
Retourner le tiroir et insérer deux
CLIPS (FFF) dans la rainure de
l’ARRIÈRE DE GRAND TIROIR (AA)
et les enrober sur le FOND DE GRAND
TIROIR (DD). Enfoncer un
CLOU (VVV) à travers chaque CLIP.
REMARQUE
: Les CLIPS devraient être
situés environ 25 mm des CÔTÉS DE
TIROIR.
Répéter cette étape pour l’autre tiroir.
With the palm of your hand, tap the DRAWER
BOTTOM down into the groove.
Avec la paume de main, enfoncer le FOND DE
TIROIR dans la rainure.
Con la mano, golpee el FONDO DE CAJÓN dentro
de la ranura.
Unfinished surface
Surface non finie
Superficie sin acabado
1
st
BB
CC
Z
AA
DD
DD
BB
4 used in this step
4 utilisés à cette étape
4 utilizados en este paso
VVV
VVV
FFF
2
nd