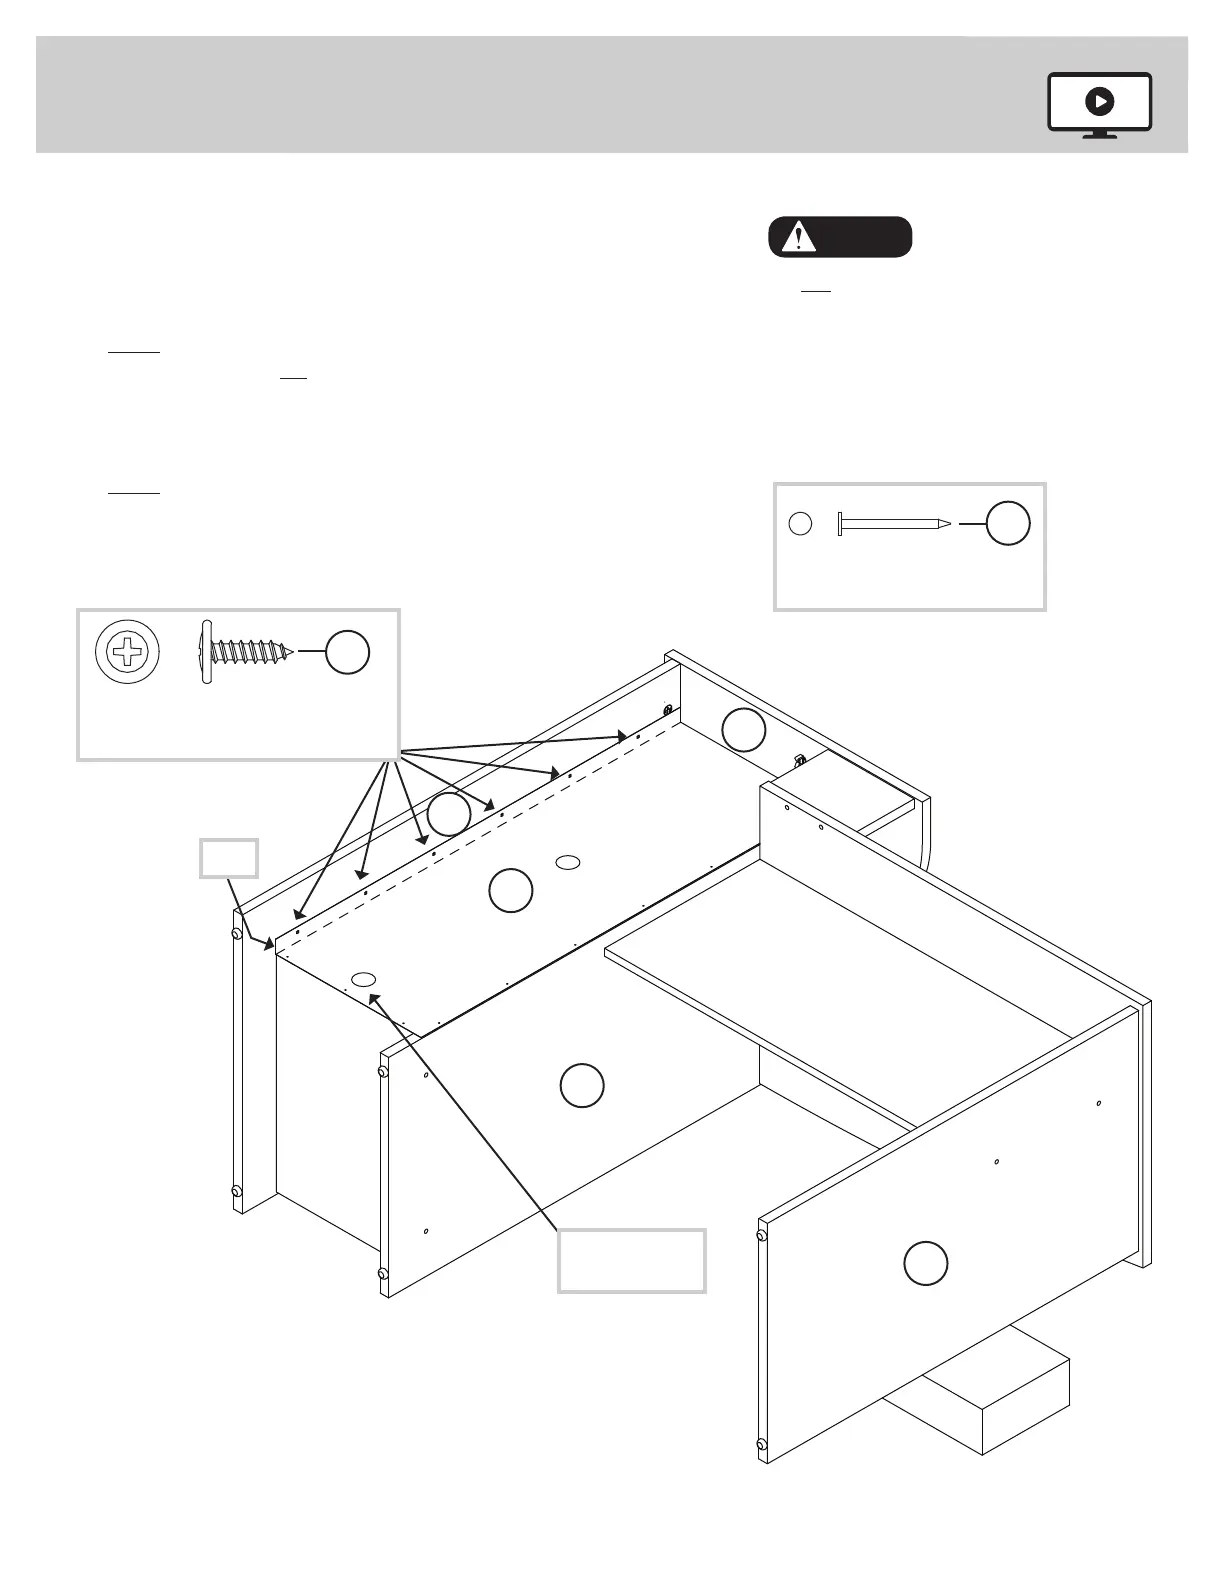
Step 8
å
Bend the fl ap up on the BACK (I) and then lay it over the
opening between the RIGHT END (A3) and UPRIGHT (C3).
å
Fasten the BACK (I) to your unit using the NAILS (1N).
å
NOTE: The BACK should be touching the bottom surface
of the TOP (E2). Do not nail into the RIGHT END (A3).
å
Fasten the fl ap of the BACK (I) to the RIGHT END (A3).
Use six BLACK 9/16" LARGE HEAD SCREWS (1S).
å
NOTE: Perforations have been provided for access through
the BACK. Carefully cut out the holes needed.
411606 www.sauder.com/servicePage 12
A3
C3
I
B3
E2
Flap
This perforation
should be here.
NAIL
(10 used in this step)
1N
BLACK 9/16" LARGE HEAD SCREW
(6 used in this step)
1S
Do not stand the unit upright without the
BACK fastened. The unit may collapse.
Caution