20
SLIDING CROSSCUT TABLE INSTALLATION
18. Use a square to position the fence exactly 90 degrees relative to the saw blade then tighten the crosscut
fence lock knob.
19. Check the miter gauge angle indicator. If the reading is not 0 degrees, loosen the indicator lens mounting
screw (245) and adjust the position of the indicator to read 0 degrees. Retighten the mounting screw.
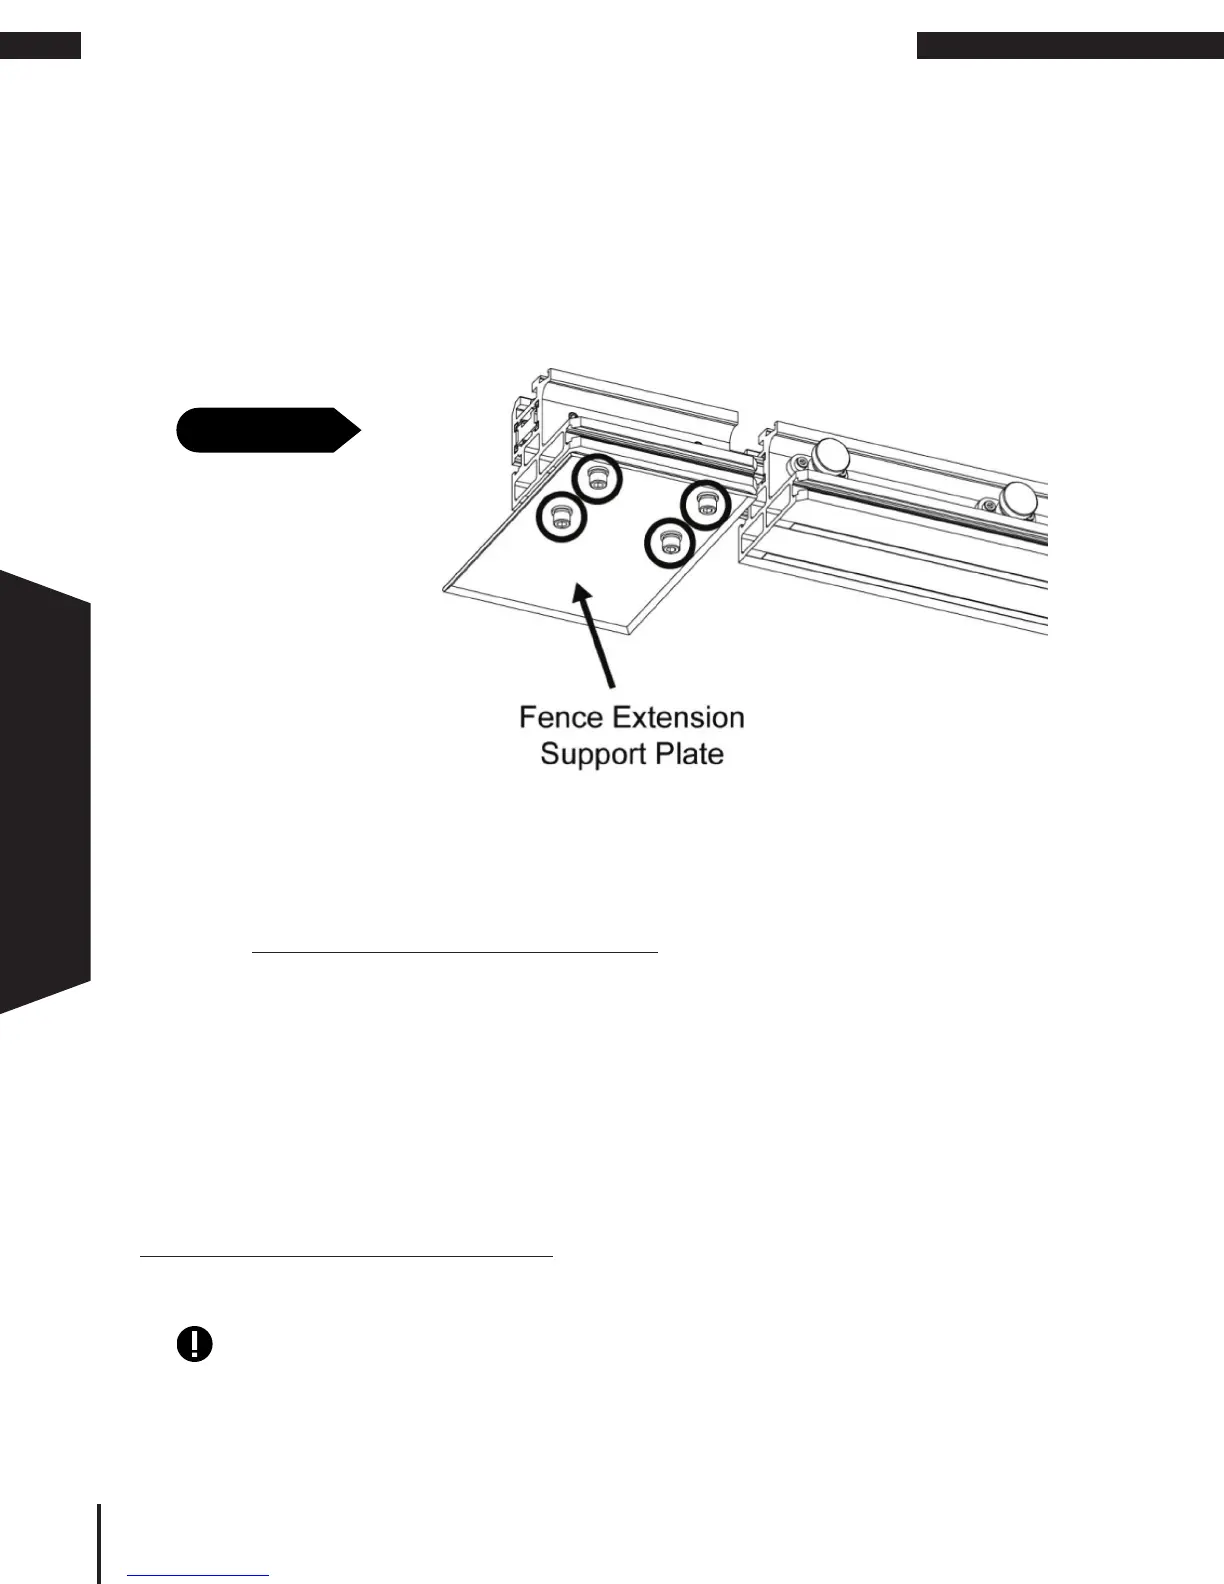
20. Mount the Fence Extension Support Plate (202) to the bottom of the Fence Extension using four M6 Cap
Screws (203), M6 Lock Washers (115) and M6 Flat Washers (116) from the Fence Extension Support Plate
Mounting Screw Hardware Pack as shown in Fig. 14
21. Slide the two ip stops (264) into the T-slot on top of the crosscut fence and then tighten their lock knobs to
hold them in place.
22. Using a tape measure, adjust the right ip stop to 12” from the blade. Adjust the fence ruler (225) so that it
indicates 12” in the ip stop indicator lens. This adjustment ensures exact measurements when cutting using
the ip
stop
with the miter gauge set to the 0 degree mark.
When the miter gauge is adjusted to an angle
other than 0 degrees, the fence ruler will need to be readjusted before using the ip stop indicator lens.
23. To properly position the ruler on the crosscut fence extension, slide the left ip stop to the left-most position
on the crosscut extension section. Next, slide the extension ruler left until it stops. Using a tape measure,
extend the crosscut fence extension out until the distance between the blade and the left ip stop is 50”.
Check the indicator reading on the extension fence. If the indicator does not read 50”, adjust the position
of the ip stop until the indicator reads 50”, then lock the ip stop in place by tightening the lock knob. This
adjustment ensures exact measurements when cutting using the ip stop on the crosscut fence extension
with the miter gauge set to the 0 degree mark.
When the miter gauge is adjusted to an angle other than 0
degrees, the extension ruler will need to be readjusted before using the ip stop indicator lens.
Fig. 14
The rulers on the fence and the fence extension are double-sided. Flip them over for
metric measurements.
WITHOUT EXTENSION WING
INSTALLING WITHOUT THE EXTENSION WING
CONGRATULATIONS! Your Sliding Table Attachment is now installed. Continue to page 21 for Operating Instructions.
 Loading...