4
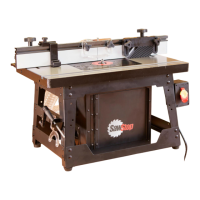
SLIDING CROSSCUT TABLE INSTALLATION
modifying your table saw:
Before mounting the Sliding Crosscut Table, you may need to modify your table saw. Some of the steps below involve removing/
installing your rails and extension wing. For those steps please refer to your table saw manual and fence manual. (You can
download copies of your manuals at www.sawstop.com.)
For Unassembled Saws: If your saw has not yet been assembled, you will rst need to pre-install the rails
to mark them for cutting. If you plan to mount the Sliding Crosscut Table with the left extension wing, begin by
installing and aligning the left extension wing as described in the installation documentation for your table saw. If
you plan to mount the Sliding Crosscut Table without the left extension wing, then do not install the wing for this
step. Next, install your rail assembly to the saw as described in your fence manual. It is not necessary to install
every screw or to fully align and tighten your rails at this time.
Now proceed to page 7 if you plan to install the Sliding Crosscut Table with the left extension wing.
Alternatively, proceed to page 13 if you plan to install the Sliding Crosscut Table without the left extension wing.
WARNING: Disconnect your table saw from electrical power before beginning any modications.
 Loading...