www.scheppach.com
GB
|
21
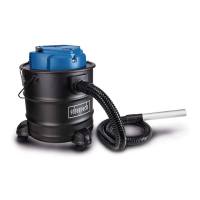
Installing the machine head (1) (g. A)
• Place the machine head (1) on the stainless steel
container (6). Secure the machine head (1) with the
locking hooks (8). When installing the machine head
(1), ensure that the locking hooks (8) latch into place
correctly.
Mounting the HEPA lter (14) (g. E + F)
• Push the protective grate (15) over the HEPA lter
(14) and place it on the bottom of the machine head
(1). (Fig. E)
• Turn the HEPA lter (14) clockwise to lock it. (Fig. F)
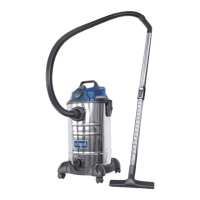
Assembling the suction hose (13) (g. G - I)
• Connect the suction hose (13) to the corresponding
port, depending on the desired use, on the wet and
dry vacuum.
Vacuuming (g. G)
• Connect the suction hose (13) to the suction hose
port (3). To do so, slide the end of the suction hose
(13) with the two nipples into the suction hose port
(3).
• Insert the two nipples into the recesses. In the end
position, turn the suction hose (13) in a clockwise
direction.
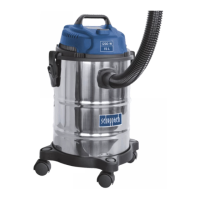
Blowing (g. H)
• Connect the suction hose (13) to the blowing func-
tion connection port (9). Slide the end of the suction
hose (13) with the two nipples into the blowing func-
tion connection port (9).
• Insert the two nipples into the recesses. In the end
position, turn the suction hose (13) in a clockwise
direction.
Mounting the hose (13), aluminum tube (16) and at
nozzle (17) (g. I)
• Push the aluminum tube (16) onto the end of the suc-
tion hose (13).
• If desired, the joint nozzle (17) can be plugged onto
the aluminum tube (16).
• Undiluted strong acids and alkalis
• Organic solvents (such as gasoline, paint thinner,
acetone, heating oil).
In addition, these substances can corrode the materi-
als used on the device.
m WARNING!
This power tool generates an electromagnetic eld
during operation. This eld can impair active or pas-
sive medical implants under certain conditions.
In order to prevent the risk of serious or deadly in-
juries, we recommend that persons with medical im-
plants consult with their physician and the manufactur-
er of the medical implant prior to operating the power
tool.
6. Technical data
Mains voltage 220-240V~ 50/60 Hz
Power 1200W
Water tank capacity 20 l
Suction performance 20 kPa
Protection category IP20
Protection class II
Technical changes reserved!
7. Assembly
m ATTENTION!
Prior to use, ensure that the device has been cor-
rectly and fully assembled.
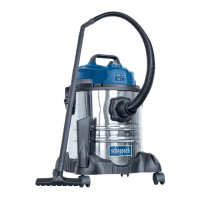
Unpacking (g. A + C)
Release the locking hooks (8) and remove the machine
head (1). The accessories are located inside the stain-
less steel container (6).
Installing roller mounts (4) (g. D)
• Turn the stainless steel container (6) upside-down
(the machine head (1) must be removed).
• Connect the castor mounts (4) into the cut-outs pro-
vided on the stainless steel container (6). (3x)
Installing the castors (g. F)
• Press the three castors (5) into the holes of the
wheel mounting (4).