EasyManua.ls Logo

Scheppach SprayVac20

Scheppach SprayVac20
212 pages
Go to English
To Next Page IconTo Next Page
Loading...
Nachdrucke, auch auszugsweise, bedürfen der Genehmigung.
Technische Änderungen vorbehalten. Abbildungen beispielhaft!
Art.Nr.
5905701901
AusgabeNr.
5905701901_0001
Rev.Nr.
06/04/2022
DE
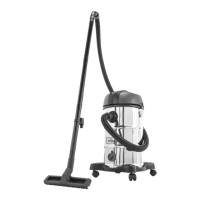
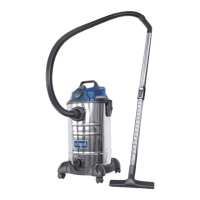
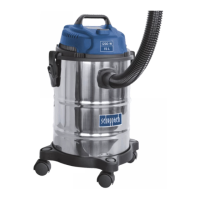
Nass- / Trockensauger
Originalbedienungsanleitung
6
GB
Wet / dry vacuum cleaner
Translation of original instruction manual
19
FR
Aspirateur eau et poussière
Traduction des instructions d’origine
29
IT
Aspiratore solidi/liquidi
La traduzione dal manuale di istruzioni originale
40
NL
Nat en droogstofzuiger
Vertaling van de originele gebruikshandleiding
51
ES
Aspiracdor en húmedo-seco
Traducción del manual de instrucciones original
61
PT
Aspirador a húmido / seco
Tradução do manual de operação original
72
CZ
Vysavač pro mokré/suché vysává
Překlad originálního návodu k obsluze
83
SK
Mokro/suchý vysáv
Preklad originálneho návodu na obsluhu
93
HU
Nedves/száraz porszívó
Eredeti használati utasítás fordítása
103
PL
Odkurzacz do pracy na mokro / sucho
Tłumaczenie oryginalnej instrukcji obsługi
113
HR
Usisivač za mokro/suho čišćenje
Prijevod originalnog priručnika za uporabu
124
SI
Sesalnik za mokro in suho sesanje
Prevod originalnih navodil za uporabo
134
EE
Märg-/kuivimur
Originaalkäitusjuhendi tõlge
144
LT
Šlapio / sauso valymo siurblys
Originalios naudojimo instrukcijos vertimas
154
LV
Putekļusūcējs mitrai/sausai tīrīšanai
Oriģinālās lietošanas instrukcijas tulkojums
164
SE
Våt-/torrsug
Översättning av original-bruksanvisning
174
FI
Märkä-/kuivaimuri
Käännös alkuperäisestä käyttöohjeesta
184
DK
Våd-/tørsuger
Oversættelse fra den oprindelige betjeningsvejledning
194
SprayVac20

Table of Contents

Questions and Answers:

Scheppach SprayVac20 Specifications

General IconGeneral
BrandScheppach
ModelSprayVac20
CategoryVacuum Cleaner
LanguageEnglish

Summary

Device Symbols Explained

Product Introduction

Device Components Overview

Package Contents

Intended Use and Limitations

General Safety Precautions

Understanding Residual Risks

Product Technical Specifications

Unpacking and Initial Checks

Assembly and Setup Guide

Install Roller Mounts

Attach the wheels to the caster mounting base using screws.

Install Castors

Insert the deflection rollers into the provided holes in the roller mounts.

Mount Machine Head and Filter Cage

Place and secure the machine head with filter cage onto the stainless steel container.

Install Main Filter

Ensure the filter is correctly fitted before use; never operate without a filter.

Fit Folded or Foam Filter

Insert the folded or foam filter into the filter cage and reinsert the cage.

Install Paper Filter Bag

Slide the paper filter bag over the suction opening for dry vacuuming.

Fill Water Tank

Fill the water tank with clear water, up to the indicated level.

Install Water Tank

Place the water tank into the caster mounting base until it locks.

Connect Suction Hose

Connect the suction hose to the appropriate port on the vacuum cleaner.

Vacuuming Operation Setup

Connect the suction hose to the main suction port for vacuuming.

Blowing Operation Setup

Connect the suction hose to the blast function connection port for blowing.

Attach Extension Tubes and Nozzles

Connect extension tubes and attach desired nozzle to the hose or pipe.

Connect Water Channels

Push water channels into corresponding connections to enable spray function.

Starting the Device

Power OnOff Controls

Use the on/off switch to control device power and spray function.

Activate Washing Function

Press the pump switch to activate the spray function after turning on the device.

Adjust Air Regulation

Move the air regulation switch on the handle to adjust suction capacity.

Wet Vacuuming Mode

Use the foam filter for wet vacuuming and ensure it is fitted correctly.

Suction Washing Procedure

Use specific nozzles and foam filter for suction washing; empty tank after use.

Electrical Connection and Safety

Handling Damaged Power Cables

Inspect power cables for damage; never use damaged cables due to risk of electric shock.

Connection Type Y Safety

Damaged mains connection cables must be replaced by qualified personnel.

Cleaning and Maintenance

Proper Storage Guidelines

Device Maintenance

Service and Consumable Parts

Note wear parts like filters and the need for occasional replacements.

Electrical Repairs and Queries

Electrical work must be done by qualified electricians; provide specific data for queries.

Disposal and Environmental Responsibility

Troubleshooting Common Issues

Related product manuals