english 13
Longitudinal cuts, Fig. 11
For parallel cuts use the longitudinal end stop. To process
smaller workpieces (less than 120 mm) use the stick
rail.
Use end stop rail with lower end stop height. In case of
disuse take down the longitudinal end stop to the right
table side.
For cutting jobs over 120 mm use the end stop ruler with
the high end stop side (1) and for cutting jobs under
120 mm use the lower end stop side (2).
Cross cuttings, Fig. 12
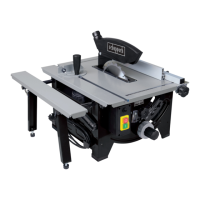
For cross - and angle cuttings use the crosscut gauge.
The performance of the crosscut gauge also allows the
making of wedges. The adjust scale reaches from 0° to
90°. Introduce the slewing unit right-angled with the
sixfold screw to the saw blade.
In case of disuse deviate the crosscut gauge sideways.
A sliding table is optional.
Exchange of saw blade, Fig. 13
Be careful: pull out power plug!
• Untightenbothupperscrews(M8)atthelowersawblad
cover.
• Deviatesawbladecover.
• Loosen clamping nut (M20 links) and hold back with
retaining arbor.
• Wearglovestoprotectyourhands.
• Takeoutsawblade,introducenewone.
• Onlyputinwellsharpened,crackfreeandnotdisformed
saw blades.
• Tightenclampingnutandholdbackwithretainingarbor
(left-hand thread).
• Liftupthelowersawbladecoverandtightenbothscrews
(M8) again.
•Aftereverysawbladeexchangetheslitwedgehastobe
re-adjusted. See slit wedge adjustment Fig. 08.
Maintenance
With all maintenance and cleaning works switch off the
motor and pull out the power plug.
All protection and safety facilities should be fitted again
after completed repair and maintenance works.
• The circular saw is to the greatest possible extent
maintenance-free, including the electrical motor.
Excluded are the saw blades, the table insert and the
brake linings, which are subject to wear (approx.15,000
shifts) of the electrical motor. The saw blade has to stop
within 10 sec. If necessary exchange the petered-out
table insert.
•Brakepadsshouldonlybeexchangedbyspecialized
staff.
• Keepthetablesurfacealwaysresinfree.
• Keep the saw blade protection box free from wood
particles and sawdust. When the power supply is pulled
out, open the protection box lid, remove possible sawdust
remains.
ACCESSORIES
Drivingappliance Art.Nº.56007000
Slidingtable Art.Nº.
Removal
On removing the machine one should unconditionally comply
with the local legal regulations.
(For further information contact the responsible local waste
department.)
 Loading...
