www.scheppach.com
GB
|
31
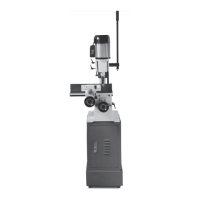
Inserting tool into chuck, Fig. 1
When replacing, ensure that the mains plug is pulled
out. Only cylindrical tools with the specied maximum
shaft diameter may be clamped in the chuck (12). Use
only faultless and sharp tools. Do not use tools that are
damaged on the shaft or that are otherwise deformed
or damaged. For your own safety, only use accessories
and additional equipment that are indicated in the op-
erating manual or have been recommended or indicat-
ed by the manufacturer. If the column drilling machine
blocks, switch o the machine and go back to the start-
ing position with the drill.
Handling the quick-action drill chuck
The column drilling machine is equipped with a
quick-action drill chuck. The tool can be changed with-
out the aid of an additional chuck key, by inserting the
tool into the quick-action drill chuck and by tightening
it by hand.
Speed adjustment, Fig. 1
The speed of the machine can be continuously adjust-
ed.
Attention!
• The speed may only be changed when the engine
is running.
• Do not move the speed adjustment lever (6) sudden-
ly, set the speed slowly and evenly while the ma-
chine is idling.
• Make sure that the machine can run freely (remove
workpieces, drills, etc.).
The speed can be continuously adjusted using the
speed adjustment lever (6). The dened speed is
shown in turns per minute on the digital display (8).
Attention! Never let the drill run with the V-belt cover
open. Always pull the mains plug before opening the
cover. Never reach into running V-belts.
Drilling depth stop, Fig. 15a
The drill spindle has a rotatable scale ring (19) for set-
ting the drilling depth. Only set up work while stopped.
• Press the drill spindle down until the drill tip lies on
the workpiece.
• Loosen the clamping screw (18) and turn the scale
ring (19) forwards until it stops.
• Turn the scale ring (19) back by the desired drilling
depth and x it with the clamping screw (18).
Attention! When setting the drilling depth of a cylindri-
cal hole, you must add the length of the drill tip.
2. Switching on: Move the laser on/o switch (14) to
position “I” to switch on the laser. Two laser lines
are projected onto the workpiece to be machined,
the intersection of which indicates the centre of the
drill tip.
3. Switching o: Move the laser on/o switch (14) into
the “0” position.
Setting the laser, Fig. 13
The laser can be adjusted using the adjusting screws
(F).
Note: To protect against corrosion, all bare parts are
heavily greased at the factory. Before placing the drill
chuck (12) on the spindle, both parts must be made
completely free of grease with an environmentally
friendly solvent, so that optimal power transmission is
guaranteed.
Setting up the machine
Prior to starting the machine, the drill must be mounted
on a solid surface.
Therefore, use the two mounting holes in the base
plate. Make sure that the machine is freely accessi-
ble for operation and for adjustment and maintenance
work.
Note: The fastening screws must only be tightened so
that the base plate is not strained or deformed. Risk of
breakage in case of heavy loads.
Pay attention prior to commissioning
Make sure that the voltage of the mains connection
matches the type plate. Only connect the machine to
a socket with a properly installed protective contact.
The drilling machine is equipped with a zero-voltage
release, which protects the operator against uninten-
tional restart after a voltage drop. In this case the ma-
chine must be switched on again.
9. Operation
General, Fig. 14
To switch on, actuate the green on switch “I” (9), the
machine starts. To switch o, press the red “O” button
(9), the device switches o.
Ensure that you do not overload the device.
If the engine noise drops during operation, the engine
is loaded too heavily.
Do not stress the device to the extent that engine is
brought to a stop. Always stand in front of the machine
during operation.
 Loading...