www.scheppach.com
18
|
3. -
ing (2). Place the complete motor housing on the
container and secure it with the sealing band.
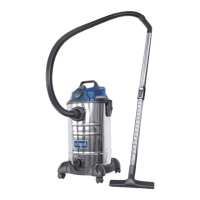
8.2 Installing the suction hose (5), g. 6 + 7
• Fit the suction hose (5) with the hose clamp (6) on
the hose port of the container.
• Fit the other side of the suction hose (5) with the
hose clamp (6) and hose coupling (7).
9. Start up
m ATTENTION!
Always make sure the device is fully assembled
before commissioning!
9.1 Switching on/o, g. 1
•
•
switch (3) to position “0”.
10. Electrical connection
The electrical motor installed is connected and
ready for operation. The connection complies
with the applicable VDE and DIN provisions. The
customer‘s mains connection as well as the ex-
tension cable used must also comply with these
regulations.
Damaged electrical connection cable
The insulation on electrical connection cables is of-
ten damaged.
• Pressure points, where connection cables are
passed through windows or doors.
• Kinks where the connection cable has been im-
• Places where the connection cables have been cut
due to being driven over.
•
wall outlet.
•
Such damaged electrical connection cables must not
be used and are life-threatening due to the insulation
damage.
Ensure that the connection cables are dis-
connected from electrical power when checking for
damage.
-
7. Unpacking
m ATTENTION!
The device and the packaging material are not
children’s toys! Do not let children play with
plastic bags, lms or small parts! There is a dan-
ger of choking or suocating!
• -
vice.
•
•
•
damage.
Later claims will not be
recognised.
•
•
time.
• -
-
•
equipment.
8. Assembly
m ATTENTION!
Always make sure the device is fully assembled
before commissioning!
-
aging reasons.
from the packaging.
Open the sealing band and remove the motor hous-
ing.
-
-
ness.
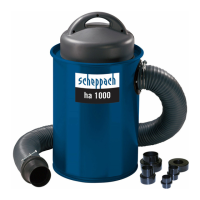
1 Filter cartridge
2 Filter bag
3 Extraction hose
4 2x hose clamps
5
8.1 Installing the lter cartridge with lter bag,
g. 3 - 5
1.
2.
4)
 Loading...