www.scheppach.com
36
|
GB
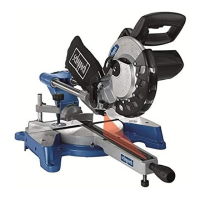
8.9 Sawdust bag (g. 1/22)
The saw is equipped with a debris bag (17) for sawdust
and chips.
Squeeze together the metal ring on the dust bag and
attach it to the outlet opening in the motor area.
The debris bag (17) can be emptied by means of a zip-
per at the bottom.
Connection to an external dust extractor
• Connect the vacuum hose with the dust extraction
spout.
• The industrial vacuum cleaner must be suitable for
the material being worked.
• When vacuuming dust that is especially detrimen-
tal to health or carcinogenic, use a special vacuum
cleaner.
8.10 Changing the saw blade (g. 1/2/14-17)
Remove the power plug!
Important!
Wear safety gloves when changing the saw blade.
Risk of injury!
• Swing the machine head (4) upwards and lock with
the locking bolt (23).
• Loosen the retaining screw (5a) of the cover using a
Philips screwdriver.
WARNING! Do not fully remove this screw.
• Fold the saw blade guard (5) upwards until the saw
•
screw (29).
• Hold the Allen key (C) and slowly close the saw
blade guard (5) until it touches the Allen key (C).
• Firmly press the saw shaft lock (30) and slowly ro-
saw shaft lock (30) engages after no more than one
rotation.
•
screw (29) in the clockwise direction.
•
•
out downwards.
•
• Fit and fasten the new saw blade (6) in reverse order.
• Important! The cutting angle of the teeth, in other
words the direction of rotation of the saw blade (6)
must coincide with the direction of the arrow on the
housing.
• Secure the set screw (16b) again.
• Move the machine head (4) to the top position.
• Fix the rotary table (14) in the 0° position.
• Loosen the set screw (22) and use the handle (1) to
angle the machine head (4) to the left, until the point-
er (19) indicates the desired angle measurement on
the scale (18).
• Re-tighten the set screw (22).
• Cut as described in section 8.3.
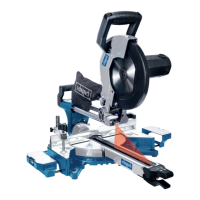
8.7 Mitre cut 0°- 45° and turntable 0°- 45°
(g. 2/4/12)
The crosscut, drag and mitre saw can be used to make
mitre cuts to the left of 0°- 45° in relation to the work
face and, at the same time, 0° - 45° to the left or 0° - 45°
to the right in relation to the stop rail (double mitre cut).
Attention! For mitre cuts (inclined saw head), the left
side
the outer position.
• Open the set screw (16b) for the moveable stop rail
(16a) and push the moveable stop rail (16a) out-
wards.
•
enough in front of the innermost position that the dis-
tance between the stop rail (16a) and the saw blade
(6) amounts to a minimum of 8 mm.
• Before making a cut, check that the stop rail (16a)
and the saw blade (6) cannot collide.
• Re-tighten the set screw (16b).
• Move the machine head (4) to its upper position.
• Release the rotary table (14) by loosening the han-
dle (11).
• Using the handle (11), set the rotary table (14) to the
desired angle (refer also to point 8.4 in this regard).
• Re-tighten the handle (11) to secure the rotary table
(14).
• Undo the set screw (22).
• Use the handle (1) to tilt the machine head (4) to the
left until it coincides with the required angle value (in
this connection see also section 8.6).
• Re-tighten the set screw (22).
• Cut as described under section 8.3.
8.8 Limiting the cutting depth (g. 3/13)
•
screw (24). To do this loosen the knurled nut (24a) on
the screw (24). Turn the screw (24) in or out to set the
required cutting depth. Then re-tighten the knurled
nut (24a) on the screw (24).
• Check the setting by completing a test cut.