EasyManua.ls Logo

Schwinn IC4/800IC - User Manual

Schwinn IC4/800IC
28 pages
Print Icon
To Next Page IconTo Next Page
Loading...
ASSEMBLY MANUAL / OWNER’S MANUAL ASSEMBLY MANUAL / OWNER’S MANUAL
IC4 / 800IC
Workout with Other Fitness Apps
This tness machine has integrated Bluetooth
®
connectivity which allows it to work with a number of tness
apps. For our latest list of supported apps, please visit:
www.nautilus.com/partners

Questions and Answers

Summary

IMPORTANT SAFETY INSTRUCTIONS

SAFETY WARNING LABELS AND SERIAL NUMBER

FCC Compliance

Details regarding compliance with FCC regulations for the device.

SPECIFICATIONS

Before Assembly

Instructions for selecting the proper location before assembling the machine.

Basic Assembly Tips

Key advice and steps to follow during the assembly process.

PARTS

HARDWARE; TOOLS

ASSEMBLY

1. Attach Stabilizers to Frame

Instructions for attaching the front and rear stabilizers to the main frame.

2. Attach Pedals to Frame Assembly

Step-by-step guide for attaching the left and right pedals to the crank arms.

3. Attach the Handlebar Post and Seat Post to the Frame Assembly, and then Attach the Seat

Instructions for connecting the handlebar and seat posts to the frame and mounting the seat.

4. Install the Handlebar Assembly to the Frame Assembly

Guidance on how to properly install the assembled handlebar unit.

5. Attach the Water Bottle Bracket and Holders to the Frame Assembly

Steps to attach the water bottle holder and bracket to the machine.

6. Attach the Console to the Frame Assembly

Instructions for connecting the console unit to the handlebar post.

7. Attach the Media Tray to the Frame Assembly

Guidance on attaching the media tray to the handlebar assembly.

8. Attach the AC Adapter to the Frame Assembly

How to connect the power adapter to the exercise machine.

9. Final Inspection

Final check of all assembled parts and hardware for security and proper function.

Installing the Shoe Clips (Cleats) on Cycling Shoes

BEFORE YOU START

Moving and Storing the Machine

Instructions on how to safely move and store the exercise bike.

Leveling the Machine

Guide to adjusting the machine's levelers for a stable workout experience.

FEATURES

Emergency Stop

Console Features

Keypad Functions

Details on the purpose and operation of each button on the console keypad.

Program Data Display

Explanation of the data displayed on the console during workouts.

CALORIES

SPEED

DISTANCE

LEVEL

PULSE (HEART RATE)

Using your JRNY membership with your machine

Bluetooth Heart Rate Enabled

Bluetooth Heart Rate Monitor (Armband supplied with the IC4 machine only)

Heart Rate Calculations

Shoe Clips (Cleats)

OPERATIONS

What to Wear

Recommended attire and footwear for exercising on the machine.

How Often Should You Exercise

Guidance on exercise frequency and duration for optimal results.

Seat Adjustment

Step-by-step guide to adjusting the seat for proper fit and comfort.

Foot Position; Pedal Strap Adjustment

How to properly position feet and adjust pedal straps for efficient pedaling.

Using the Shoe Clips (Cleats)

Handlebar Adjustment

Locking the Flywheel for Storage

Power-Up Mode

Auto Shut-Off (Sleep Mode)

Resistance Adjustment

Starting a Workout

Changing Unit Measures (English Imperial;Metric)

Pausing or Stopping

MAINTENANCE

Daily:

Daily maintenance tasks for the machine and console.

Weekly:

Weekly maintenance checks and cleaning recommendations.

Monthly or after 20 hours:

Monthly or periodic maintenance tasks for ensuring smooth operation.

Checking the Drive Belt Tension

How to check if the drive belt has the correct tension.

Adjusting the Drive Belt Tension

Procedure for adjusting the drive belt tension if it is too loose.

Maintenance Parts

TROUBLESHOOTING

No display;partial display; unit will not turn on

Troubleshooting steps for power and display issues.

Speed displayed is not accurate

Solutions for inaccurate speed readings on the console.

Speed displayed is always 0;stuck in Pause mode

Steps to resolve issues with speed display stuck in pause mode.

No Speed;RPM reading

Troubleshooting no speed or RPM data being received by the console.

Unit operates but Bluetooth Heart Rate (HR) not displayed

Steps to fix problems with the Bluetooth® heart rate monitor not displaying.

Unit operates but Bluetooth HR displayed incorrectly

Solutions for incorrect display of Bluetooth® heart rate data.

Console shuts off (enters sleep mode) while in use

Unit rocks;does not sit level

Pedals loose;unit difficult to pedal; Pedals seem to skip or slip with a sudden increase in rpm

Clicking sound when pedaling

Seat post movement

WARRANTY

Who Is Covered

Information specifying who is covered by the product warranty.

What Is Covered

Details on what parts and workmanship are covered by the warranty.

Terms

Specific warranty periods for different components of the machine.

How Nautilus Will Support the Warranty

How Nautilus handles warranty claims and repairs.

What You Must Do

Actions the owner must take to ensure warranty validity and claims.

What Is Not Covered

List of conditions and situations not covered by the product warranty.

How to Obtain Service

Instructions on how to get warranty service or support.

Exclusions

Legal exclusions and limitations related to the express warranties.

Limitation of Remedies

Legal limitations on remedies available for warranty breaches.

State Laws

Information on consumer rights related to state-specific warranty laws.

Expirations

Information regarding warranty expiration and post-warranty services.

International Purchases

Warranty coverage details for products purchased outside the US.

Overview

This document is an assembly and owner's manual for the Schwinn IC4/800IC fitness machine. It provides comprehensive instructions for assembly, operation, maintenance, and troubleshooting, ensuring a safe and effective user experience.

Function Description

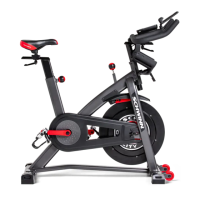
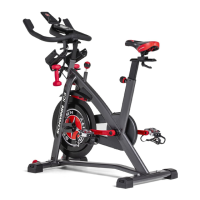
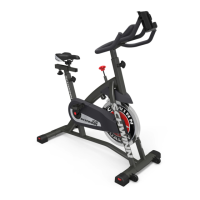
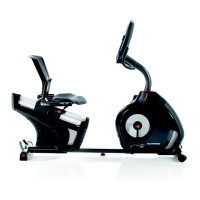
The Schwinn IC4/800IC is a stationary cycling fitness machine designed for home use. It features integrated Bluetooth® connectivity, allowing it to interact with various fitness apps to enhance the workout experience. The machine operates with a fixed gear system, meaning the pedals and flywheel move together, requiring the user to actively slow down the flywheel to stop pedaling. It includes a console that displays workout metrics such as RPM, Time, Calories, Speed, Distance, Level, and Pulse (Heart Rate). The machine is equipped with an Emergency Brake/Resistance Adjustment Knob, which serves both to adjust resistance during a workout and to lock the flywheel for safe storage. Foot pedals are designed to accommodate both athletic shoes with foot restraints and cycling shoes with cleats, providing secure footing. The machine also includes a dumbbell rack (dumbbells supplied with the IC4 model), water bottle holders, and a media tray for user convenience during workouts.

Usage Features

The Schwinn IC4/800IC offers a variety of features to customize and enhance the user's workout. Before starting, users are advised to consult a physician and ensure the machine is set up on a solid, level surface with adequate clear space around it.

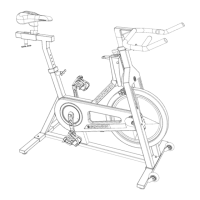
  • Assembly and Setup: The manual provides detailed, step-by-step instructions for assembling the machine, including attaching stabilizers, pedals, handlebar post, seat post, seat, water bottle bracket and holders, console, and AC adapter. It emphasizes the importance of proper pedal installation to prevent stripping threads and potential injury. Users are guided on how to install shoe clips (cleats) on cycling shoes, noting that the left pedal is reverse-threaded.
  • Adjustments: The machine offers multiple adjustment points to ensure a comfortable and effective riding position.
    • Seat Adjustment: The seat height and fore/aft position can be adjusted to ensure proper leg extension and comfort. Users are instructed to step off the machine before adjusting the seat and to ensure the adjustment knob engages the holes in the seat post.
    • Handlebar Adjustment: The handlebar height and fore/aft position can also be adjusted to suit the user's preference. Similar to the seat, users should ensure the adjustment knob engages the holes in the handlebar post.
    • Pedal Strap Adjustment: For users wearing athletic shoes, the foot restraint straps can be fastened over the shoe to secure the foot on the pedal.
    • Shoe Clips (Cleats): For cycling shoes, the cleats engage with the pedals, providing a secure connection. The manual explains how to engage and disengage the cleats and how to adjust the retention force of the mechanism if needed.
  • Resistance Adjustment: The Emergency Brake/Resistance Adjustment Knob allows users to modify the resistance level from 0% to 100%. Turning the knob clockwise increases resistance, while turning it counter-clockwise decreases it.
  • Console Operation:
    • Power-Up: The console powers up when any button is pushed or when it receives an RPM signal from pedaling.
    • Workout Start: Users can start a workout by pushing the START/ENTER button and then set goals for Time, Calories, and Distance using the Increase/Decrease buttons.
    • Workout Metrics: The console displays real-time workout data, including RPM, Time, Calories, Speed (in km/h or miles/h), Distance, Level (resistance), and Pulse (heart rate).
    • Unit Measures: The units for distance (kilometers or miles) can be switched before a workout.
    • Pausing/Stopping: Workouts can be paused by stopping pedaling and resumed by starting again. The console will automatically shut off after 5 minutes of inactivity (Sleep Mode). To end a paused workout, users can push and hold the Reset button.
  • Heart Rate Monitoring: The machine is equipped with Bluetooth® Heart Rate Sensing capabilities. For IC4 models, an armband heart rate monitor is supplied. The console displays the heart rate in BPM, and users are instructed on how to connect their Bluetooth® HR monitor.
  • Fitness App Connectivity: The integrated Bluetooth® connectivity allows the machine to work with various fitness apps, including Bowflex™ JRNY™. Users can download the app, activate Bluetooth® and Location Settings on their device, and sync it with the machine for guided workouts and virtual coaching.
  • Emergency Stop: To immediately stop the pedals, users must push down hard on the Emergency Brake/Resistance Adjustment Knob. It is crucial to slow the flywheel and pedals to a complete stop before dismounting to avoid injury.
  • Moving and Storage: The machine can be moved by carefully pulling the handlebars and pushing the front downward. For safe storage, the power supply should be removed, and the flywheel locked by tightening the Emergency Brake/Resistance Adjustment Knob. The machine should be stored in a secure location away from children and pets.
  • Leveling: Levelers on the stabilizers allow users to adjust the machine to ensure it is stable on uneven surfaces.

Maintenance Features

Regular maintenance is crucial for the longevity and safe operation of the Schwinn IC4/800IC. The manual outlines daily, weekly, and monthly maintenance tasks.

  • Daily Maintenance:
    • Before each use, inspect the machine for loose, broken, damaged, or worn parts. Do not use if any issues are found.
    • Ensure all adjustment knobs are tight.
    • After each workout, wipe the machine and console with a damp cloth to remove moisture. For the console, use only mild dish soap and a soft cloth; avoid petroleum-based solvents, automotive cleaners, or ammonia-containing products. Keep the console out of direct sunlight and high temperatures.
  • Weekly Maintenance:
    • Check pedals and tighten as necessary.
    • Clean the machine to remove dust, dirt, or grime.
    • Check for smooth seat operation and sparingly apply a thin coating of silicone lubricant if needed. Silicone lubricant is not for human consumption and should be stored safely away from children.
  • Monthly (or after 20 hours) Maintenance:
    • Check crank arms and tighten as necessary. Ensure all bolts and screws are tight.
    • Check the drive belt tension and adjust if necessary. The manual provides a procedure for checking and adjusting the drive belt tension by operating the bike at different RPMs and tightening the flywheel retainer nuts if slipping occurs.
  • Warning Labels: Users are instructed to replace any loose, unreadable, or dislodged warning labels.
  • Replacement Parts: Only genuine replacement parts and hardware supplied by Nautilus should be used for repairs to ensure safety and maintain warranty validity.
  • Power Disconnection: Always unplug the AC adapter from the wall outlet and the machine, and wait 5 minutes before cleaning, maintaining, or repairing the machine.

The manual emphasizes that the owner is responsible for regular maintenance and that worn or damaged components must be repaired or replaced immediately. It also advises users to contact customer service or their local distributor for repair information or warranty support.

Schwinn IC4/800IC Specifications

General IconGeneral
Resistance TypeMagnetic
Power SourceAC Adapter
Drive SystemBelt drive
Display TypeLCD
ConnectivityBluetooth
Weight Capacity330 lbs
Flywheel Weight40 lbs
Included AccessoriesDumbbells, Device Holder, Water Bottle Holder
Weight106 lbs
Compatible AppsExplore The World, Peloton, Zwift
Handlebar AdjustmentVertical
PedalsDual-link pedals with toe cages
Resistance Levels100 micro-adjustable levels

Related product manuals