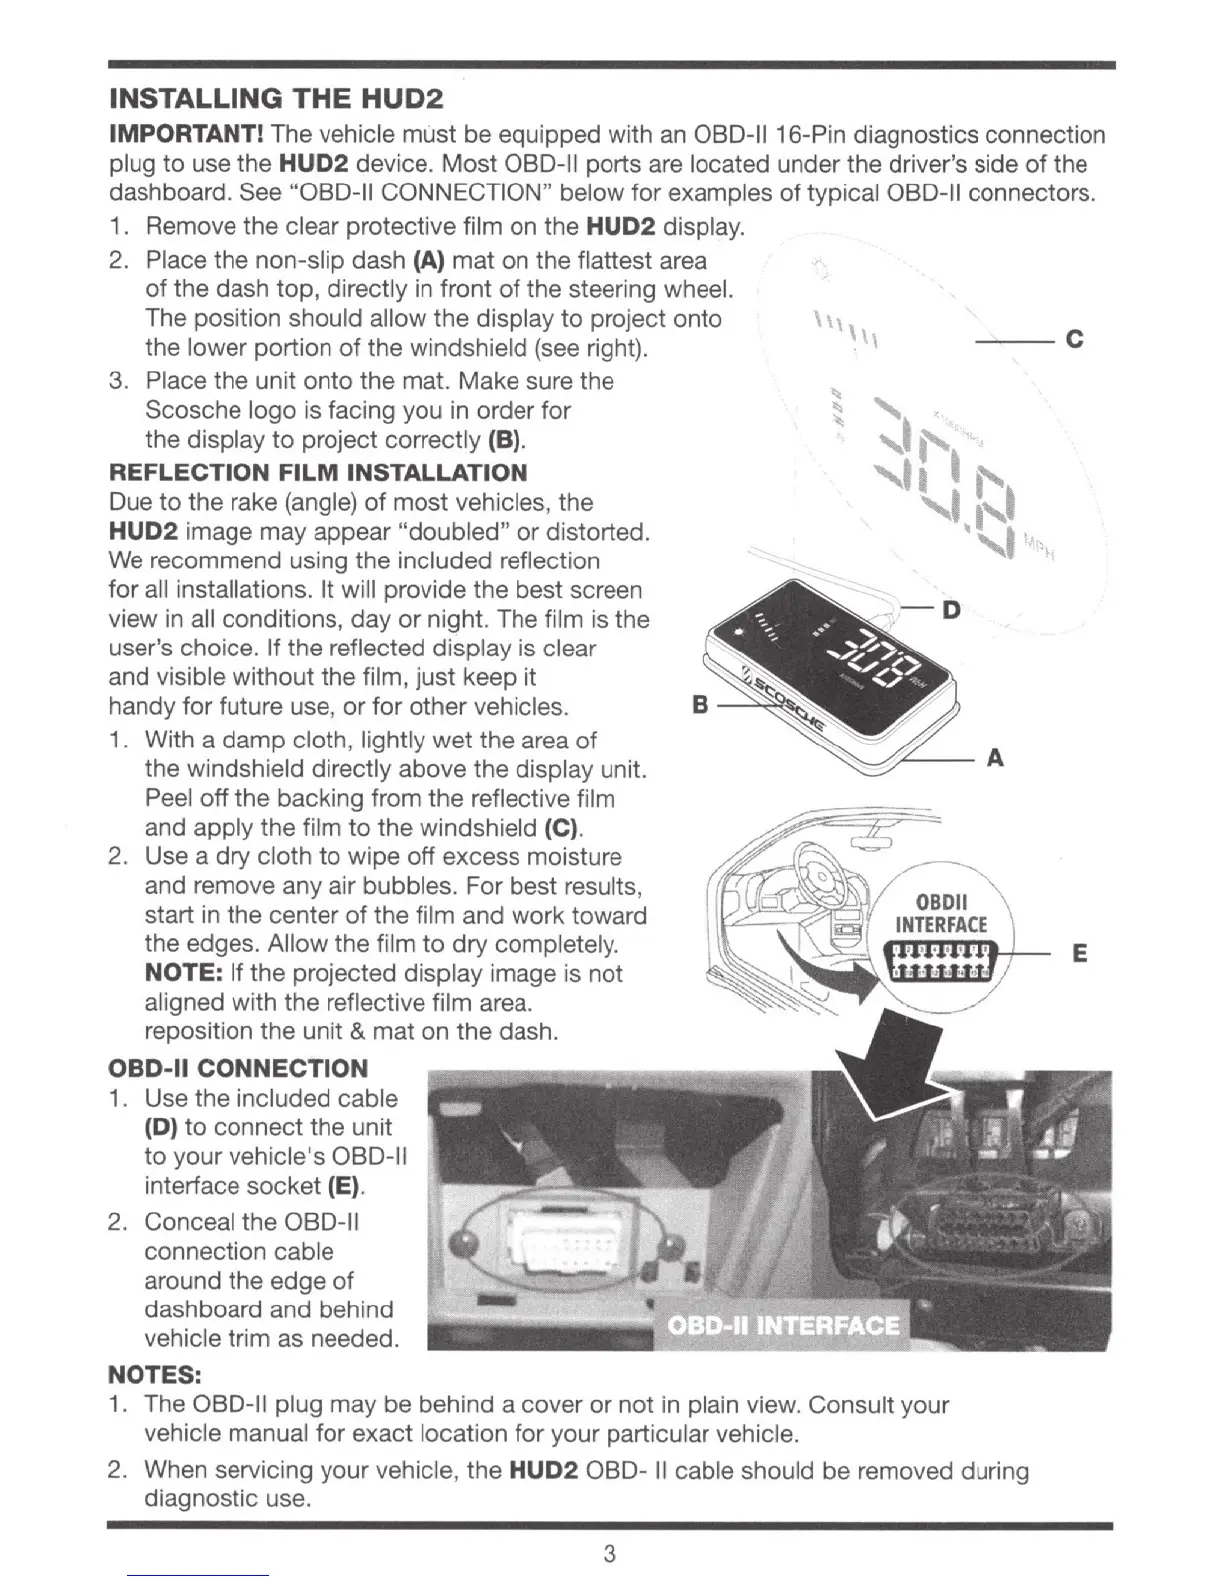
INSTALLING THE
HUD2
IMPORTANT! The vehicle must be equipped with an 080-11 16-Pin diagnostics connection
plug to use the
HUD2 device. Most 080-11 ports are located under the driver
's
side
of
the
dashboar
d.
See "080-11 CONNECTION" below for examples
of
typical 080-11 connectors.
1 . Remove the clear protective film on the
HUD2 display.
2. Place the non-slip dash
(A)
mat on the flattest area
of
t
he
dash top, directly
in
front
of
the steering wheel.
The position should allow the display to project onto
the lower portion
of
the windshield
(see
right).
---
C
3. Place the unit onto the mat. Make sure the
Scosche logo is facing you
in
order
for
the
disp
lay
to
project
cor
rectly (B).
REFLECTION
FILM
INSTALLATION
Due
to
the rake (angle)
of
most vehicles, the
HUD2 image may appear "doubled" or distorted.
We
recommend using the included
re
flection
for
all
installations. It will provide the best screen
view
in
all conditions, day
or
night. The film is the
user's choice. If the reflected display is clear
and visible without the film, just keep it
handy for future use, or for other vehicles.
1.
With a
damp
cloth, lightly wet the area
of
the windshield directly above the display unit.
Peel
off
the backing from the reflective film
and apply the film
to
the windshield (C).
2. Use a
dry
cloth to wipe
off
excess moisture
and remove any air bubbles. For best results,
start
in
the center
of
the film and work toward
the edges. Allow the film
to
dry completely.
NOTE: If the projected display image is not
aligned with the reflective film area.
reposition the unit & mat on the dash.
OBD-11
CONNECTION
1.
U
se
the included cable
(D) to connect the unit
to
your vehicle's
OB0-11
interface socket (E).
2.
Conceal the
08
0
-1
1
connection cable
around the edge
of
dashboard and behind
vehicle trim as needed.
NOTES:
.
-o
"
1. The 080-11 plug may be behind a cover or not in plain view. Consult your
vehicle manual for exact location for your particular vehicle.
2. When servicing your vehicle, the
HUD2
080-
II
cable should be removed during
diagnostic use.
3
E