34
WARNING
BATTERIES MUST ONLY BE CHANGED IN
AN AREA KNOWN TO BE NONFLAMMABLE.
CHANGING THE BATTERIES IN A FLAM-
MABLE ATMOSPHERE MAY CAUSE AN
IGNITION WHICH COULD RESULT IN SERI-
OUS INJURY OR DEATH.
WARNING
IF A RESPIRATOR INCORPORATING THE
PASS DEVICE DISTRESS ALARM IS USED
IN AN EXPLOSIVE OR FLAMMABLE ATMO-
SPHERE, FAILURE TO REGULARLY
INSPECT THE RESPIRATOR, INCLUDING
THE PASS DEVICE DISTRESS ALARM, AS
DESCRIBED IN THIS INSTRUCTION, FAIL-
URE TO CORRECT DAMAGE TO THE PASS
DEVICE DISTRESS ALARM, OR THE IN-
STALLATION OF INCORRECT BATTERIES
OR SUBSTITUTION OF ANY OTHER COM-
PONENTS MAY IMPAIR THE INTRINSIC
SAFETY OF THE UNIT. IMPAIRING THE IN-
TRINSIC SAFETY OF THE UNIT MAY LEAD
TO A FIRE OR AN EXPLOSION WHICH
COULD RESULT IN SERIOUS INJURY OR
DEATH.
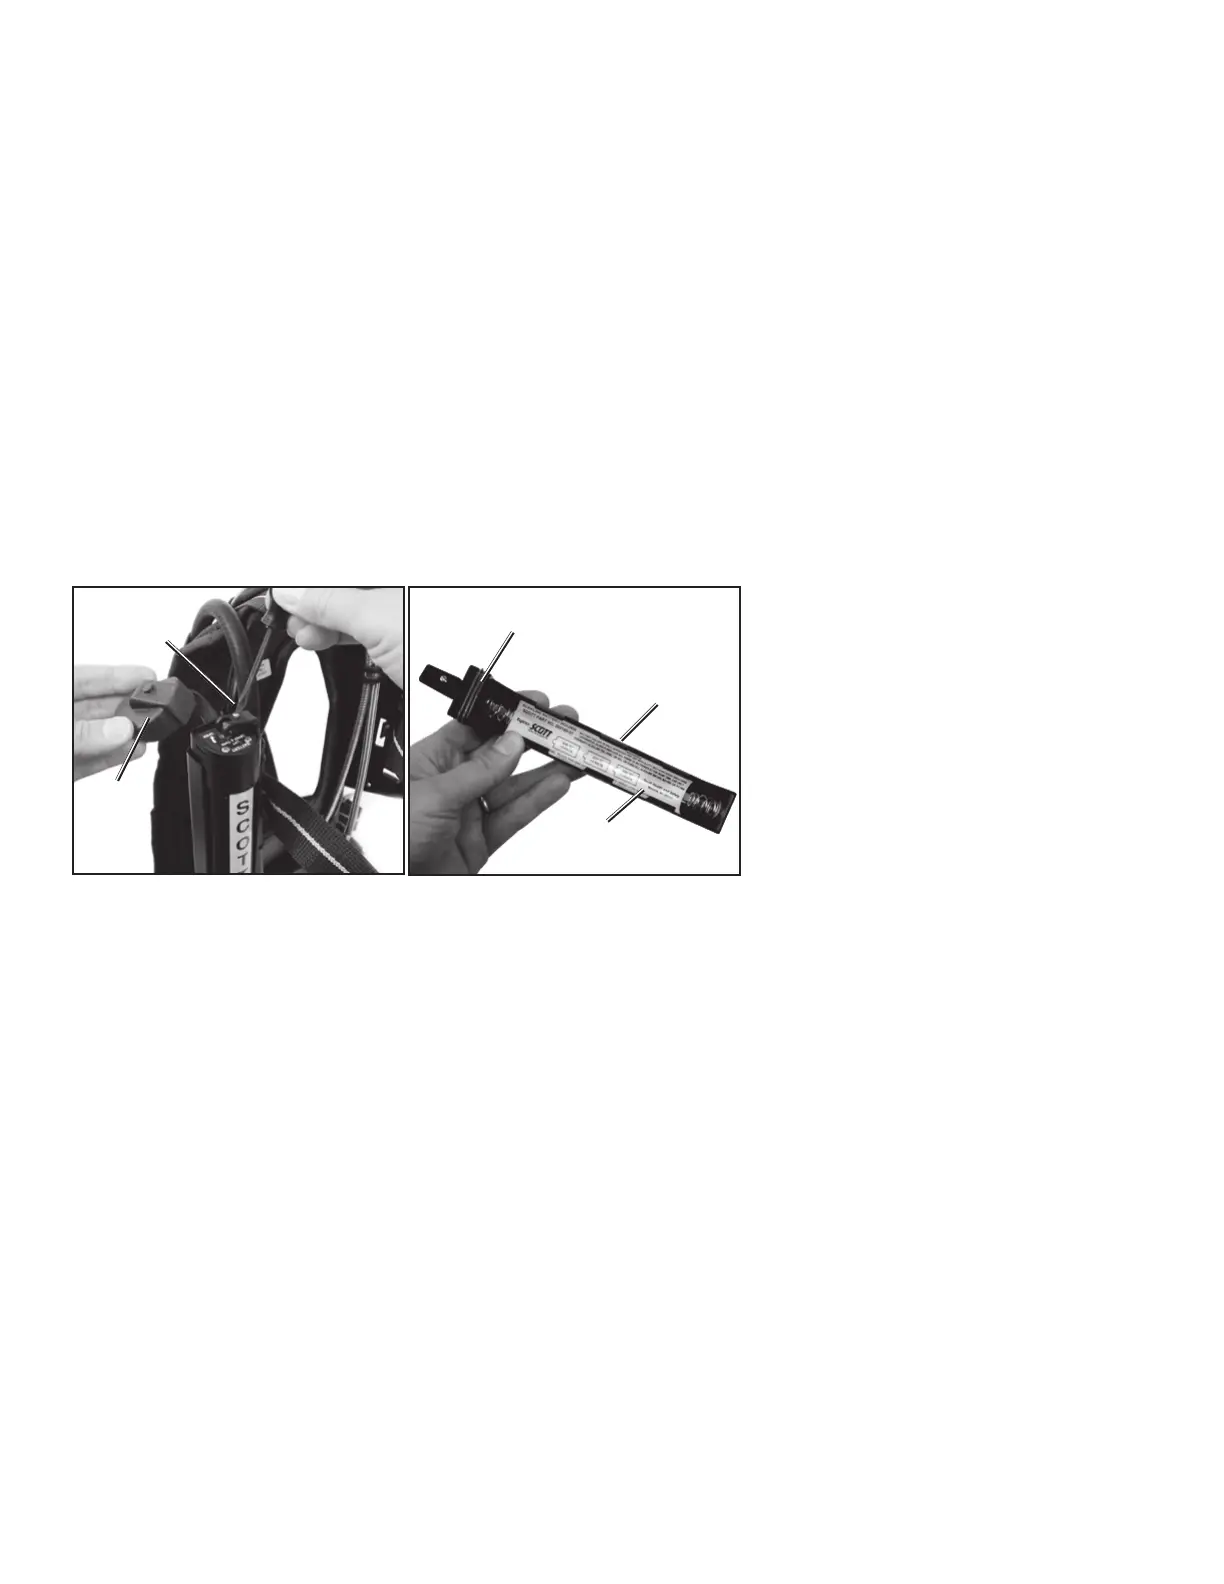
FIGURE 17
LOOSEN
SCREW IN
LEVER
RUBBER
CAP
FIGURE 18
BATTERY
HOLDER
COVER SEAL
LABEL
BATTERY REPLACEMENT
The AIR-PAK NxG
2
respirator requires three "C" cell batteries in the
backframe assembly to operate the HEADS-UP electronic end of ser-
vice time indicator and, if installed, the PASS DEVICE distress alarm.
Always replace all batteries at the same time. To change batteries,
place the respirator in a clean, nonhazardous area. Close respirator cyl-
inder valve, open regulator purge valve letting out all the trapped air,
close regulator purge valve, press the reset button twice. A fifteen sec-
ond beep sequence occurs as the residual air bleeds off. Unit will sound
a two tone chirp and green light will go out. To cancel the electronic end
of service time indicator, press the RESET button twice and twice again.
NOTE
BE SURE THE CYLINDER VALVE IS OFF AND PASS DEVICE DISTRESS
ALARM IS COMPLETELY INACTIVE BEFORE CHANGING BATTERIES.
NEVER REMOVE OR REPLACE BATTERIES WITH SYSTEM PRESSUR-
IZED OR DAMAGE MAY OCCUR TO ELECTRONIC COMPONENTS.
BACKFRAME ASSEMBLY
1. To replace the batteries in the Backframe, position the respirator
so the top of the backframe battery compartment is accessible as
shown in FIGURE 17. Remove the protective rubber cap from the
top of the battery compartment.
1. Use a small screw driver to loosen the screw in the battery compart-
ment lever. Lift and turn the lever one quarter turn clockwise to re-
lease. Pull the lever to remove battery holder.
3. Remove any used batteries from battery holder. Be careful not to
damage battery contacts.
4. Clean the surface around battery compartment and seal around
the cover of the battery holder. Wipe with a clean damp cloth to
remove any dirt or foreign matter which might prevent a proper
seal. Check the seal for tears or cuts. The battery holder must
be installed so that it is water tight after replacement. If damage
is found, remove respirator from service and tag for repair by au-
thorized personnel.
 Loading...