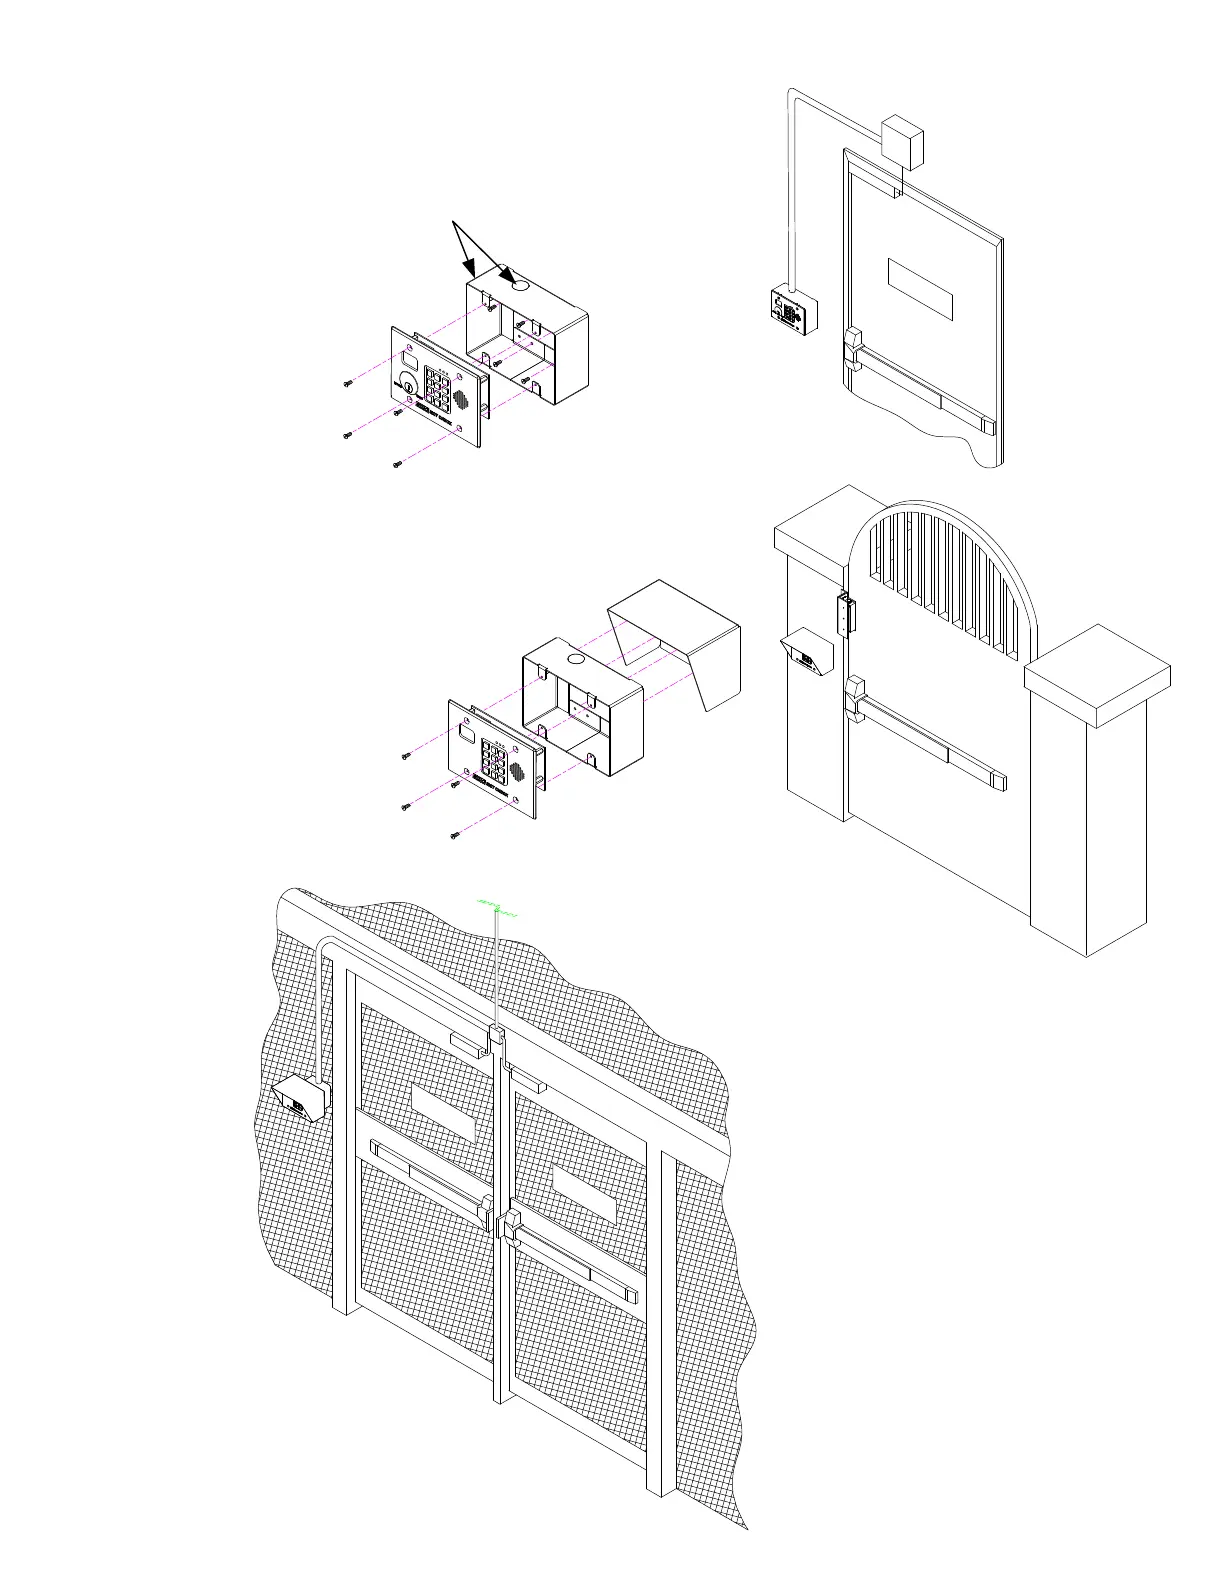
SURFACE MOUNT
3 GANG BOX
TO WALL
2) Carefully insert unit and
secure with screws
supplied.
1) Attach optional 3 Gang Surface
Mount Box to wall using
screws supplied.
P:\INSTALLATION INST\Delayed Egress\INST-101DE_KDE.vsd Rev F 05-16 Page 5
1a) Knockouts are located on
two surfaces of the box to
allow wire conduit insertion.
OUTSIDE WALL or
POST MOUNTING
with WEATHER SHROUD
1) Use optional 3 Gang Box inside
optional Shroud as a template to
drill pilot holes through
shroud and into post (or wall).
2) Mount 3 Gang Box and Shroud
to Post with screws supplied.
3) Carefully insert unit and
secure with screws
supplied.
P
U
S
H
U
N
T
I
L
A
L
A
R
M
S
O
U
N
D
S
.
D
O
O
R
C
A
N
B
E
O
P
E
N
E
D
I
N
1
5
S
E
C
O
N
D
S
.
P
U
S
H
U
N
T
I
L
A
L
A
R
M
S
O
U
N
D
S
.
D
O
O
R
C
A
N
B
E
O
P
E
N
E
D
I
N
1
5
S
E
C
O
N
D
S
.
P
U
S
H
U
N
T
I
L
A
L
A
R
M
S
O
U
N
D
S
.
D
O
O
R
C
A
N
B
E
O
P
E
N
E
D
I
N
1
5
S
E
C
O
N
D
S
.
To
Power
Supply
CAUTION:
101-DE CONTROLLERS ARE
DESIGNED FOR INDOOR USE.
UNIT IS NOT WATER PROOF