P:\INST INSTRUCTIONS\ELECTRIFIED LOCKSETS\INST-Z7835-E REV G 09-22 Page 2
SECURITY DOOR CONTROLS ■ WWW.SDCSECURITY.COM
[t] 800.413.8783 ■ 805.494.0622 ■ E-mail: service@sdcsecurity.com ■ 801 Avenida Acaso, Camarillo, CA 93012 ■ PO Box 3670, Camarillo, CA 93011
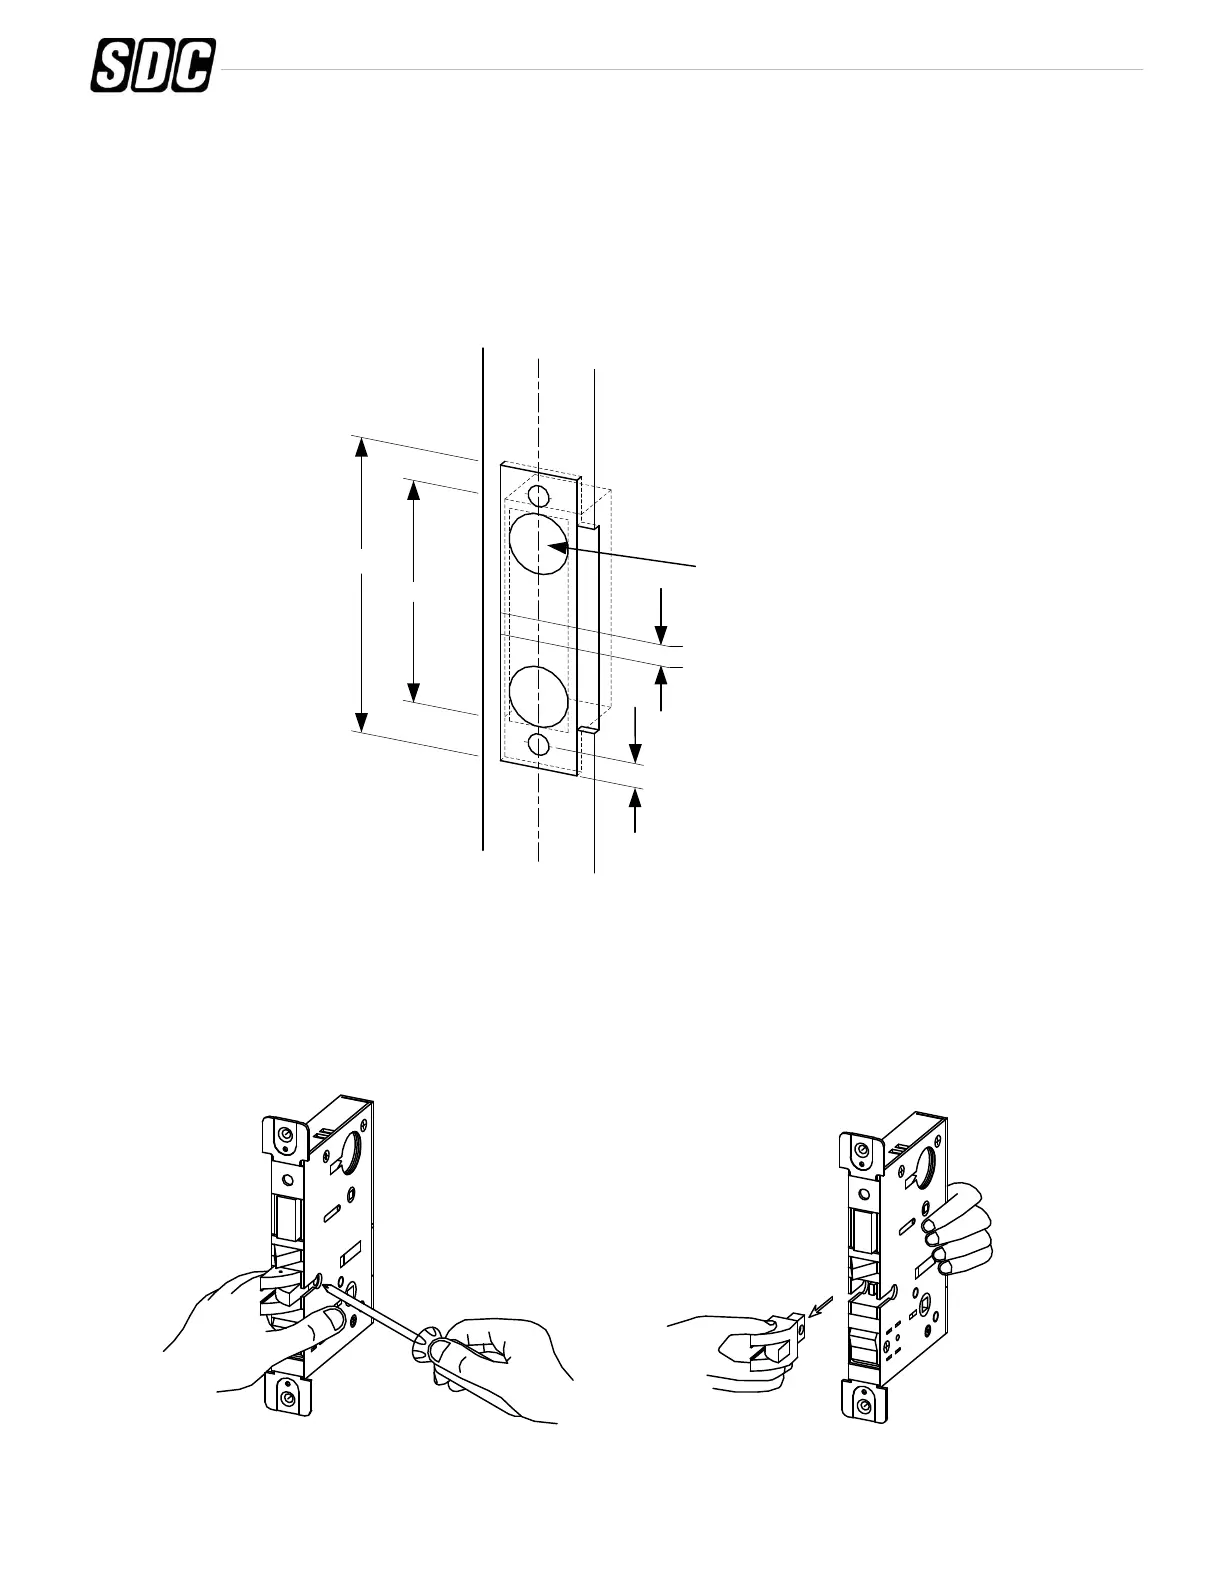
B. Strike Installation:
1. Align strike template on jamb. Be sure to keep 3/8" distance between lock centerline and strike
centerline. Recess 5/32" for flush fit of strike and dust box.
2. Mortise jamb according to measurement of strike template. Then fit strike and dust box into frame
and secure into place with supplied screws.
4-7/8"
3-17/32"
C
L
Strike
Lock
C
L
3/8"
3/8"
1" Holes
1-1/8" Deep
C
L
Jamb
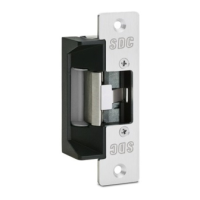
Pull out and
turn
1. Change latchbolt handing.
If the hand of the latchbolt doesn’t match the door hand, remove the fixing screw and pull the latchbolt out from
lock case. Turn the latchbolt 180 ° to change the handling. Position latchbolt back, into case and fasten it.
Instructions for changing latchbolt handing (From LH to LHR or RH to RHR):
C. Install Lockcase
Remove
screw