EasyManua.ls Logo

Seagull Models HARMON ROCKET III User Manual

Seagull Models HARMON ROCKET III
23 pages
To Next Page IconTo Next Page
Page #1 background imageLoading...
Page #1 background image
HARMON ROCKET III
Made in Vietnam.
Kit features.
Ready-made—minimal assembly & finishing required.
Ready-covered covering.
Photo-illustrated step-by-step Assembly Manual.
Specifications
Wingspan---------------------------------------- 50.4 in---------------------------- 128cm.
Wing area--------------------------------------- 558sq.in----------------------- 36 sq.dm.
Approximate flying weight------------------ 6.2-6.4lbs-------------------- 2.8-2.9kg.
Length-------------------------------------------- 51.6 in---------------------------- 131cm.
Recommended engine size---------------.40-.46 cu.in-------------------- 2-stroke.
.52-.82 cu.in--------------------4-stroke.
Radio System required 4 channel with 6 servos.
Flying skill level Intermediate/advanced.
Hand-made Almost Ready to Fly R/C Model Aircraft
ASSEMBLY MANUAL
Question and Answer IconNeed help?

Do you have a question about the Seagull Models HARMON ROCKET III and is the answer not in the manual?

Seagull Models HARMON ROCKET III Specifications

General IconGeneral
BrandSeagull Models
ModelHARMON ROCKET III
CategoryToy
LanguageEnglish

Summary

Aircraft Specifications

Key Aircraft Specifications

Wingspan, wing area, weight, length, and recommended engine size.

Kit Features Overview

Harmon Rocket III Kit Attributes

Highlights ready-made assembly, pre-covered parts, and photo-illustrated manual.

Introduction and Safety

Harmon Rocket III Introduction

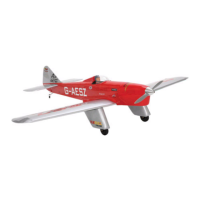
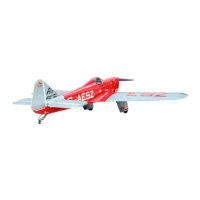
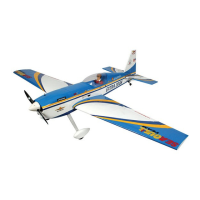
Overview of the semi-scale airplane designed for intermediate/advanced flyers.

Critical Safety Precautions

Warning about potential injury, assuming all risk and responsibility for use.

Assembly Prerequisites

Additional Required Items

List of engines, radio systems, glow plugs, propellers, and fuel lines needed.

Parts Identification Guide

Catalog of fuselage, wing, tail section, hardware, cowling, and landing gear components.

Control Surface Hinging

Hinging the Ailerons

Securing ailerons to wing panels using C/A glue, ensuring proper gap.

Elevator Hinging

Hinging the Elevators

Securing elevators to the horizontal stabilizer using C/A glue.

Rudder Hinging

Hinging the Rudder

Securing the rudder to the fuselage panel using C/A glue.

Wing Assembly

Joining Wing Halves and Dihedral Brace

Assembling wing halves with epoxy and reinforcing the dihedral.

Aileron Servo Installation

Installing Aileron Servos

Fitting servos into wing mounts and threading control leads.

Aileron Linkage Setup

Aileron Linkage Assembly

Drawing lines, positioning control horns, and drilling mounting holes.

Control Horn Installation

Mounting Control Horns

Positioning horns, drilling holes, and securing them with screws.

Engine Mount and Fuel System

Engine Mount Preparation

Preparing the engine mount for installation.

Fuel Tank Assembly Process

Preparing the fuel tank stopper with pickup and vent tubes.

Engine Mounting

Securing the Engine

Mounting the engine to the mount, marking, and drilling.

Cowling Installation

Fitting and Trimming the Cowling

Attaching the fiberglass cowl to the engine.

Spinner and Propeller Mounting

Installing the Spinner

Mounting the spinner backplate, propeller, and cone.

Landing Gear and Wheels

Wheel and Wheel Pants Assembly

Mounting wheels and wheel pants to the landing gear.

Tail Section Servo Installation

Elevator and Rudder Servo Installation

Installing servos and connecting them to the receiver.

Horizontal Stabilizer Mounting

Preparing and Mounting Horizontal Stabilizer

Cutting covering, marking, and epoxying the horizontal stabilizer.

Vertical Stabilizer Mounting

Installing the Vertical Stabilizer

Fitting the stabilizer into the fuselage slot and checking alignment.

Control Horn and Pushrod Setup

Control Horn Installation

Mounting control horns on elevator and rudder surfaces.

Elevator-Rudder Pushrod Connection

Connecting pushrods to servos and control horns.

Tail Wheel Assembly

Mounting the Tail Wheel Bracket

Securing the tail wheel bracket to the plywood plate.

Attaching the Control Clasp

Attaching the clasp to the rudder for tail wheel control.

Throttle Servo and Switch Installation

Throttle Servo Installation

Installing the throttle servo and its connector.

Receiver Switch Installation

Mounting the power switch into the fuselage.

Receiver, Battery, and Balancing

Installing Receiver and Battery Pack

Securing electronics and routing the antenna.

Airplane Center of Gravity Balancing

Adjusting weight for proper flight balance and stability.

Control Throws Adjustment

Setting Control Surface Throws

Adjusting control surface throws for low and high rate settings.

Flight Preparation and Final Checks

Flight Preparation Procedures

Checking operations, connections, and control directions before flight.

Preflight Checklist Review

Final checks for safety, balance, and readiness.

Related product manuals