Do you have a question about the Seagull Models SEA278 and is the answer not in the manual?
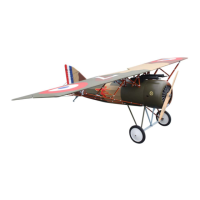
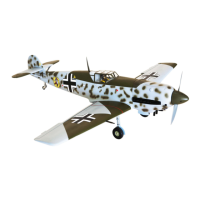
Key technical details of the Messerschmitt Bf 109E 60 model, including wingspan, weight, and engine type.
Provides an overview of the model and its intended use by SG MODELS, highlighting ease of flight and assembly.
Alerts users that the model is not a toy and assumes all risk for its use and potential injury.
Lists all parts included in the model kit for assembly, such as fuselage, wing set, and tail set.
Lists necessary external items for completing the model assembly, including engines, radios, and fuel.
Lists necessary tools and supplies for model assembly and finishing, such as glues, knives, and drills.
Step-by-step guide to hinging the model's flap control surface using C/A glue.
Detailed instructions for properly hinging the aileron control surface using C/A glue.
Guide to attaching the control horn to the aileron for control linkage, distinguishing between taller and shorter horns.
Guide to attaching the control horn to the flap for control linkage using the same method as the aileron.
Instructions for assembling the main wing sections and attaching the aluminum wing tube.
Steps to install the servos that control the ailerons into the wing, noting potential size adjustments.
Procedure for connecting the aileron servo to the control surface via pushrods using clevis and tubing.
Steps to install the servo that controls the flap into the fuselage, repeating prior procedures.
Procedure for connecting the flap servo to the control surface via pushrods, similar to aileron setup.
Instructions for assembling and installing the model's standard fixed landing gear components.
Steps to install the servo for the optional retractable landing gear system.
Securing landing gear doors and installing wheels onto the landing gear struts using collars and screws.
Information and recommendation for installing optional electric retractable landing gear units.
Instructions for inserting the plastic covers onto the model's wings.
Steps to install servos within the main fuselage structure, noting potential size adjustments.
Instructions for installing the adjustable servo connector onto the throttle servo arm.
Steps to install the engine's power switch into the fuselage.
Steps to install the receiver's power switch into the fuselage.
Guide to assembling the stopper for the fuel tank, including fuel pickup and vent tubes.
Steps for installing the assembled fuel tank into the model's fuselage, connecting lines to the engine.
Instructions for attaching the engine mount to the model's firewall using bolts and washers.
Detailed steps for securely mounting the engine onto the engine mount and firewall.
Instructions for fitting and securing the engine cowling to the fuselage using tape and drilling.
Steps for attaching the spinner and propeller assembly to the engine, ensuring clearance.
Instructions for hinging the elevator control surface using the same techniques as the ailerons.
Guide to attaching the control horn to the elevator for control linkage.
Detailed steps for fitting and securing the horizontal stabilizer to the fuselage.
Instructions for hinging the rudder control surface, referencing aileron methods.
Guide to attaching the control horn to the rudder for control linkage.
Steps for aligning and securely attaching the vertical stabilizer to the fuselage.
Procedure for connecting the elevator servo to the control surface via pushrods.
Procedure for connecting the rudder servo to the control surface via pushrods.
Instructions for mounting the tail wheel assembly onto the model.
Steps for preparing and installing the tail struts for the landing gear.
Instructions for installing the scale pilot figure and securing the canopy to the fuselage.
Guide to applying the model's decorative decals accurately onto the airframe.
Steps for connecting and securing the battery pack and receiver within the fuselage.
Instructions for securely attaching the assembled wing to the model's fuselage.
Explains the importance of balancing and how to find the correct center of gravity for safe flight.
Specifies the recommended control surface throw amounts for optimal flight characteristics.
Steps to prepare the model and radio system before the first flight.
Comprehensive checklist of checks before every flight to ensure safety and functionality.
| Brand | Seagull Models |
|---|---|
| Model | SEA278 |
| Category | Toy |
| Language | English |