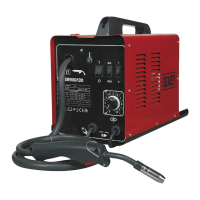
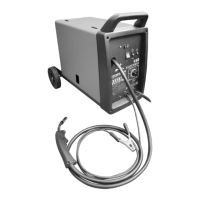
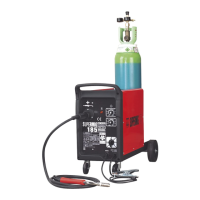
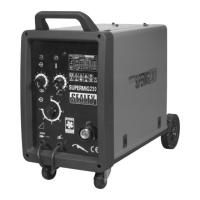
This document is an instruction manual for Sealey Power Welders, specifically covering ARC Welders across several models: 150XL, 150XTC, 160XTC, 200XTC, 250XT, and 250XT/DV. The manual provides essential information for the safe and effective operation, assembly, and maintenance of these welding machines.
Function Description:
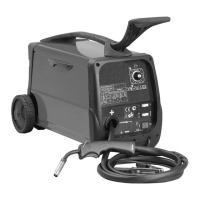
The Sealey Power Welders are ARC Welders designed for various welding tasks. They utilize either a single-phase or three-phase transformer with a drooping characteristic, suitable for welding with alternating current (AC) using stick electrodes. The welding current can be regulated steplessly via a screw-type control, with the current value readable on an amp graduated scale. The "XL" models are heavy-duty air-cooled arc welders, while the "XTC" and "XT" ranges feature Turbo Forced Air Cooling Systems for increased duty cycle and performance. The 250XT and 250XT/DV models offer Dual Voltage input (230V/415V) for higher performance and the 250XT/DV also has Dual Voltage output for a wider range of electrodes.
Important Technical Specifications:
150XL (Heavy Duty Air-Cooled Arc Welder):
- Welding Current: 40-150A
- Electrode Capacity: Ø1.6-3.2mm
- Cooling: Air Cooled
- Output Cable Ø: 10mm²
- No-Load Voltage: 48V
- Power Input/Efficiency: 230V 1ph, 3.35 kVA
- Weight: 20 kg
150XTC (Heavy Duty Turbo Cooled Arc Welder):
- Welding Current: 40-150A
- Electrode Capacity: Ø1.6-3.2mm
- Cooling: Turbo Fan
- Output Cable Ø: 16mm²
- No-Load Voltage: 48V
- Power Input/Efficiency: 230V 1ph, 3.35 kVA
- Weight: 20 kg
160XTC (Heavy Duty Turbo Cooled Arc Welder):
- Welding Current: 55-160A
- Electrode Capacity: Ø2-4mm
- Cooling: Turbo Fan
- Output Cable Ø: 16mm²
- No-Load Voltage: 49V
- Power Input/Efficiency: 230V 1ph, 5.98 kVA
- Weight: 21 kg
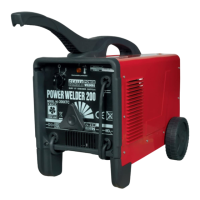
200XTC (Heavy Duty Turbo Cooled Arc Welder):
- Welding Current: 55-200A
- Electrode Capacity: Ø2-4mm
- Cooling: Turbo Fan
- Output Cable Ø: 16mm²
- No-Load Voltage: 52V
- Power Input/Efficiency: 230V 1ph, 5.98 kVA
- Weight: 27 kg
250XT (Super Duty Turbo Cooled Arc Welder):
- Welding Current: 35-170A (230V), 50-250A (415V)
- Electrode Capacity: Ø2-5mm
- Cooling: Forced Air
- Output Cable Ø: 25mm²
- No-Load Voltage: 48V
- Power Input/Efficiency: 230V 1ph, 415V 3ph, 6 kVA
- Weight: 48 kg
250XT/DV (Super Duty Turbo Cooled Arc Welder with Dual Voltage Output):
- Welding Current: 32-170A (230V), 80-250A (415V)
- Electrode Capacity: Ø2-5mm
- Cooling: Forced Air
- Output Cable Ø: 25mm²
- No-Load Voltage: 48V/70V
- Power Input/Efficiency: 230V 1ph, 415V 3ph, 6 kVA
- Weight: 48 kg
General Electrical Safety:
- All electrical equipment must be checked for safety before use, including power supply leads, plugs, and connections.
- An RCCB (Residual Current Circuit Breaker) should be in the main distribution board, and an RCD (Residual Current Device) is recommended for all electrical products, especially portable ones.
- The Electricity At Work Act 1989 requires portable electrical appliances used in business premises to be tested by a qualified electrician at least once a year (PAT).
- The Health & Safety at Work Act 1974 makes owners responsible for appliance safety.
- Insulation on cables and the product must be safe.
- Cables must be protected against short circuits and overload.
- Regularly inspect power supply, leads, plugs, and electrical connections for wear and damage.
- Ensure the product voltage matches the power supply and that plugs are fitted with the correct capacity fuse (minimum 13 AMP fuse for UK 3-pin plugs, or a 30 AMP fused supply for models without a fitted plug).
- DO NOT pull or carry the appliance by its power supply or output leads.
- DO NOT pull power plugs from sockets by the power cable.
- DO NOT use worn or damaged leads, plugs, or connections. Replace or repair immediately.
- For UK 3-pin plugs, ensure correct wiring: GREEN/YELLOW to earth (E), BROWN to live (L), BLUE to neutral (N).
- Double insulated products (marked with a symbol) have only live (BROWN) and neutral (BLUE) wires; DO NOT connect them to earth.
- Cable extension reels should be fully unwound and ideally fitted with an RCD. Recommended cable section is at least 1.5mm², preferably 2.5mm².
General Safety Warnings:
- Arc welding produces dangerous sparks, fused metal projectiles, and fumes.
- Always unplug from the mains power supply before maintenance or service.
- Keep the welder and cables in good working order.
- Use genuine parts for repairs.
- Keep the welder clean for best performance.
- Locate the welder in an adequate working area with sufficient ventilation to disperse harmful welding fumes.
- Keep the work area tidy, free from unrelated materials, adequately lit, and have a fire extinguisher at hand.
- ALWAYS use an appropriate shaded lens welding face mask, safety welding gauntlets, and dry oil-free safety protective clothing to protect from sparks, hot droplets, and UV rays.
- Ensure good ventilation and free airflow around the welder.
- DO NOT weld near flammable or combustible materials.
- Welding containers or pipes that held dangerous gases or substances may explode or burn.
- Materials cleaned with chlorinated solvents or varnished surfaces pose a danger of toxic fumes.
- Keep unauthorised persons at a safe distance.
- Remove ties, watches, rings, and other jewellery, and contain long hair.
- DO NOT use the welder for purposes other than its design.
- DO NOT use the welder in damp or wet locations.
- DO NOT stand the welder on a metal workbench, car bodywork, or similar object.
- DO NOT touch live metal parts of the torch or electrode while the machine is switched on.
- DO NOT weld without proper safety gear (head shield, gauntlets, clothing).
- DO NOT operate the welder while under the influence of drugs, alcohol, or other medication, or if fatigued.
- DO NOT operate the welder if it or its cables are damaged.
- DO NOT allow untrained persons to operate the welder.
- DO NOT pull the welder by the cable or electrode holder. Protect cables from sharp or abrasive items, heat, and do not stand on them. Coil slack cables neatly.
- DO NOT touch the electrode holder or workpiece immediately after welding; allow to cool.
- DO NOT open the cover of the machine. Switch off and remove the plug from the power supply after use.
Usage Features:
Assembly:
- Unpack and check contents.
- Assemble wheels, handle, feet, and fit the lens inside the face mask (Fig 1a,b,c & Fig 2).
- Assemble the work clamp to the cable associated with the work collet symbol (Fig 3).
- Assemble the electrode holder to the cable associated with the manual arc welding symbol (Fig 4). For terminal style connections, assemble eyelets to cables.
Controls & Symbols:
- Thermostatic Protection: Light indicates overheating; machine cuts out and can be used again when cooled.
- Regulation Scale: For adjusting welding current.
- Rain Warning Symbol: DO NOT use in rain or snow.
- Electro-Fan: Cools the machine when running.
- Switch Position Settings: For different voltage inputs (e.g., 230V, 400V).
- Electrode Holders: Outlet for connecting the electrode holder.
- Manual Arc Welder Symbol: Indicates manual arc welding.
- Work Collet Symbol: Outlet for connecting the work clamp.
- Earth Clamp Symbol: Indicates the earth clamp connection.
- Drooping Characteristic Symbol: Indicates the welding power source characteristic.
- Single Phase Transformer Symbol: Indicates a single-phase power source.
- Rated No Load Voltage (Uo): 45-49V.
- Frequency: 50/60Hz.
- Rated Welding Current (I2): Varies by model and electrode diameter (e.g., 55A for 2.0mm, 160A for 4.0mm).
- Duty Cycle (nc/nc1, nh/nh1): Number of electrodes weldable before thermostat intervention or in one hour.
- Rated Supply Voltage (U1): 230V (or 415V for 250XT/DV).
- Mains Fuse Required: 16A, 26A, 32A, or 11 max (depending on model and current).
- International Standard (IP 21): Degree of protection against moisture ingress.
- Class of Insulation (H): Indicates the insulation class.
- Rated Maximum Supply Currents: Indicated by an arrow.
Operating Instructions:
- Ensure the machine is turned off from the mains power supply.
- Create a complete circuit by joining the earth clamp to a clean, ground point on the workpiece. DO NOT join to painted or wooden surfaces.
- Connect the earth lead to the machine.
- Insert the electrode into the electrode holder, ensuring a good connection, and connect the other end to the machine.
- Keep welding surfaces clean and free from grease or oil.
- Set amperage using the control wheel according to the visual scale for amperage/electrode diameter.
- Ready to Weld: Wear a full face welding mask, gauntlets, and protective clothing. Wear goggles whilst chipping slag.
- DO NOT switch on power until ready to weld. Practice on scrap metal.
- Tap the electrode lightly to strike an arc and maintain a steady gap (approx. 2mm) between the electrode and workpiece. DO NOT hit the workpiece. Withdraw with a clean movement at the end of the run.
- If the electrode sticks, pull sharply left then right to free it.
- After welding, chip off slag with a chipping hammer (wear goggles).
- Disconnect welder from mains supply before resetting the electrode holder.
- Use pliers to remove hot consumed electrodes or to move hot welded pieces.
- Thermostatic Control: The welder is air-cooled. Larger welding rods require more current, causing the machine to heat up and temporarily shut off to protect the transformer from overheating. The machine will cut out faster with larger rods.
- Various Welding Methods:
- Thin Metal (up to 7mm): Keep pieces 2-3mm apart. A second run can be added for extra strength. For very thin metal, the lowest amperage may be too fierce; a brazing kit (Sealey Part Number "AK4") may be needed.
- Medium Thickness (up to 30mm): Make a single butt joint, filling the space with several layers of weld.
- Thick Metal (over 30mm): Use a double "V" butt joint, filling the space with several layers of weld.
Maintenance Features:
- WARNING! Ensure the welder is disconnected from the electrical mains power supply before any service or maintenance.
- Keep the welder clean and dry at all times using a dry cloth.
- Keep all electrodes clean and ensure all cables are in good condition.
- Use an authorised service agent for any other maintenance or service requirements.
Troubleshooting:
- Burning through thin metal: The lowest amperage setting may be too fierce for very thin sheet metal. A brazing kit (AK4) may be needed.
- Machine frequently cuts out: This can be due to overworking the welder, activating the thermostatic control. It can also be caused by a sticking electrode. The machine will automatically reset when cooled.
- Difficulty in striking an arc: Possible causes include a damp electrode (heat to 60°-70° before use) or using the wrong type of rod.