ENGLISH
8
STEP 2:
PREPARE THE VENTING SYSYTEM
NOTE: The ductwork you need for outside ventilation is not included with your oven. The standard ductwork
fittings and length are shown in Figure 9, page 9.
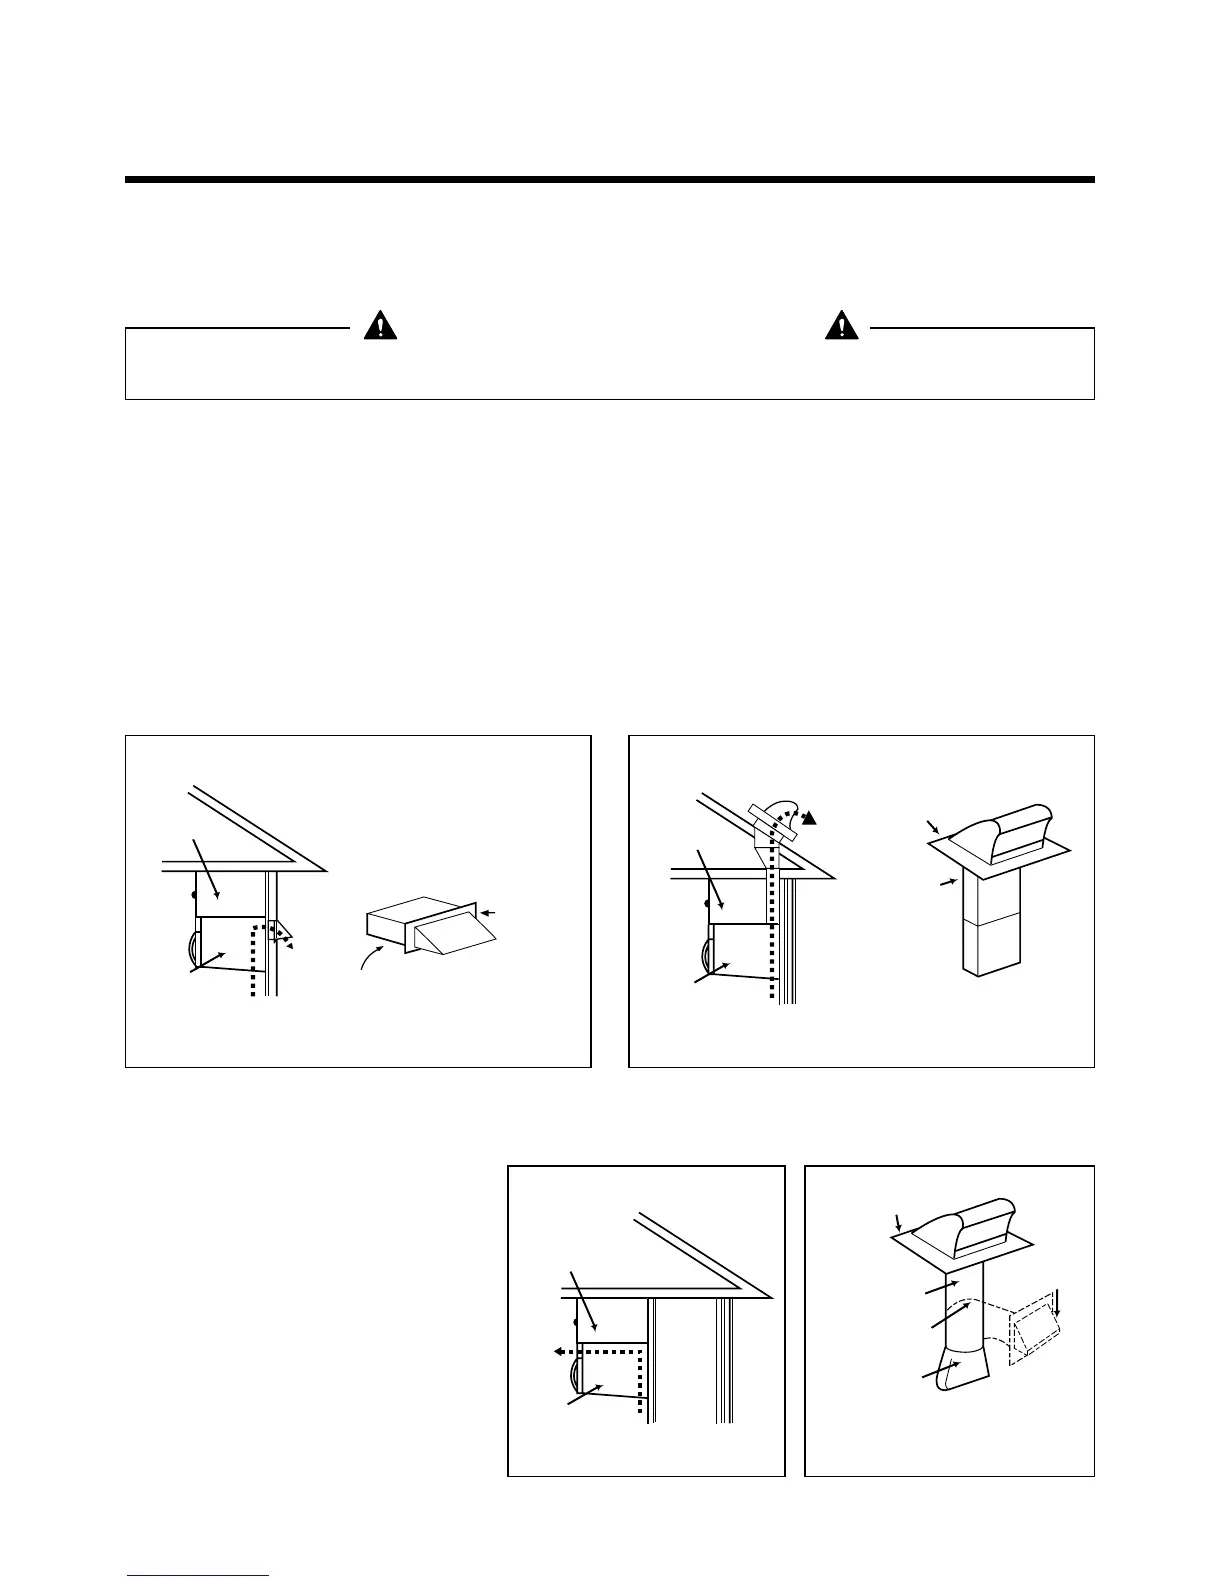
You may vent your oven in one of three ways:
Roof Venting If your oven is located on an outside wall near the roof, as in Figure 6 (3-1/4" x 10" duct) and
Figure 8 (6" round duct.)
Wall Venting If your oven is located on an outside wall on the first floor of your house, as in
Figure 5 (3-1/4" x 10" duct) and Figure 8 (6" round duct.)
Room Venting If your oven is located on an inside wall of your house, as in Figure 7.
NOTE: If you choose the rear exhaust method (roof or wall venting), be sure there is enough clearance within
the wall for the exhaust duct.
REMEMBER AS YOU INSTALL THE VENTING:
●
Keep the length of the ductwork and the
number of elbows to a minimum to
ventilate your oven efficiently.
See examples on page 9.
●
Keep the size of the ductwork the same.
●
Do not install two elbows together.
●
Use duct tape to seal all joints in the duct
system.
●
Use caulking to seal the exterior wall or
roof opening around the cap.
 Loading...