Loading the Front Spacers
used, install a short Actuator Shaft to lock
the Hanging Clamp in place. In this case
the camera will need to be switched on
before closing the housing. The camera
need to operate continuously on with the
may damage the Hanging Clamp
Use the Mini Wrench to lock the actuator
shaft in place and tighten by turning a further
According to the shape and size of the
ter button, select the best Pin Pad and
press it onto the tip of Actuator Shaft.
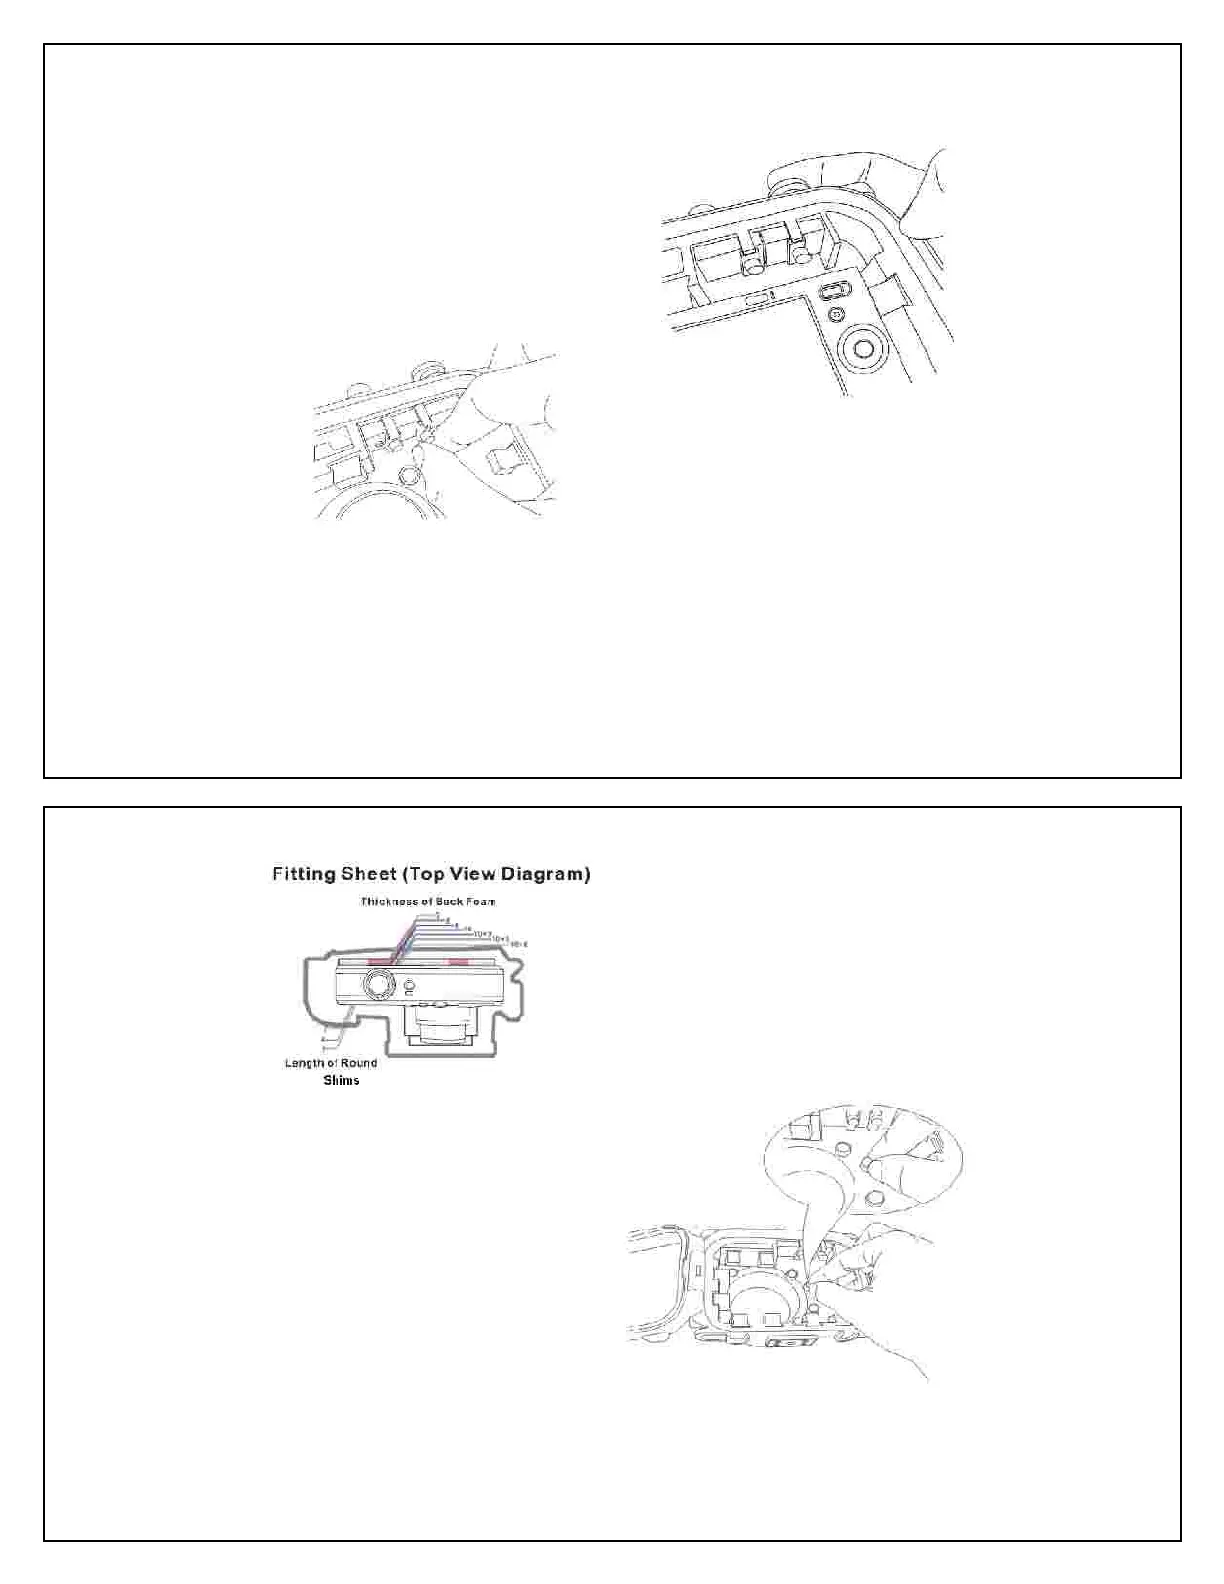
Record the colors and numbers of the
touching lines for the front and rear. The
front number refers to the correct length of
the Front Spacers and back number to t
correct thickness of the Back Foam Pad
Select four or more Front Spacers of correct
length and apply them to the appropriate
circular receptacles at the front.
Load the camera to test. It should fit snuggl
inside the housing. Turn on the camera
and the lens should extend fully without
Place the camera standing, with the lens
facing you, and powered “On” in “Photo
Place the camera on the Fitting Sheet (Top
View) with the front of the protruding lens
within the outline of the lens in the diagram.