nstalling the Dove Tail Shims & Actuator
Installing the Actuator Shafts
Choosing the correctly matched Dove Tail
Shims and Actuator Shafts
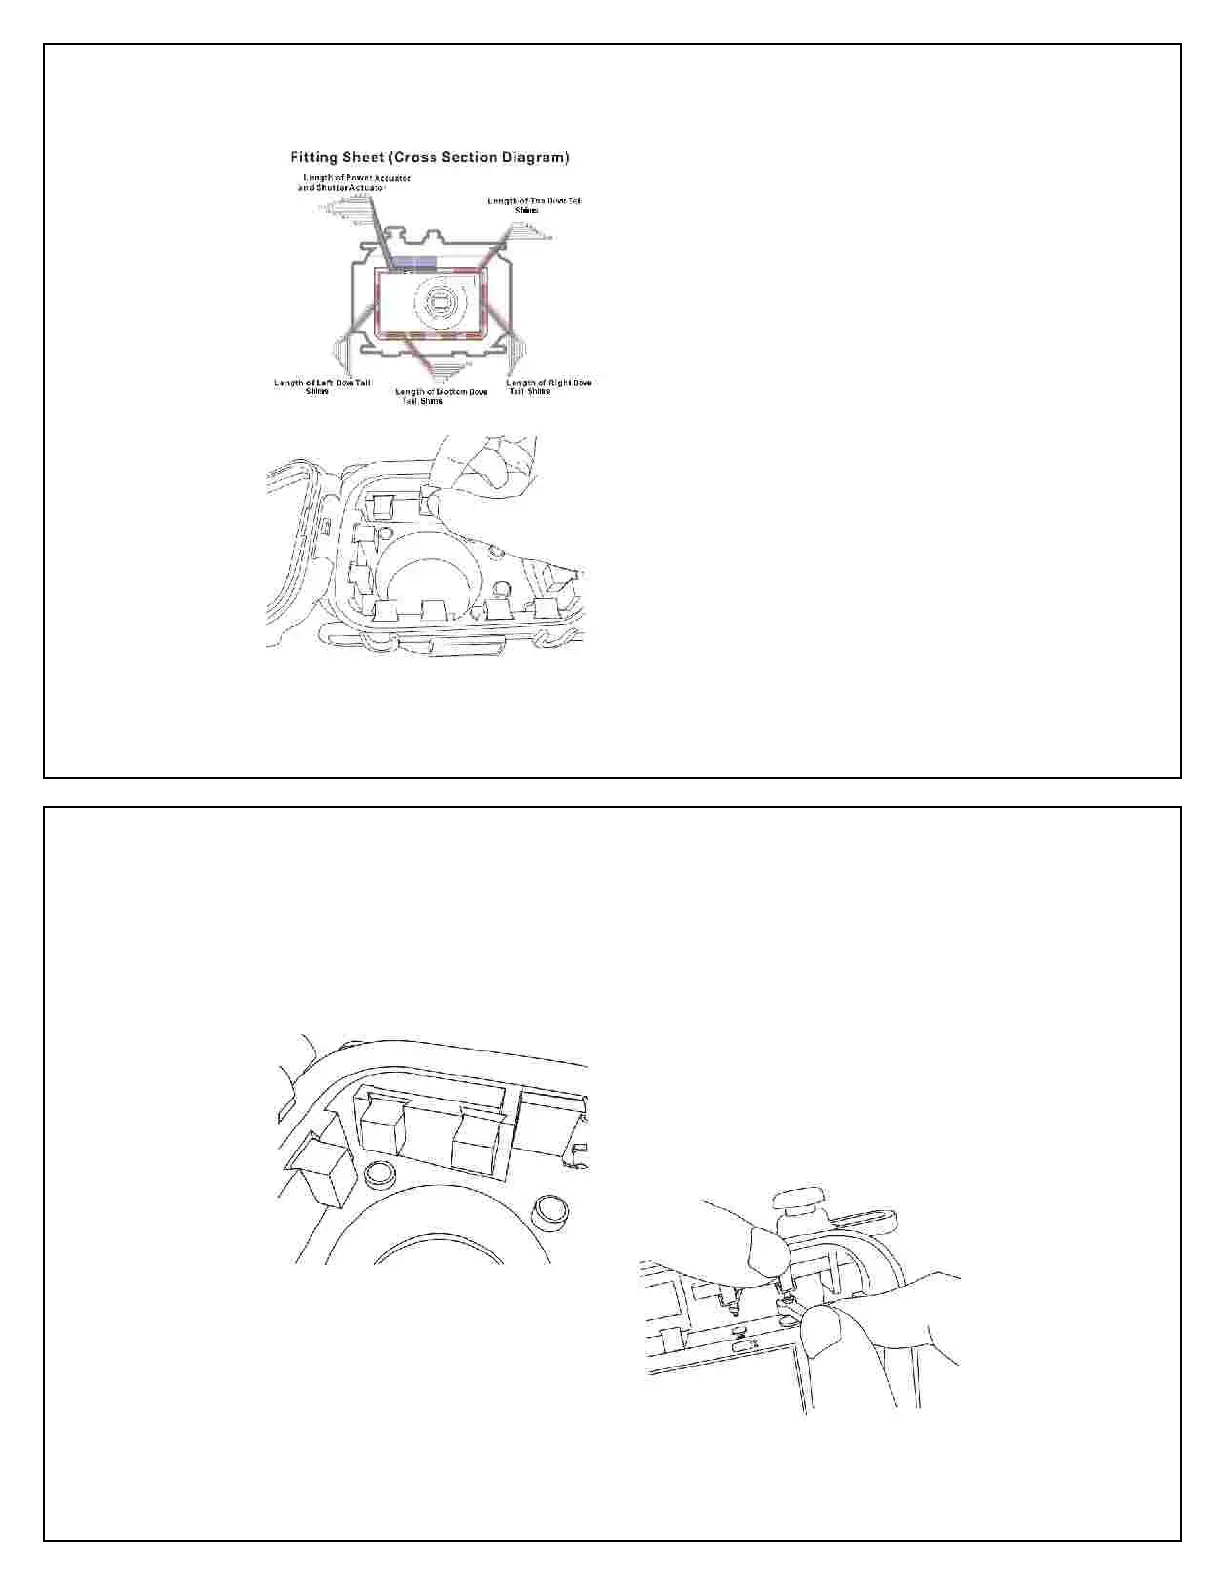
Lay camera on the Fitting Sheet (Cross
Section Diagram) on a flat surface facing
up with the camera switched off
Position the lens of the camera as close to
hairs on the Fitting Sheet as po
sible, but ensure that the camera is inside
If the camera is compatible with Seashell,
the camera will fit within the fitting lines with
the lens reasonably near the center cross
hairs. Ideally, the Shutter and Pow
of the camera are within the range ind
cated on the Fitting Sheet.
Note: The colors and numbers of the fitting
lines on the four sides of the camera. The
numbers refer to the thickness. Select the
Dove Tail Shims with the corresponding
thickness and install them accordingly i
Press the corresponding Dove Tail Shims
into the appropriate places in the front
Insert camera into the Seashell housing to
ensure a good fit. Change Dove Tail Shims
Record the colors and numbers of the
touching lines for the power button and
shutter button. The numbers refer to the
correct lengths for the Actuator Shafts to be
used for the power button and shutter button
If replacement is needed, first
installed Actuator Shaft by unscrewi
correct Actuator Shaft gentl
into the nut inside the Hanging Clamp.
Load the camera into the front housing.
Mentally note the correct position of the
Actuator Shaft. Remove the camera.
the Actuator Shaft to the correct positio
verify the position. Adjust if necessary until
the Actuator Shaft is directly ov