Do you have a question about the Seaward Apollo Series and is the answer not in the manual?
Register your Apollo to receive an additional 12 months warranty and full access to Product Support.
Access the firmware update URL for Apollo Series instruments.
Prepare scanner by fitting batteries and scanning setup codes 1 to 8 and code 9 for flashing blue light.
Access the Bluetooth menu on the Apollo by pressing 'F4' and selecting option '3'.
Initiate Bluetooth search on Apollo using 'F2' when scanner has a flashing blue light.
Select the scanner device, named "OPL2724_..", from the dropdown list.
Press 'F4' to save the new Bluetooth configuration settings.
Use the configured scanner to enter information such as asset IDs.
Scan the 'ZZ' barcode to place the scanner into setup mode.
Scan 'ENAU' to enable the auto-connect feature for the scanner.
Scan 'PC05' to enable manual connection by pressing the scanner trigger.
Scan 'PD08' to enable manual disconnection by pressing the scanner trigger.
Scan 'AD01' to activate Power Save Mode, disconnecting after 10 minutes of inactivity.
Scan 'CA05' to enable auto-reconnect functionality for the scanner.
Scan 'BBD' to make the scanner connectable via the trigger.
Scan 'ZZ' again to end the configuration sequence.
Scan the provided barcode sequence to make the Bluetooth device discoverable.
This document, Application Note 0051, provides a comprehensive guide for setting up and pairing the older model of Seaward Bluetooth scanner, specifically the cream or white version, with your Apollo Series instruments. The guide is designed to assist users through the entire process, from initial registration and configuration to the final pairing, ensuring seamless integration for tasks such as entering asset IDs. It emphasizes checking all aspects of the setup before seeking technical support, highlighting the importance of a methodical approach to avoid common issues.
The primary function of this device is to enable efficient data entry, particularly for asset identification, into the Apollo Series instruments using Bluetooth technology. This old Bluetooth scanner acts as a peripheral input device, allowing users to quickly scan barcodes and transfer the information directly to the Apollo unit, thereby streamlining data collection processes in various professional environments. The scanner is designed to enhance productivity by reducing manual data entry errors and speeding up inventory or asset management tasks.
To begin the setup process, users are advised to first register their Apollo instrument. This registration not only provides an additional 12 months of warranty but also grants full access to Product Support, which can be crucial for troubleshooting or further assistance. Registration can be completed online via the provided URL or by filling out and returning the "Care and Support" card included with the product. Following registration, it is essential to ensure that the Apollo Series instrument's firmware is up to date. The document directs users to a specific URL for downloading the latest firmware, emphasizing the importance of keeping the device's software current for optimal performance and compatibility with the scanner.
The initial configuration of the scanner itself is a critical step, detailed meticulously in the guide. Users must first ensure that the batteries are correctly fitted and that the scanner is operational. The core of the configuration involves scanning a series of setup codes, numbered 1 through 8, in the correct sequence. These codes are provided on a separate page within the document, presented as distinct barcodes. Each successful scan of a barcode is confirmed by an audible beep from the scanner, indicating that the command has been registered. After scanning codes 1 through 8, the user is instructed to scan code 9. This final code triggers a visual cue on the scanner: its light will begin flashing blue, signifying that it is ready for the next stage of pairing.
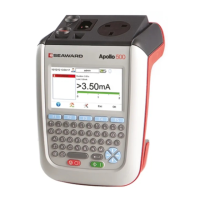
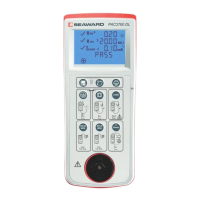
Once the scanner is configured, the focus shifts to the Apollo instrument. From the Apollo's "Home Screen," the user needs to press the "F4" button, which typically corresponds to the "Menu" option. Within the menu, the "Bluetooth" option must be selected, usually by pressing key number "3." A successful activation of Bluetooth on the Apollo is indicated by the appearance of a 'Bluetooth active' symbol next to the battery symbol on the display. This visual confirmation assures the user that the Apollo is ready to search for and connect with Bluetooth devices.
The next step involves initiating a Bluetooth search on the Apollo. This is done by pressing the "F2" button, designated as the "Bluetooth search" button. A helpful tip provided in the guide suggests that it is beneficial if the scanner is the only Bluetooth device turned on at this time. This minimizes interference and ensures that the Apollo can easily discover the intended scanner. If the scanner's light is not flashing blue at this point, users are advised to repeat step 3 of the initial configuration to re-enable its discoverability.
Upon successful discovery, the user must select the "Bar Code" field on the Apollo using the arrow keys. From the dropdown menu that appears, the device named "OPL2724_..." should be selected. This name uniquely identifies the old Seaward Bluetooth scanner. After selecting the correct device, the user must press "F4" again to save the new Bluetooth configuration. This action finalizes the pairing process, establishing a stable connection between the scanner and the Apollo instrument.
With the configuration saved, the scanner is now ready for use. Users can immediately begin utilizing the scanner to enter information, such as asset IDs, directly into the Apollo. This capability significantly enhances the efficiency of data collection, allowing for rapid and accurate input of barcode-encoded information.
Maintenance features, while not explicitly detailed as a separate section, are implicitly covered through the emphasis on battery management and firmware updates. Ensuring batteries are correctly fitted and functional is a basic but crucial maintenance step for the scanner. Similarly, keeping the Apollo's firmware updated can be considered a preventative maintenance measure, ensuring compatibility and optimal performance with the scanner. The guide's focus on a methodical setup process also contributes to long-term usability by preventing common configuration errors that could lead to operational issues. The advice to register the Apollo for warranty and product support also provides a pathway for maintenance and repair services should they be needed.
The document also includes detailed visual aids for the initial configuration of the scan steps. These are presented as a series of barcodes, each corresponding to a specific command:
Additionally, a ninth barcode, labeled "+ - D S C O - +", is provided on the third page with the instruction "Scan to make device discoverable." This barcode likely serves a similar function to step 7, ensuring the scanner is visible for pairing.
In summary, this manual provides a clear, step-by-step guide for integrating the old Seaward Bluetooth scanner with Apollo Series instruments. It covers everything from initial device registration and firmware updates to detailed scanner configuration and Bluetooth pairing. The emphasis on methodical execution, combined with visual aids and troubleshooting tips, ensures that users can successfully set up their devices for efficient and accurate data collection, ultimately enhancing productivity in their respective fields. The document implicitly addresses maintenance through its focus on correct setup and the availability of support resources.
| Display | LCD |
|---|---|
| Connectivity | USB, Bluetooth |
| Power Supply | Rechargeable battery or mains power |
| Insulation Resistance | 250V, 500V |
| Run/Load Test | Yes |
| RCD Test | Yes |
| Safety Standards | EN 61010 |
| Leakage Current Tests | AC/DC leakage current measurement |