Installing and adjusting the blade
● Take the supplied cutting blade and place it in the blade holder in such a way, that the sharp
side extends at the front.
● Now set the cutting depth by turning the screw at the upper end of the blade holder.
● Initially, the depth is set correctly if you can carefully move your fingertip across the blade
and feel only a light scratching. Since the depth adjustment for the blade depends on the
material, it may be necessary to adjust it later.
● Secure the blade setting by tightening the gold lock nut.
● Press the pin on the rear end of the blade holder to remove and replace the blade at any
time. Caution - risk of injury!
The various material thicknesses require different blade settings or even special blades; it may
therefore be necessary to repeat the adjustment described above.
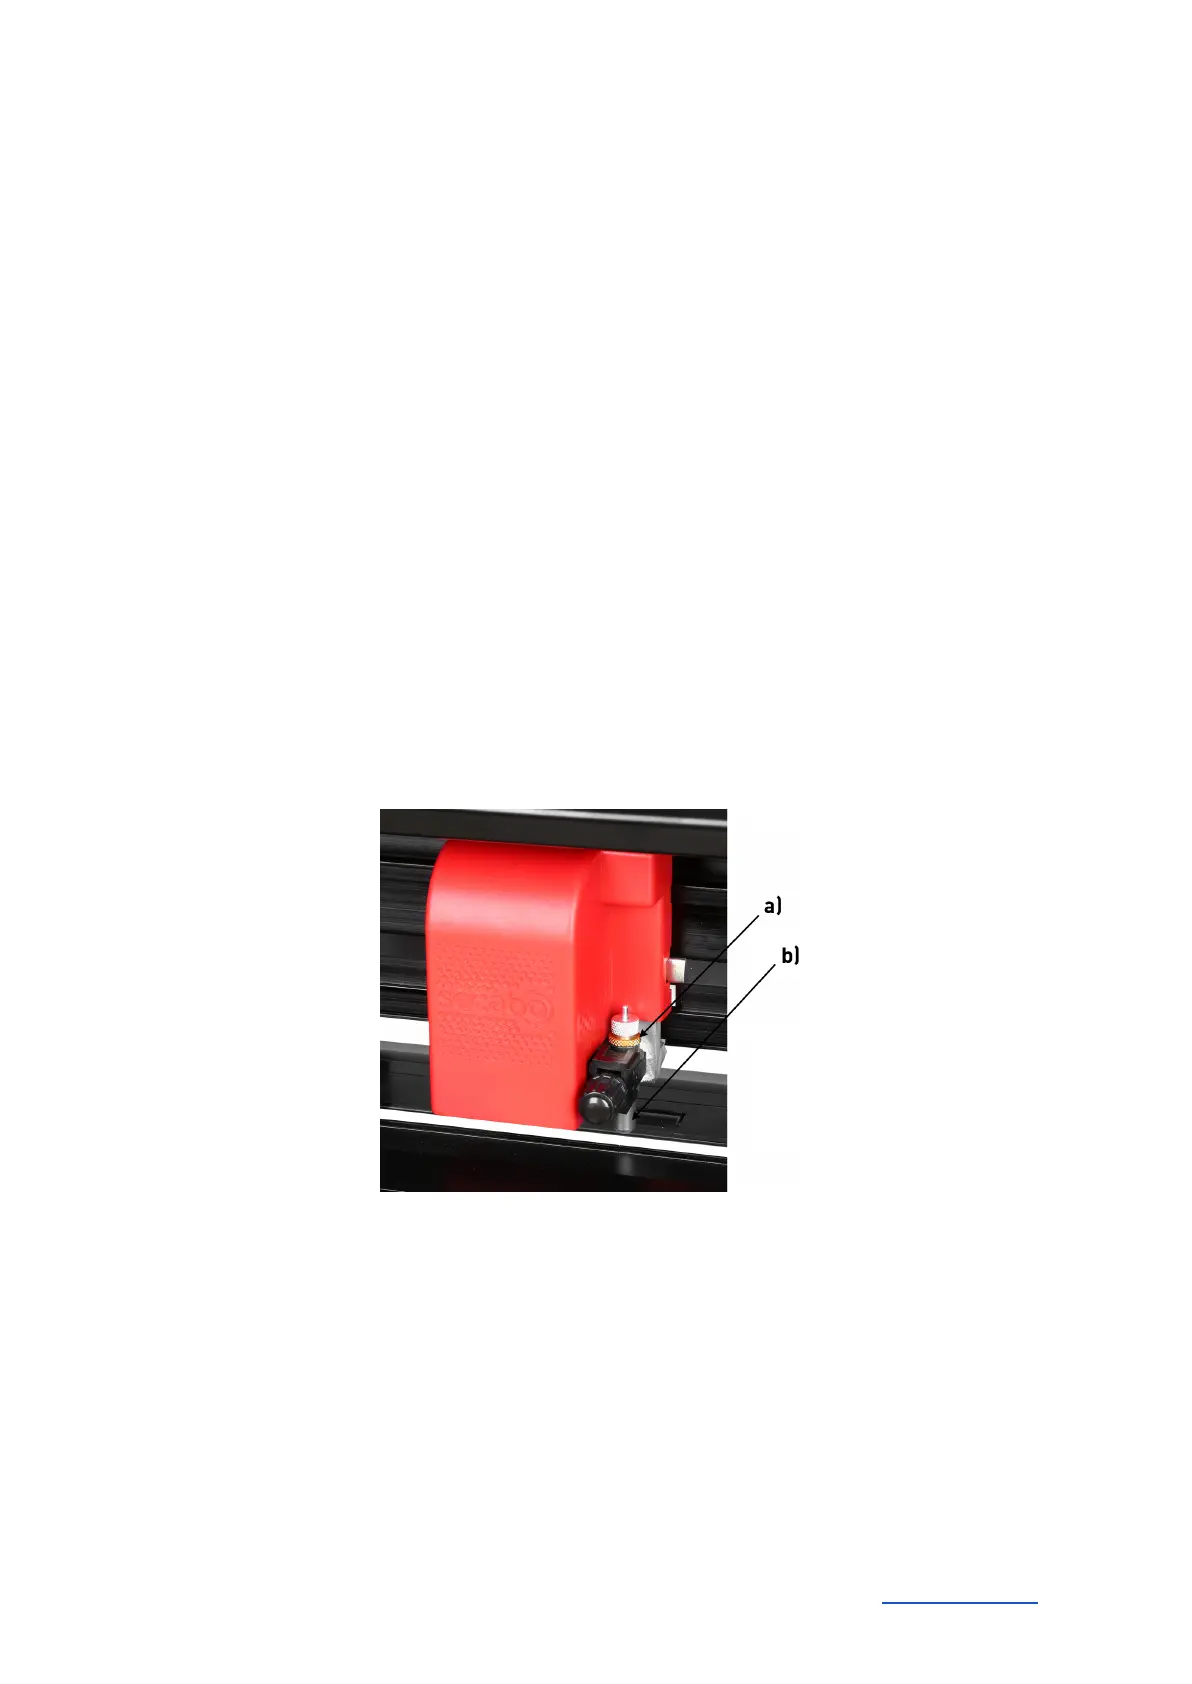
Inserting the blade holder
● First, sufficiently loosen the clamping screw for the blade holder on the cutting head.
● Next, press down the blade holder from above into the hole on the right side until there is
contact and pull the lock nut tight. In doing so, please ensure that the blade holder is also
secured correctly from above by means of the fixture provided for this purpose.
a) Clamp
b) Blade holder
Inserting the film
● Always insert the material into the device from the rear.
● Pull the film up to the cutting bar to correctly set the zero point.
● If inserting a roll instead of a film sheet, you can use the supplied holder integrated into the
base to ensure the film is rolled off cleanly.
Secabo GmbH Hochstatt 6-8 85283 Wolnzach Germany mail@secabo.com www.secabo.com
10