GETTING
STARTED
ON
YOUR
SEGA
GENESIS
SYSTEM
What's
in
Store
for
the
Future
Rear
Connectors
on
The
Miracle
2
Please fill out your Registration Card and mail it right away. This is the
only way we can keep in touch and let you know about:
Future software upgrades.
Add-on products, such as
SONG COLLECTIONS.
Advanced courses.
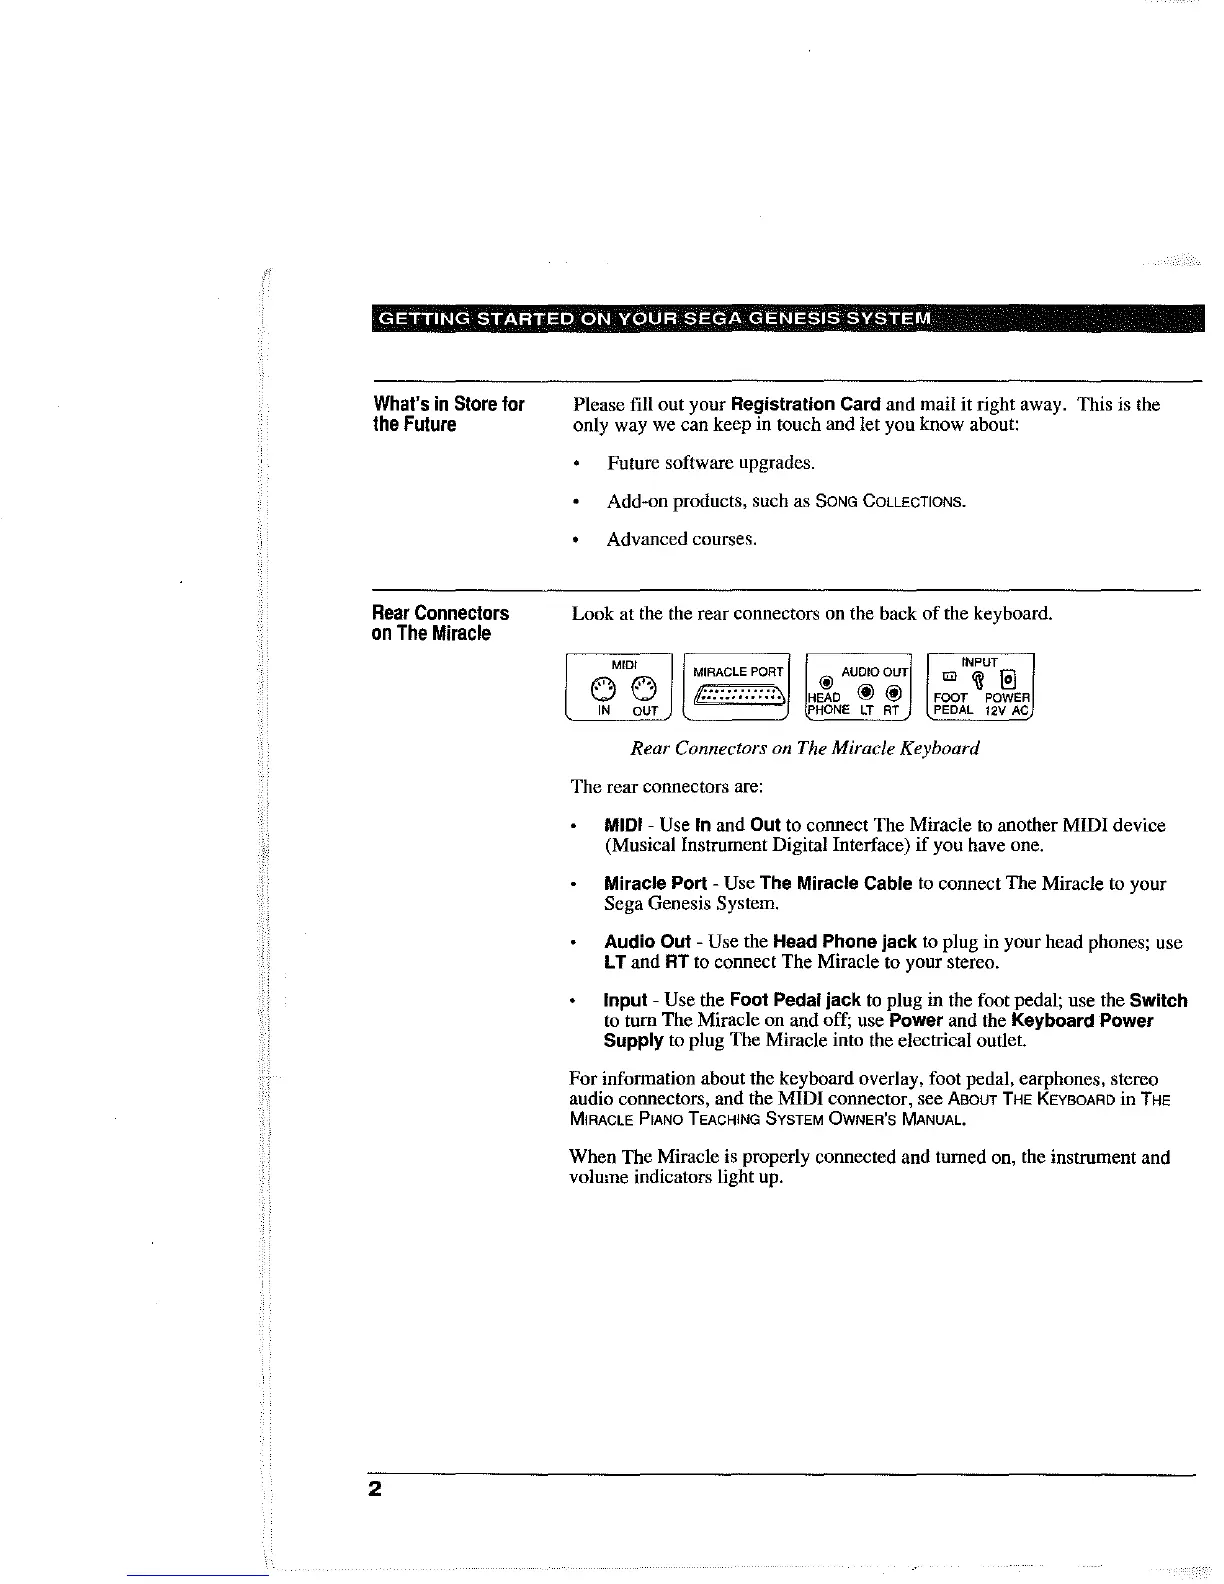
Look at the the rear connectors on the back
of
the keyboard.
MIDI
0
0
IN
OUT
MIRACLE
PORT
ii:::::::::::'"
@ AUOIOOUT
HEAD
@ @
PHONE
LT
AT
INPUT
tm
~
@]
FOOT
POWER
PEDAL 12V
AC
Rear Connectors on The Miracle Keyboard
The rear connectors are:
MIDI - Use In and Out to connect The Miracle to another MIDI device
(Musical Instrument Digital Interface)
if
you have one.
Miracle Port - Use The Miracle Cable to connect The Miracle to your
Sega Genesis System.
Audio Out - Use the Head Phone jack to plug in your head phones; use
L T and
RT
to connect The Miracle to your stereo.
Input - Use the Foot Pedal jack to plug in the foot pedal; use the Switch
to turn The Miracle on and off; use Power and the Keyboard Power
Supply to plug The Miracle into the electrical outlet.
For
information about the keyboard overlay, foot pedal, earphones, stereo
audio connectors, and the
MIDI
connector, see
ABOUT
THE KEYBOARD
in
THE
MIRACLE PIANO TEACHING SYSTEM OWNER'S MANUAL.
When The Miracle is properly connected and turned on, the instrument and
volume indicators light up.