62
CONTROL UNIT
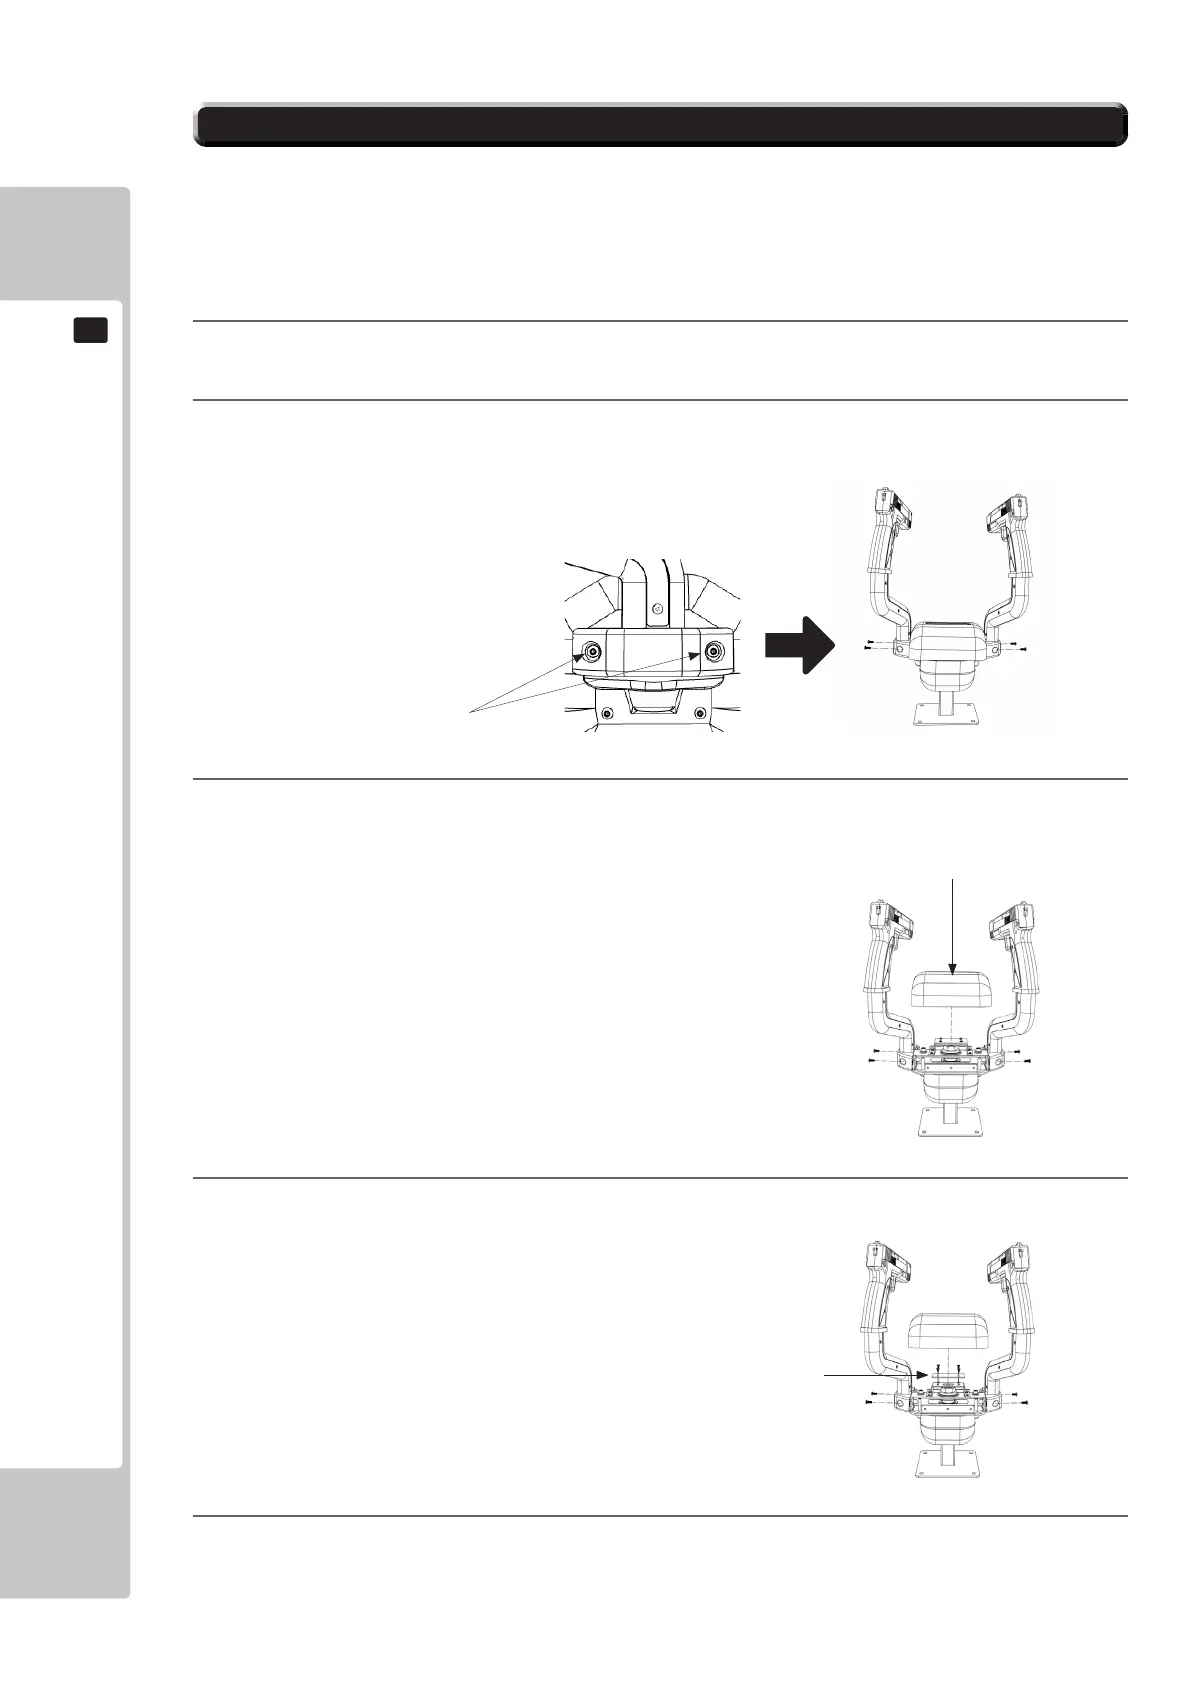
11
2
Remove the (4) Torx tamperproof xings from both sides of the controller
3
Remove the (4) Torx tamperproof xings from both sides of the controller to remove the center cover
4
Disconnect the connectors from around the GUN I/O PCB. Remove the (4) Pozi screws and carefully re-
move the GUN I/O PCB
5
Replace the GUN I/O PCB and reassemble in reverse order
In instances whereby either or both controllers malfunction a possible cause is the GUN I/O PCB mounted beneath
the center controller cover.. On the rare ocassions where the GUN I/O PCB fails, please follow these instructions for
removal
11-2 REPLACING THE CONTROLLER I/O
1
Turn OFF the power to the machine and remove the Power cable
Torx Tamperproof (2)
Cover
Gun I/O PCB
 Loading...