4
SETTING UP
5
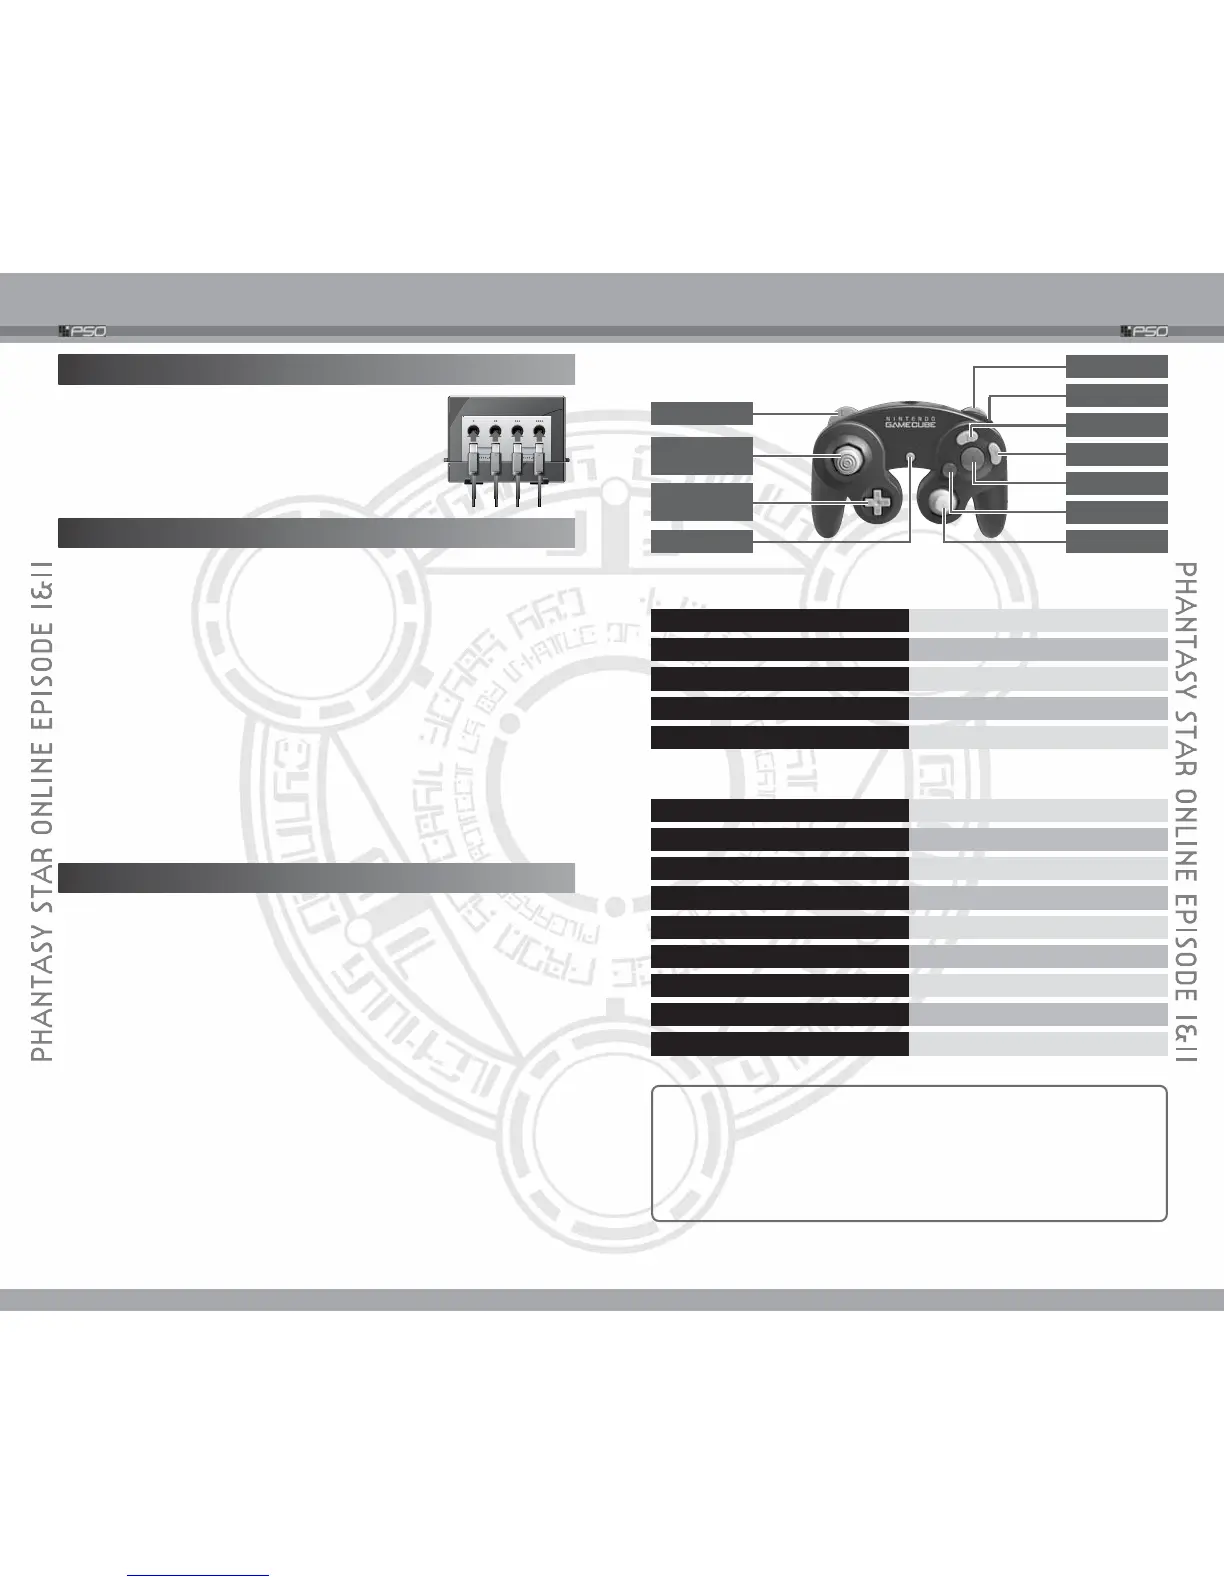
CONTROLS
HARDWARE SETUP
PSO is a one to four player game. Connect the
Nintendo GameCube™ Controllers to the Controller
Socket 1, 2, 3 and 4 (depending on the number of
players participating) in order. You will not be able to
play properly with the controller connected out of order.
The Nintendo GameCubeTM Component Video Cable is available only
through Nintendo, visit www.nintendo.com or call 1-800-255-3700. This
software is compatible with progressive scan video output, using the
Component Cable (sold separately). Please refer to the instruction manual of
Nintendo GameCube™ for the direction on how to connect.
1
Connect your TV set and Nintendo GameCube™ with the Component Cable.
2 Place the PSO Game Disc inside the GameCube™, close the Disc Cover,
and press the POWER Button.
3 After the Nintendo GameCube™ logo is displayed, press and hold
the b Button.
4 You will be asked whether to display in Progressive Mode. Select “Yes”
and the game will be displayed with Progressive Scan output.
Once the Progressive Mode is selected, unless the video cable is changed, the
Display Mode Select screen will be displayed each time the power is turned on,
without pressing the b Button. Also, depending on the type of television set you
are using, the horizontal/vertical ratio of the screen may be changed.
USING PROGRESSIVE SCAN TV
SAVE FILES
PSO is a Nintendo GameCube™ Memory Card compatible game (Memory
Card sold separately). There are 6 types of save files, some being created
automatically on the first time PSO Game Disc is started up. Never turn OFF
the
Nintendo GameCube™ power or remove the Memory Card while the
game data is being saved. Please also note that, when you erase either the
System
File or the Character File, you may not be able to use all remaining
save files.
■ SAVE FILES THAT ARE CREATED AUTOMATICALLY
(Can be used only with the Memory Card inserted to Memory Card Slot A.)
System File 3 blocks
Character File 11 blocks
Guild Card File 10 blocks
■ SAVE FILE FOR NETWORK SETTINGS
SEGA Network Info. 4 blocks
■ OTHER FILES
Snapshot File 15 blocks
(Can be used only with the Memory
Card inserted to Memory Card Slot B.)
Download Quest Files Size vary according to the size of
the Quest.
START/STOP / z Button
DISPLAY THE MAIN MENU
START/PAUSE GAME START
Control Stick/+ Control Pad/C Stick
SELECT
a
Button
GAME START
b Button
CANCEL
l/r Button
SWITCH BETWEEN PAGES
Control Stick MOVE CHARACTER
+ Control Pad/C Stick SELECT
a
Button
ENTER/USE CENTER ACTION MENU
b
Button
CANCEL/USE LEFT ACTION MENU
x Button
USE RIGHT ACTION MENU
y
Button
DISPLAY SOFTWARE KEYBOARD
l
Button
CAMERA VIEW/SWITCH BETWEEN PAGES
r Button
SWITCH BETWEEN PAGES/TOGGLE ACTION MENU
■ TITLE SCREEN/GAME MENUS/MENU ITEM SELECTIONS
■ VISUAL LOBBY/WITHIN THE CITY/IN BATTLE
Anytime during the gameplay, simultaneously press and hold the b
Button, x Button, and the START/PAUSE to return to the Title Screen.
✻ For detailed description of the controls, see each section, starting
with p.18.
✻ The functions of the l/r Buttons can be switched via Button Config
under Options of the Main Menu (➝p.51).
l
Button
Control
Stick
+ Control
Pad
START/PAUSE
r
Button
z
Button
C Stick
b
Button
a
Button
x
Button
y
Button
 Loading...