2 Diagram 3 Adjustment
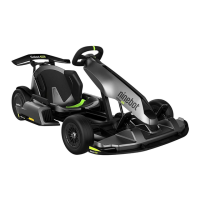
Handbrake handle
Seat
Steering wheel
compartment
Throttle (right)
(left)
Status indicator
Headlight
Seat belt
Waist protector
Rear spoiler
Scalable structure
of frame
Steering wheel
quick-release components
Electrical connection
cable plug
Attachment straps
Connection tube
Support rods
(with frame adjustment marking)
Adapter pad
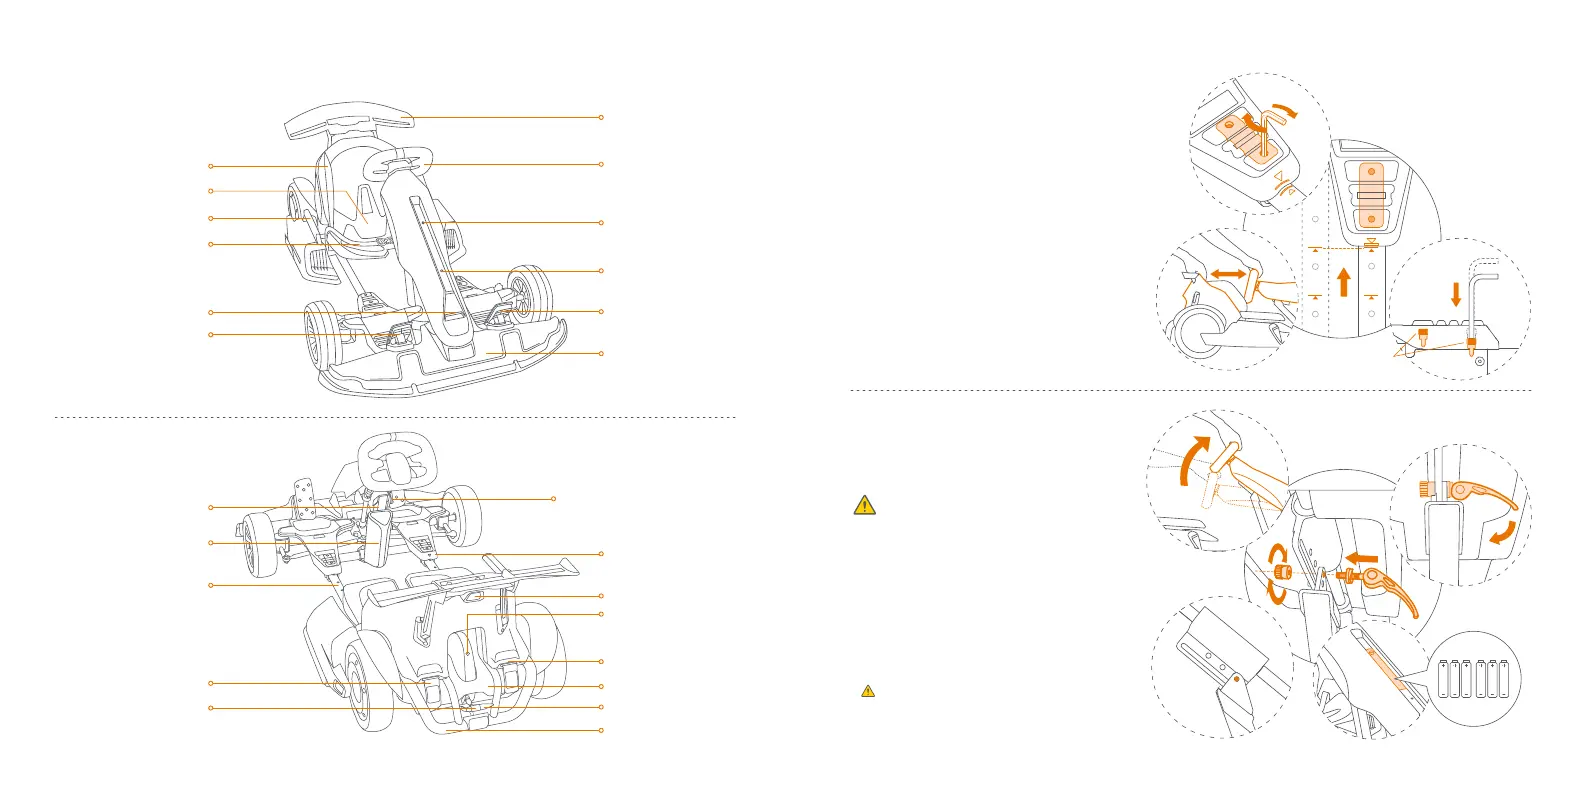
Stretch the frame and adjust the length
Adjust the steering wheel height
a Raise the steering wheel to a suitable height.
b Insert the quick-release screw into the hole of
the corresponding height.
()
c Tighten the quick-release nut.
d
components.
e Ensure the steering wheel is not loose.
Otherwise, repeat the steps b, c, d, e.
f Install the Gokart batteries.
corrosion, remove the batteries if not using the
Gokart for an extended period of time.
a
b
b
c
d
a
Taillight
Rear bumper
Ninebot Engine Speaker
Remove the speaker before adjusting the
height of the steering wheel (see page 11).
Power extension cord
a With both hands holding the steering wheel and the
seat, stretch the frame out to a suitable position
along the horizontal direction of the connection
tube.
b Align the scalable structure of the frame with the
marking on the connection tube.
c Positioning: Use the short hex wrench to press the
two screws into the holes on the left and right
(The screw is set to a depth of about 1 cm for
successful position).
d Tighten the 4 screws.
inserted into the screw holes.
b
c
d
a
f
08 09
 Loading...