23/44
7D56A Technical Guide
No. 3
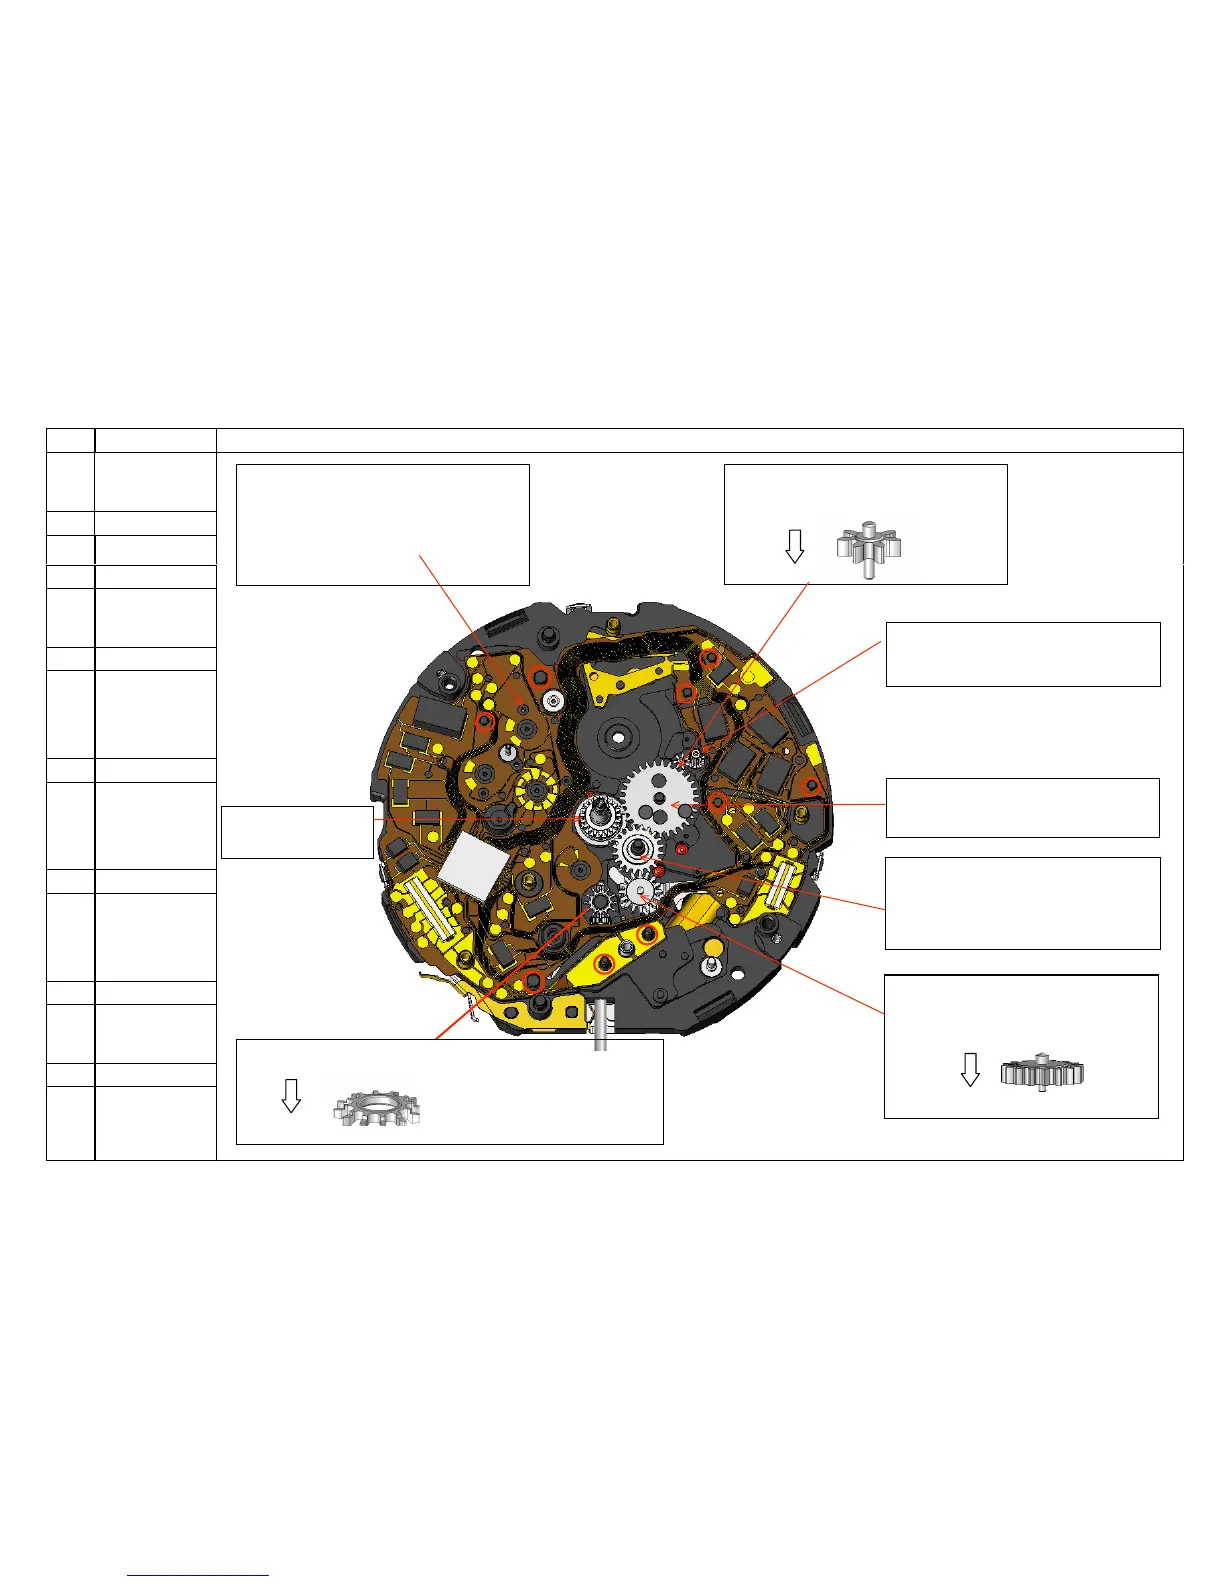
No. PROCESS ILLUSTRATION AND SPECIAL INSTRUCTIONS
44
Assemble the
HOUR WHEEL.
43
Assemble the
3
RD
INTERMEDIATE
42
Assemble the
CALENDAR
CORRECTOR
2
ND
INTERMEDIATE
WHEEL.
41
ssemble the
DATE PINION
FOR TEN’S
DIGIT.
38
Assemble the
DATE DRIVING
<38> Assemble the DATE DRIVING
WHEEL FOR TEN’S DIGIT
(see Fig. 3-3).
<45> Assemble the CIRCUIT BLOCK
FOR CALENDAR.
Do not touch gilt printed pattern directly
and make sure that the nine posts are
securely engaged (see illustration).
<44> Assemble the
HOUR WHEEL.
<43> Assemble the 3
INTERMEDIATE DATE WHEEL.
<41> Assemble the CALENDAR
CORRECTOR 4
TH
INTERMEDIATE
WHEEL.
<40> Assemble the CALENDAR
CORRECTOR 3
RD
INTERMEDIATE
WHEEL (see Fig. 3-2).
<39> Assemble the DATE PINION
FOR TEN’S DIGIT.
Fig.3-2
Fig.3-3
Fig.3-1
42> Assemble the CALENDAR CORRECTOR 2
INTERMEDIATE WHEEL
Make sure not to assemble the
.wheels and pinions upside