EasyManua.ls Logo

Seiko 7D56A - Page 28

Seiko 7D56A
44 pages
Print Icon
To Next Page IconTo Next Page
To Previous Page IconTo Previous Page
Loading...
28/44
7D56A
Technical Guide
N0. 8
No.
PROCESS ILLUSTRATION AND SPECIAL INSTRUCTIONS
[ CALENDAR TRAIN
WHEEL ]


Assemble the 2
ND
INTERMEDIATE
DATE WHEEL.



Assemble the
CALENDAR
CONTROL
WHEEL and
secure the
jumper to it.



Assemble the
INTERMEDIATE
MONTH INDICATOR
WHEEL.


Assemble the
DETECTION WHEEL
FOR 24 HOUR
INDICATOR.


Assemble the 24
HOUR INDICATOR
WHEEL.





<22> Assemble the DETECTION
WHEEL FOR 24 HOUR INDICATOR.
Align the curved hole of the wheel and the
triangle shaped detection patterns on the
plate (the position where the detection
spring of the wheel overlaps with the
patterns) so that the 24 hour.
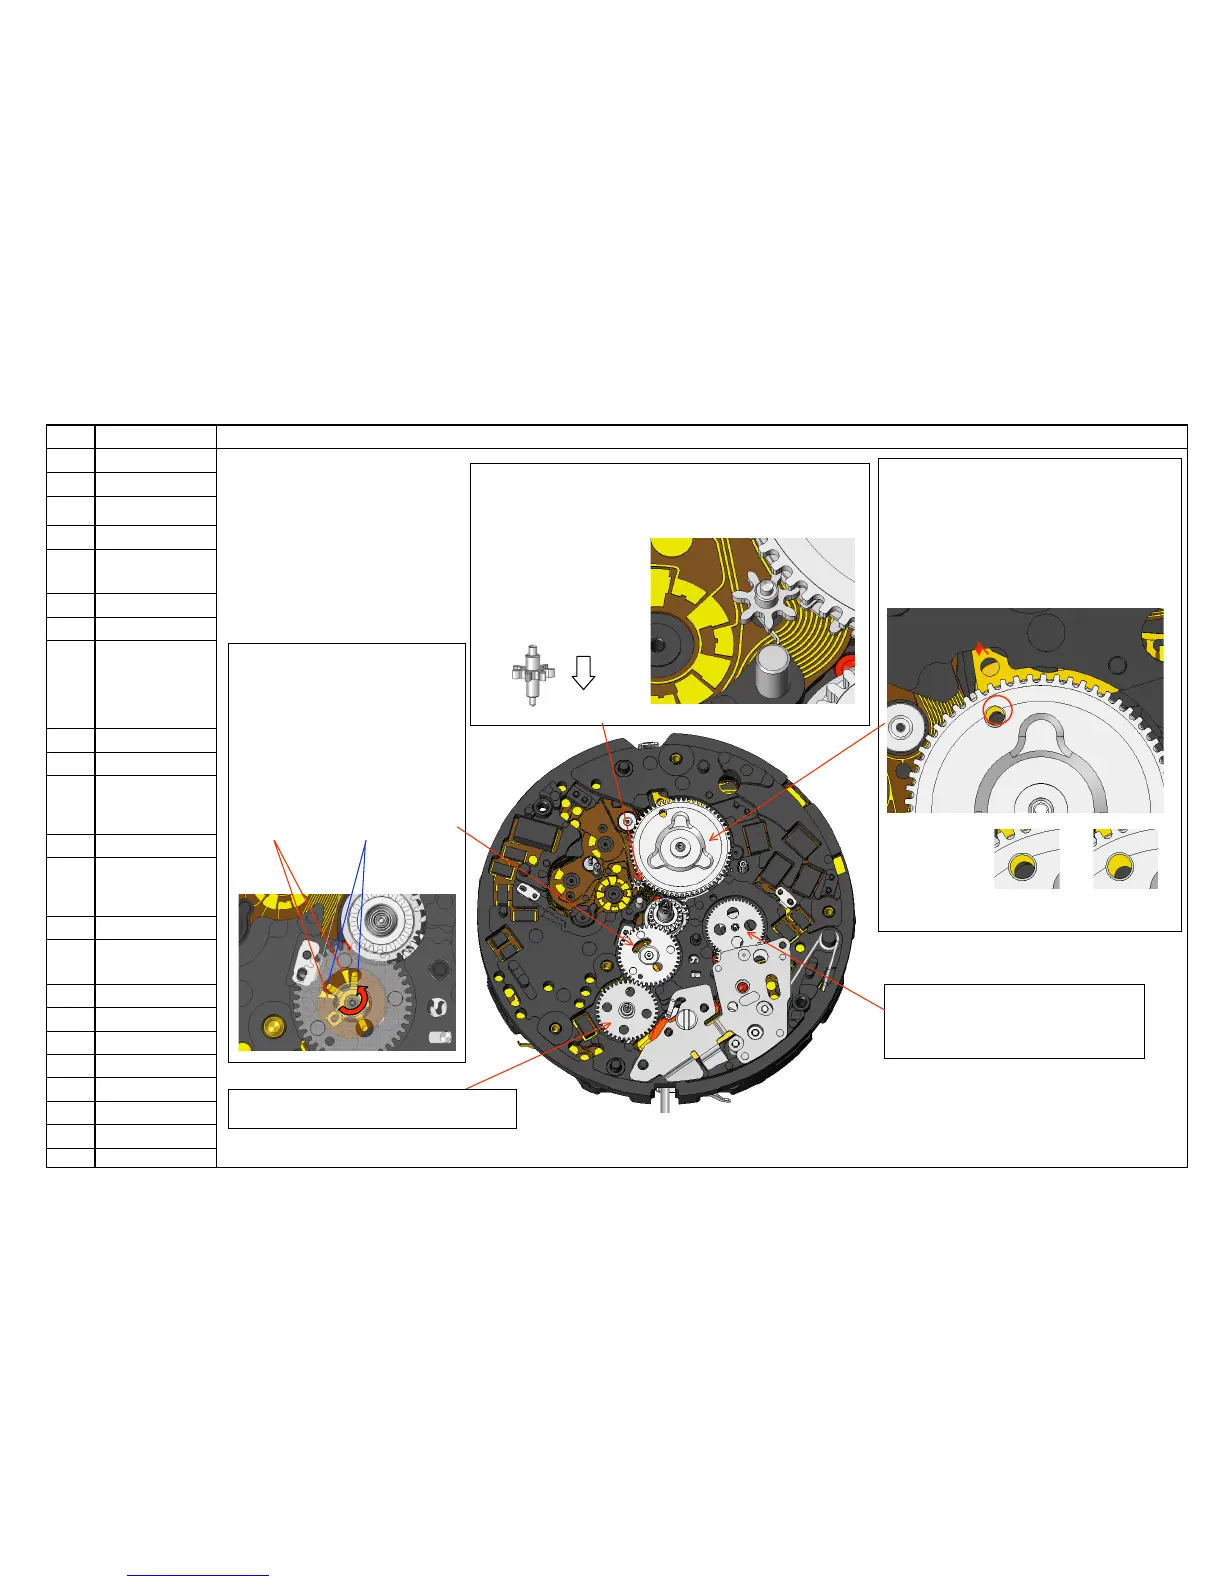
23!Assemble the INTERMEDIATE MONTH INDICATOR WHEEL.
Set the wheel from outside (from the CALENDAR
CONTROL WHEEL side)
of the spring (see Fig.8-2).
Make sure not to assemble
The wheel upside down
(see Fig.8-3).
<24> Assemble the CALENDAR
CONTROL WHEEL and secure the jumper
to it.
Align the holes of both the wheel and the
jumper when securing the jumper to the
teeth of the wheel (see Fig. 8-1) .
%#$"
<25> Assemble the 2
ND
INTERMEDIATE
DATE WHEEL.
 
 
  

 
(,'*.)&*

+/-




<21> Assemble the 24 HOUR INDICATOR
WHEEL.

Related product manuals