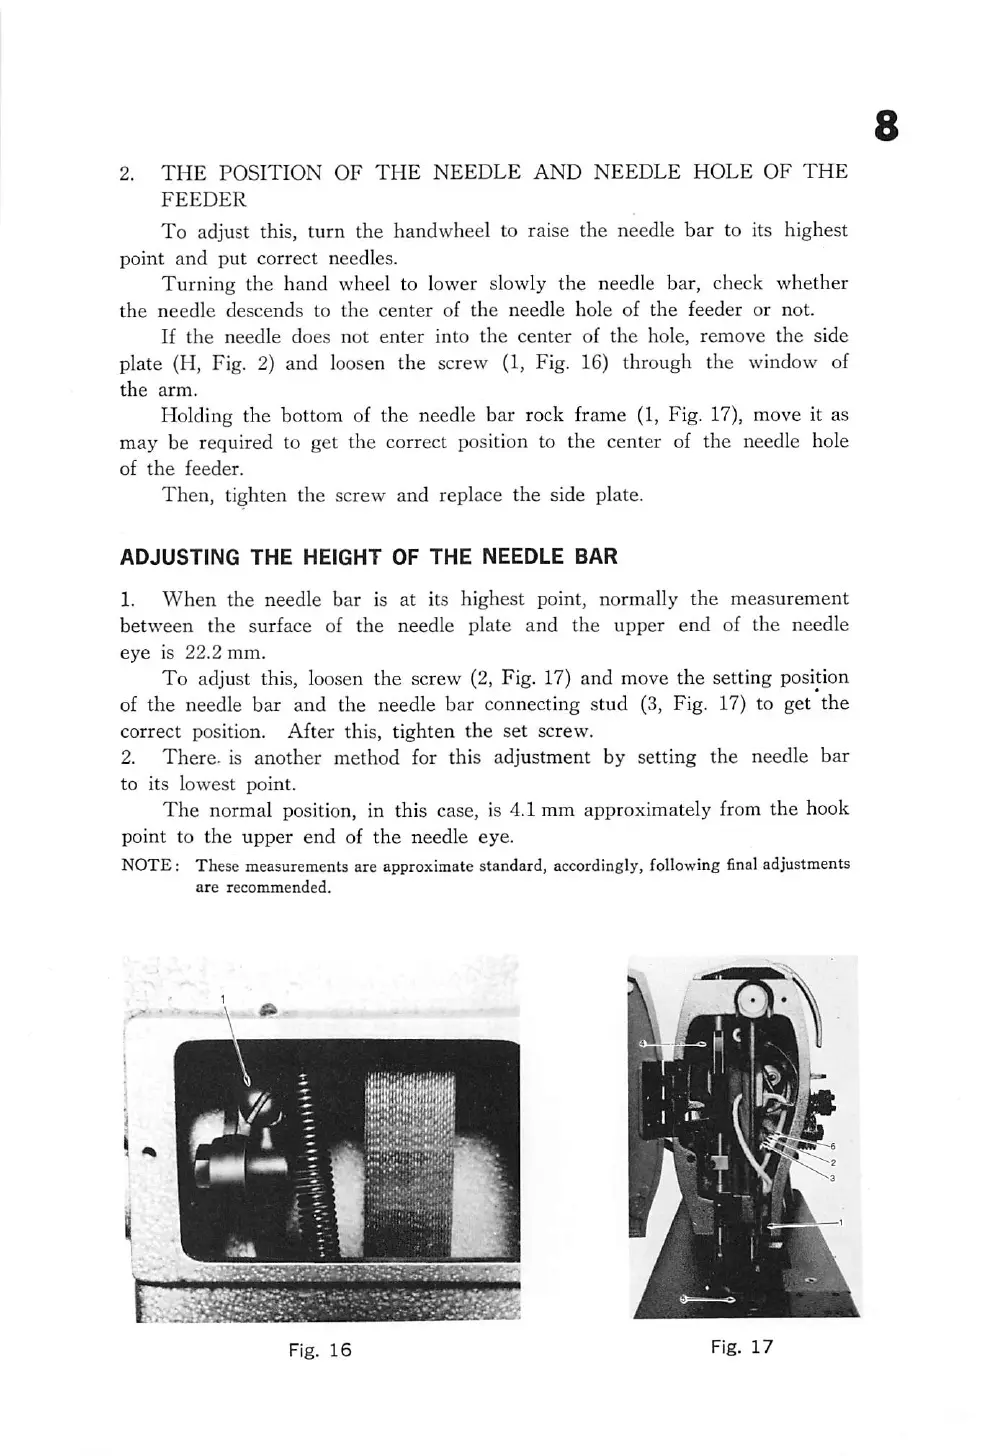
2.
THE
POSITION
OF
THE
NEEDLE
AND
NEEDLE
HOLE
OF
THE
FEEDER
To adjust this, turn the handwheel to raise the needle
bar
to its highest
point
and
put
correct
needles.
Turning the hand wheel to lower slowly the needle bar, check whether
the
needle
descends
to
the
center
of
the
needle
hole
of
the
feeder
or
not.
If
the
needle
does
not
enter
into
the
center
of
the
hole,
remove
the
side
plate (H, Fig. 2) and loosen
the
screw (1, Fig. 16) through the window of
the
arm.
Holding the bottom of the needle bar rock frame (I, Fig. 17), move it as
may be required to get the correct position to the center of the needle hole
of
the
feeder.
Then,
tighten
the
screw
and
replace
the
side plate.
ADJUSTING
THE
HEIGHT
OF
THE
NEEDLE
BAR
1.
When
the
needle
bar
is at its highest point, normally
the
measurement
between
the
surface of
the
needle plate
and
the
upper
end
of
the
needle
eye
is
22.2
mm.
To
adjust this, loosen
the
screw (2, Fig. 17)
and
move
the
setting position
of the needle
bar
and the needle
bar
connecting stud (3, Fig. 17) to get the
correct position.
After
this, tighten
the
set screw.
2. There, is another method for this adjustment by setting the needle
bar
to its
lowest
point.
The normal position, in this case, is 4.1 mm approximately from the hook
point
to
the
upper
end
of
the
needle
eye.
NOTE:
These measurements are approximate standard, accordingly, following finaladjustments
are
recommended.
Bb
Fig.
16
Fig.
17
From the library of: Superior Sewing Machine & Supply LLC
 Loading...