F
fosterryanSep 10, 2025
What causes oxidations when using a Selco Welding System?
- CCalvin ReevesSep 10, 2025
Oxidations when using a Selco Welding System are caused by insufficient gas protection. To resolve this, adjust the gas flow.
What causes oxidations when using a Selco Welding System?
Oxidations when using a Selco Welding System are caused by insufficient gas protection. To resolve this, adjust the gas flow.
Why my Selco Welding System fails to come on (green LED off)?
If your Selco Welding System isn't turning on (green LED off), check a few things. First, ensure there's mains voltage at the socket and repair the electrical system if needed. Inspect the plug and cable for faults, replacing them if necessary. Also, check the line fuse and replace it if blown. A faulty on/off switch could also be the culprit, so replace it if needed. If these steps don't solve the problem, the electronics may be faulty, requiring professional repair.
What causes incorrect output power in Selco Welding System?
Incorrect output power in your Selco Welding System can stem from several causes. Verify that you've selected the correct welding process. Reset the system and welding parameters to their correct settings. A faulty potentiometer/encoder for adjusting the welding current might also be to blame, requiring component replacement. Ensure the mains voltage is within range and the system is correctly connected. Check for a missing input mains phase, ensuring proper connection. If problems persist, the electronics may be faulty, requiring professional service.
How to fix irregular wire feeding on a Selco Welding System?
To fix irregular wire feeding on your Selco Welding System, start by checking the torch trigger button and replacing it if faulty. Examine the rolls for wear or incorrect type, and replace them as needed. A faulty wire feeder itself could be the issue, requiring replacement. Inspect the torch liner for damage and replace if necessary. If these steps don't resolve the issue, release the clutch.
How to troubleshoot wire feeder failures in Selco Welding System?
If the wire feeder is failing on your Selco Welding System, begin by checking the torch trigger button and replacing it if faulty. Inspect the rollers for incorrect type or wear, replacing them as needed. A faulty wire feeder may need replacement. Check for a damaged torch liner and replace it. Ensure the wire feeder is properly connected to the power source. If the wire is tangled on the spool, untangle it or replace the spool. Lastly, if the torch nozzle is melted with wire stuck, replace it.
What causes excessive spatter with a Selco Welding System?
Excessive spatter with your Selco Welding System can arise from several factors. Adjust the gas flow if there is insufficient shielding gas. It might be due to an incorrect arc length, so decrease the distance between the electrode and the piece. Also, incorrect welding parameters, so decrease the welding voltage. If the arc regulation is incorrect, increase the equivalent circuit inductive value setting. Lastly, consider adjusting the torch angle if the welding mode is incorrect.
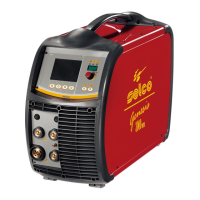
What causes cold cracks in Selco Genesis 3000 PMC Welding System welds?
Cold cracks in Selco Welding System welds are caused by humidity in the filler metal. Always use quality materials and products.
What causes hot cracks in Selco Welding System welds?
Hot cracks in Selco Welding System welds can occur due to incorrect welding parameters, so decrease the welding voltage. Also, grease, varnish, rust, or dirt on the workpieces can contribute, so clean the workpieces carefully before welding.
How to prevent tungsten inclusions when welding with a Selco Welding System?
To prevent tungsten inclusions when welding with your Selco Welding System, decrease the welding voltage if welding parameters are incorrect. Always use quality materials and products for the electrode. Avoid contact between the electrode and the weld pool if the welding mode is incorrect.
How do I fix sticking when using my Selco Welding System?
If you're experiencing sticking with your Selco Welding System, try these adjustments. Increase the distance between the electrode and the piece if the arc length is incorrect. Increase the welding current if the welding parameters are incorrect. Try angling the torch more if the welding mode is incorrect. If the pieces are too big, increase the welding current. Also, increase the equivalent circuit inductive value setting if the arc regulation is incorrect.
Guidelines for safe operation, environment, and user protection.
Measures against fumes, fire, explosion, and gas cylinder risks.
Protection against electric shock and electromagnetic interference.
Procedures for safe lifting, transport, and placement.
Instructions for connecting the machine to the power supply.
Selecting and modifying welding parameters and functions.
Navigating setup menus and configuring MMA, TIG, MIG/MAG parameters.
| Input Voltage | 400 V |
|---|---|
| Input Current | 32 A |
| Output Current Range | 5 - 300 A |
| Protection Class | IP23 |
| Duty Cycle | 300 A at 35% |