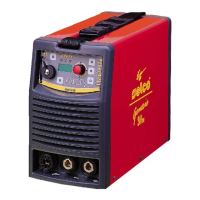
Do you have a question about the Selco Genesis 240 TLH and is the answer not in the manual?
Lists the circuit parts of the G 240 model.
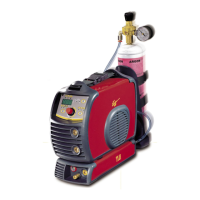
Lists additional circuits present in the TLH version.
Explains the master switch and input filter functions and safety.
Details the function of rectifier bridge, power inverter, and transformer.
Describes the rectifier circuit, output filter, and levelling inductance.
Explains current transducer and power circuits for control.
Describes control circuits on the front panel.
Explains H.F. transformer and discharge generation for TIG.
Details power supply circuits for the cooling unit WU15.
Explains the auxiliary transformer's role in providing power supplies.
Explains the external LEDs (GREEN, YELLOW) on the front panel for status.
Details internal diagnostic LEDs (L1-L4) on board 15.14.254.
Warns about high voltage and capacitors, advising waiting before access.
Advises caution with moving parts like fans when machine is powered.
Warns about handling hot internal parts and radiators.
Lists necessary instruments for Level 1 and Level 2 diagnostics.
Explains the general logic and approach to diagnosis.
Defines conventions for measurements and pin identification.
Provides detailed diagnostic steps for the G 240 model.
Diagnostic steps for G 240 TLH, Phase 1 and Stage 2.
Diagnostic steps for G 240 TLH, Stage 3 and 4.
Diagnostic steps for G 240 TLH, Stages 5, 6, 7, 8.
Procedure to check the power inverter.
Procedure to check secondary power diodes.
Procedure to check power supplies for G 240.
Procedure to check power supplies for G 240 TLH.
Procedure to check current control circuits for G 240.
Procedure to check current control circuits for G 240 TLH.
Procedure to check the H.F. generation circuit.
Instructions for removing and refitting the upper cover.
Steps for removing the plastic front panel.
Instructions for removing the plastic rear panel.
Procedure for removing the switch and knob.
Steps to disconnect and remove the power supply cable.
Procedure for removing the board 15.14.254 (kit 14.60.060).
Instructions for removing and refitting board 15.14.233.
Steps for dismantling and reinstalling board 15.14.240.
Procedure for removing and replacing rectifier circuit diodes.
Instructions for fan removal and refitting.
Steps to remove the capacitor.
Procedure for removing and replacing the varistor.
Instructions for disassembling diode bridges.
Steps for removing the auxiliary transformer.
Procedure for removing the fixed socket.
Instructions for removing front panels.
Steps for removing rear panels.
Instructions for removing the plastic base.
Procedure for removing the metal base.
Steps for removing the TIG central socket on TLH.
Instructions for removing the solenoid valve nipple on TLH.
Steps for removing the H.F. generation board on TLH.
Lists preliminary conditions for operating tests on G 240.
Procedure for measuring and setting minimum current on G 240.
Procedure for measuring and setting maximum current on G 240.
Lists preliminary conditions for operating tests on G 240 TLH.
Procedure for measuring minimum current on G 240 TLH.
Procedure for calibrating maximum current on G 240 TLH.
Calibrating max current using external reference on G 240 TLH.
| Input Voltage | 230V |
|---|---|
| Input Frequency | 50/60 Hz |
| Rated Input Current | 16 A |
| Welding Current Range | 5 - 240 A |
| Output Current Range | 5 - 240 A |
| Protection Class | IP23 |
| Welding Process | TIG, MMA |
| Duty Cycle | 35% at 240 A |