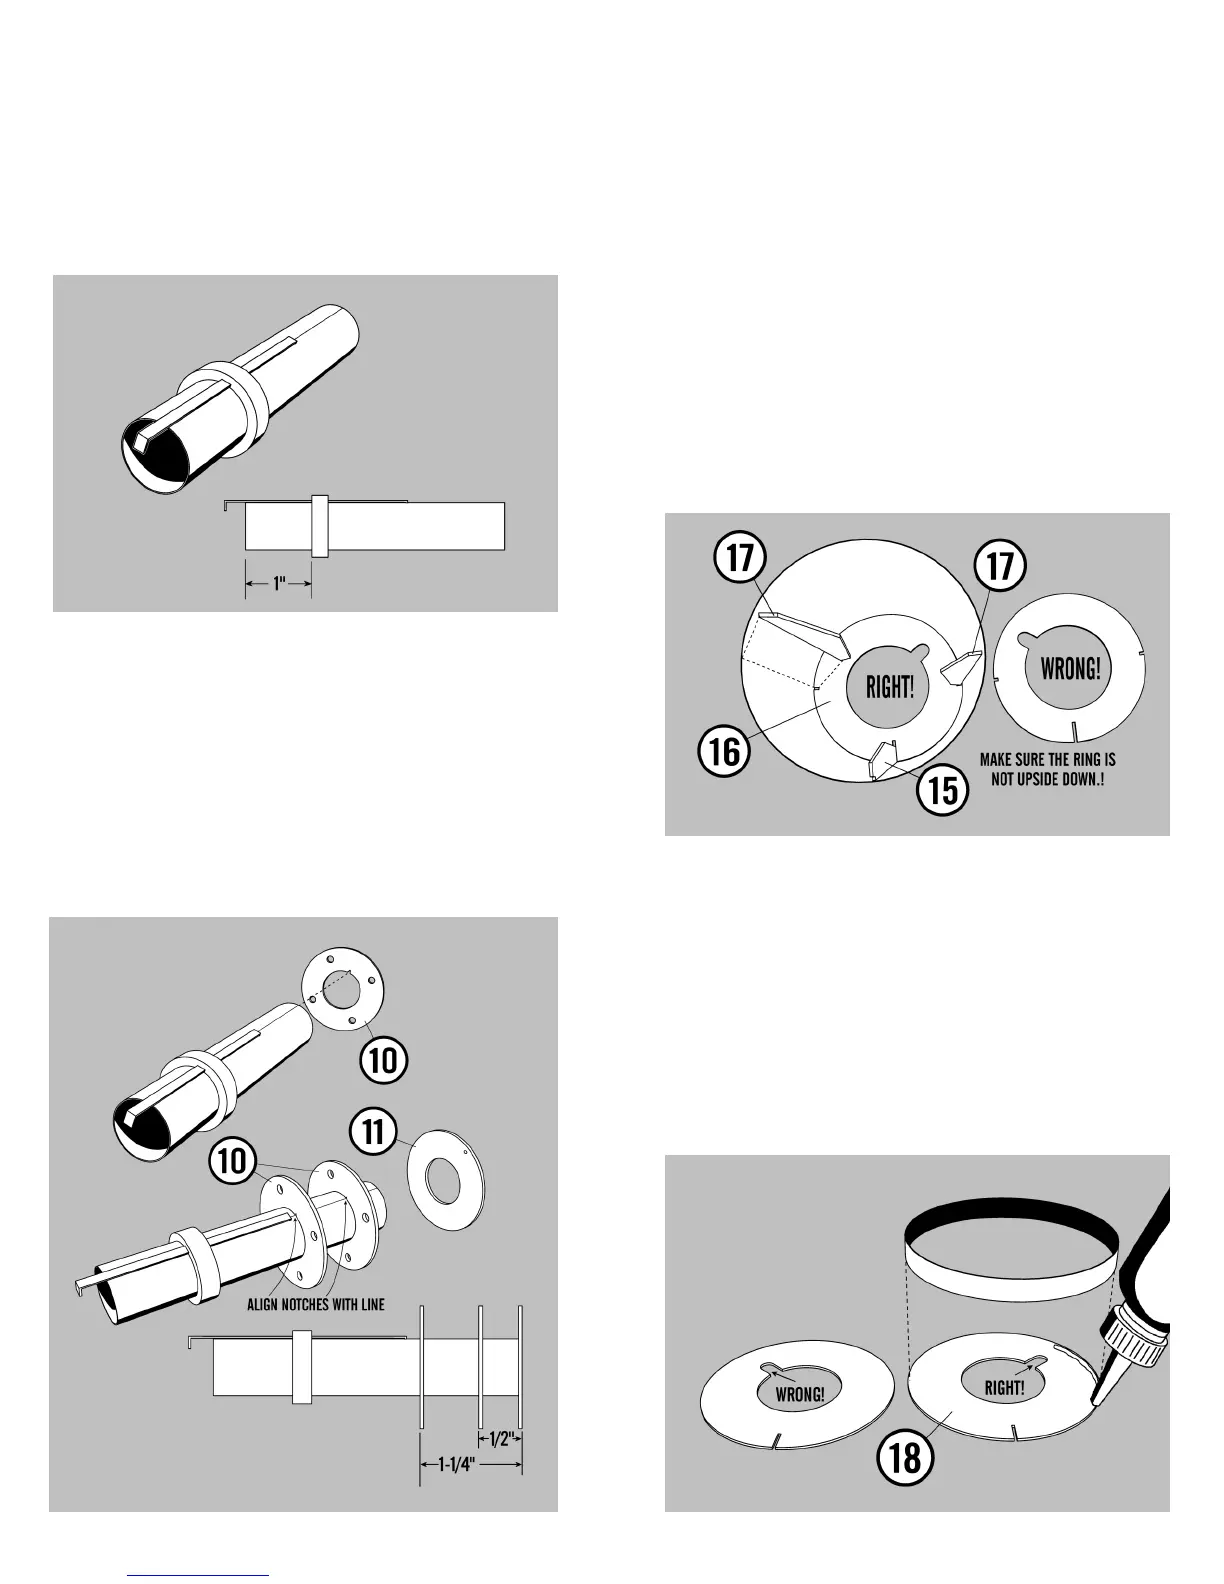
22. Now mark the tube 1” from the rear as
shown in the illustration below . Cut a notch on the
inside of the engine tube centering ring 1/32” deep
and 3/32” wide. Run a line of glue around the tube
at the mark that you made 1” from the end and
slide the centering ring on with the notch over the
engine hook.
23. Mark the opposite end of the tube at ex-
actly 1-1/4” and 1/2” from the top end. These marks
need to be in line with the (A) line that goes all the
way down the tube. Using the notch in the center-
ing ring as a alignment guide slide one of the rings
(10) down to the 1-1/4” mark and apply fillets to
both sides. Repeat with the other ring (10) glued
even with the 1/2” mark. Make sure both notches in
the rings are lined up with the line on the tube as
shown. Then slide the cap ring (11) onto the end of
the tube aligning the small hole over the (A) line. It
must be glued flush with the end of the tube.
38. On a flat surface lay a piece of wax paper
down. Position the small end of the ascent module
shroud on the paper. Position the forward bulk-
head (16) exactly as shown. Make note of the posi-
tion of the notched piece in the diagram. Slide the
bulkhead into the bottom of the unit until it is even
with the end and flat against the wax paper. Run a
glue fillet around the inside of the ring to attach it to
the shroud and allow it to set. Then run a line of
glue along the longest edge of an ascent brace (17).
Too much glue on the shrouds will cause them to
buckle. Position it into one of the notches in the
ring and glue it into place. Repeat with the other
ascent brace.
39. Punch out the ascent module’s aft bulk-
head (18). Place it on a flat surface and run a bead
of glue around the outside of the bulkhead and cen-
ter the internal ring (RT-99D) on it and glue into
place. Let dry completely.