1. These instructions are presented in a logical
order to help you put your Mars Lander™ together
quickly and efficiently. Check off each step as you
complete it and enjoy putting this kit together.
ASSEMBLY
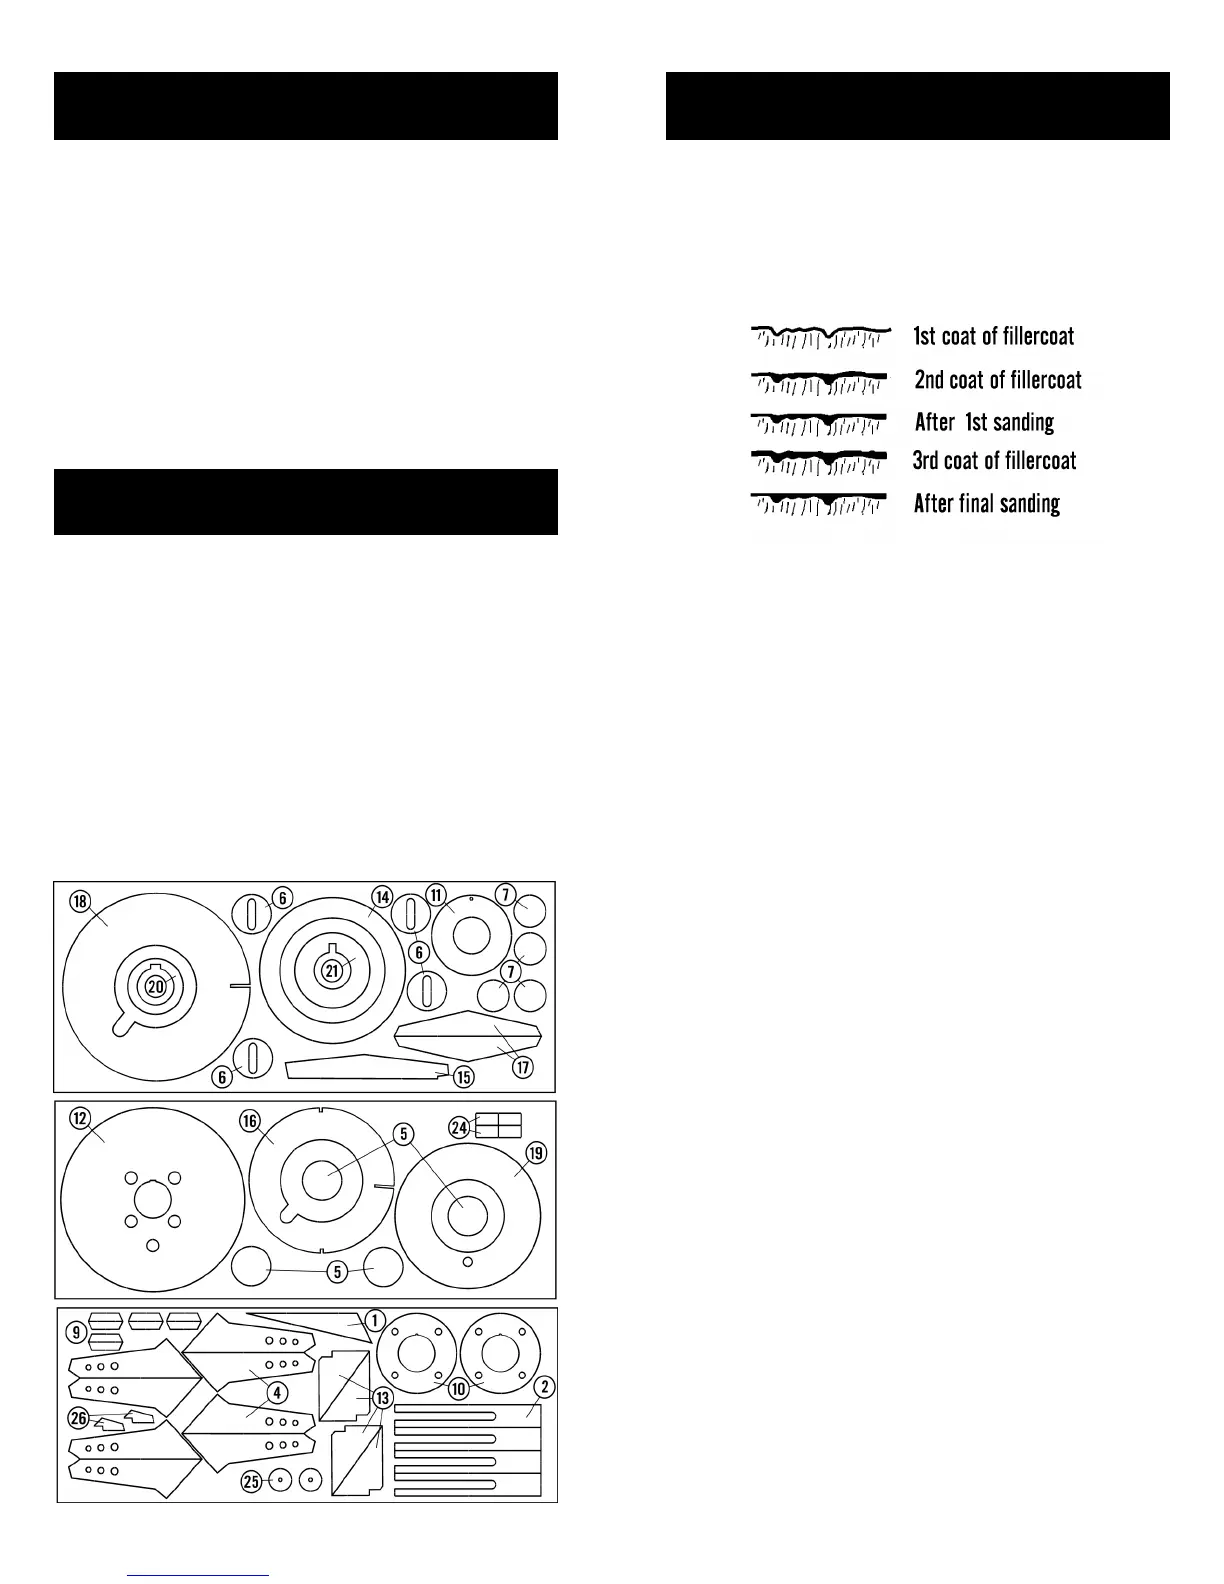
2. There are many different balsa fins and fi-
ber parts included in this kit. The balsa parts are
obvious, but the fiber parts can be confusing. Use
the guide below to identify the parts that are called
out in these instructions. Some of the parts are
similar, but will not work if exchanged. Some of the
parts have a top and a bottom and must be in-
stalled correctly or other parts will not fit later. If
you “goof,” contact us and we can possibly help
you out. The laser-cut rings and parts are messy.
Use paper towels to wipe all the edges as you
punch them out.
PARTS IDENTIFICATION
NOTE: The Mars Lander™ is not for inexperi-
enced modelers. If you have not developed suffi-
cient skills to build this kit, wait until you have built
a few more models. It will wait for you. Patience is
required as well as a careful review of each instruc-
tion before continuing. If you are ready for this
challenge, “Let’s go!”
FINISHING
60. Prepare any remaining balsa surfaces for
a smooth professional looking finish. Fill the wood
grain with diluted Fill n’ Finish or sanding sealer.
When dry, sand with fine sandpaper. Repeat until
smooth.
61. After all balsa surfaces have been pre-
pared, wipe off all dust with a dry cloth. Cover the
landing gear and the exhaust nozzle with paper and
masking tape. The base color for the rest of the
model is white.
63. Spray painting your model with a fast-
drying enamel will produce the best results. PA-
TIENCE…is the most important ingredient. Use sev-
eral thin coats, allowing each coat to completely dry
before the next coat. Start each spray a few inches
above the model and end a few inches below the
model. Keep the can about 12” away and use quick
light coats. The final coat can be a little heavier to
give the model a glossy wet-looking finish.
62. Paint the Mars Lander™ using the follow-
ing guide:
Overall Model White
Landing gear International Orange (or red)
Exhaust shroud International Orange (or red)
Large Exhaust Ring Black
Landing Gear Pads Silver
Control Cylinders Silver
64. Refer to the photo on the front of the in-
structions for decal placement. The decals supplied
are waterslide decals. Each decal should be cut
separately from the sheet. Apply each decal before
starting the next. Think about where you want to
apply each decal and check for fit before wetting
the decal. Soak each decal in water for about 30
seconds or until it slides easily off the backing pa-
per. Slide the decal off the paper and onto the
model surface. Blot dry using the backing paper.
 Loading...