Page 6 of 8
Doc 6001051, Rev C
4 – Installing Additional Features
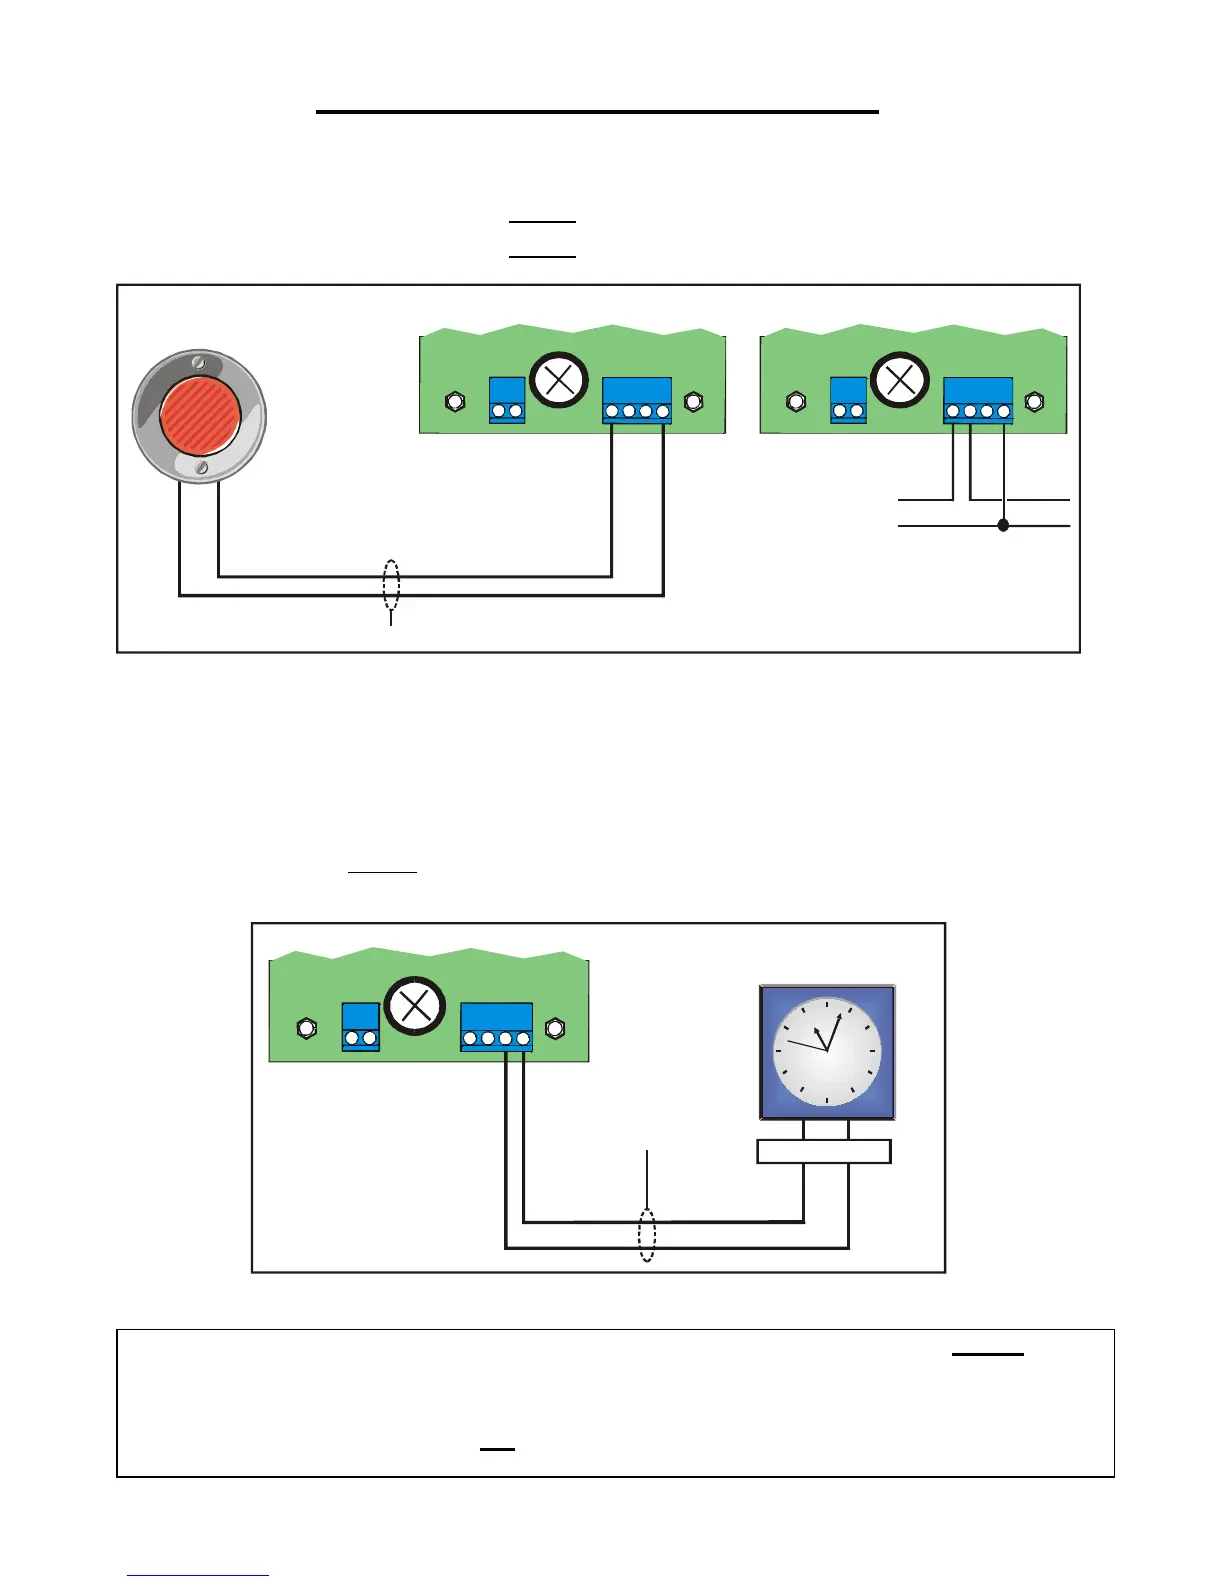
AUX OPEN/REQUEST FOR ACCESS
Any device (e.g., exit button or Knox box) that provides a contact closure can be hooked up to the Mini-Key unit at:
"EXIT1" and "COM" (TB3) to activate Relay 1
OR
"EXIT2" and "COM" (TB3) to activate Relay 2
TB3
1051F11
2 / 18-24 AWG
Exit
Request
COM EXIT1
TB3
EXIT1
EXIT2
COM COM
Using two (2) Exit DevicesUsing one (1) Exit Device
Relay 1: Connect as Shown.
Relay 2: Connect wires
to EXIT2 and COM
Figure 9: Exit Request Connections
Use shielded cable and connect shield to the ground screw.
When a contact closure occurs, the system will activate the appropriate relay for the programmed period of time.
TIME CLOCK
You may install a timer or clock to the Mini-Key system to be used in conjunction with the time clock feature. This
timer or clock must provide a floating
contact closure (a floating contact closure is a contact closure that is not
grounded). To install a timer or clock, refer to Figure 10.
TB3
2 / 18-24 AWG
COM
COM NO
TZONE
Timer: Must have
Floating Contact Closure
1051F10
Relay Contact
Figure 10: Installing a Timer
WARNING: Any clock or timer that is connected to the Mini-key system must provide a floating
contact
closure. If the clock or time does not provide a floating contact closure, there is a very
strong chance that the clock will "burn-out" the circuit board, and may start a fire. Any use
of these devices will also void any Sentex warranty. If your clock or timer plugs directly
into an AC power source and it has an AC output terminal, it does not provide a floating
contact closure and should not be used with the Mini-Key system.